I know, I know – this post is 3 days late. This week has felt strange for, among other reasons, although I’ve made a good bit of progress on the bathroom, it was all in “odds and ends” tasks that didn’t feel like enough to write about so I asked Instagram if anyone had any questions for me and I will answer five questions for week 5.
- How will I protect the exposed brick from moisture?
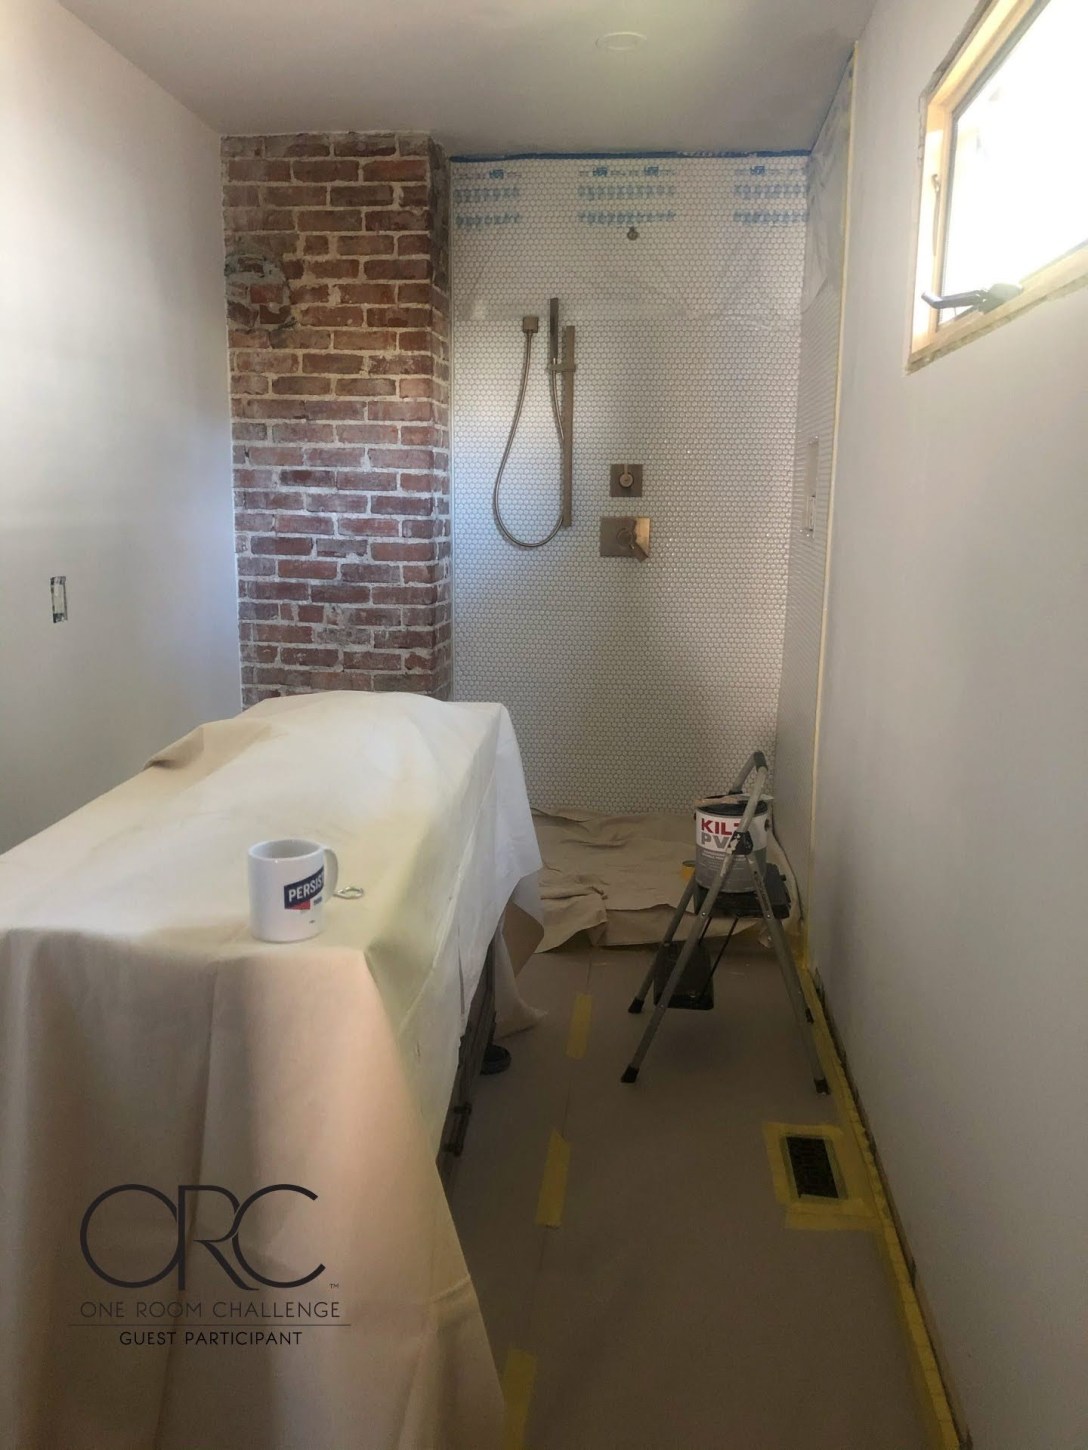
I know it is a bit controversial to have exposed brick in a historic home. Some people maintain that you shouldn’t expose chimneys because they would not have been exposed when the house was originally built. I get that argument and I think it can be the right call for some homes. My decision to leave this brick exposed has two reasons. First, it allowed us to fit a standard size 48” pre-fabricated shower pan into our design for the bathroom which saved us some money because we didn’t have to do a completely custom shower. Second, this room was not originally a bathroom. I think, in the original floor plan in 1924, it was probably the kitchen. The badly patched hole seems about right for where a wood burning oven would have been and there was a very shallow closet (with a matching one on the other side of the chimney) that seems like it could have held dishes at one point. By exposing the brick in here, we have a visual reminder that this house has been on a journey herself in her nearly 100 years of existence.
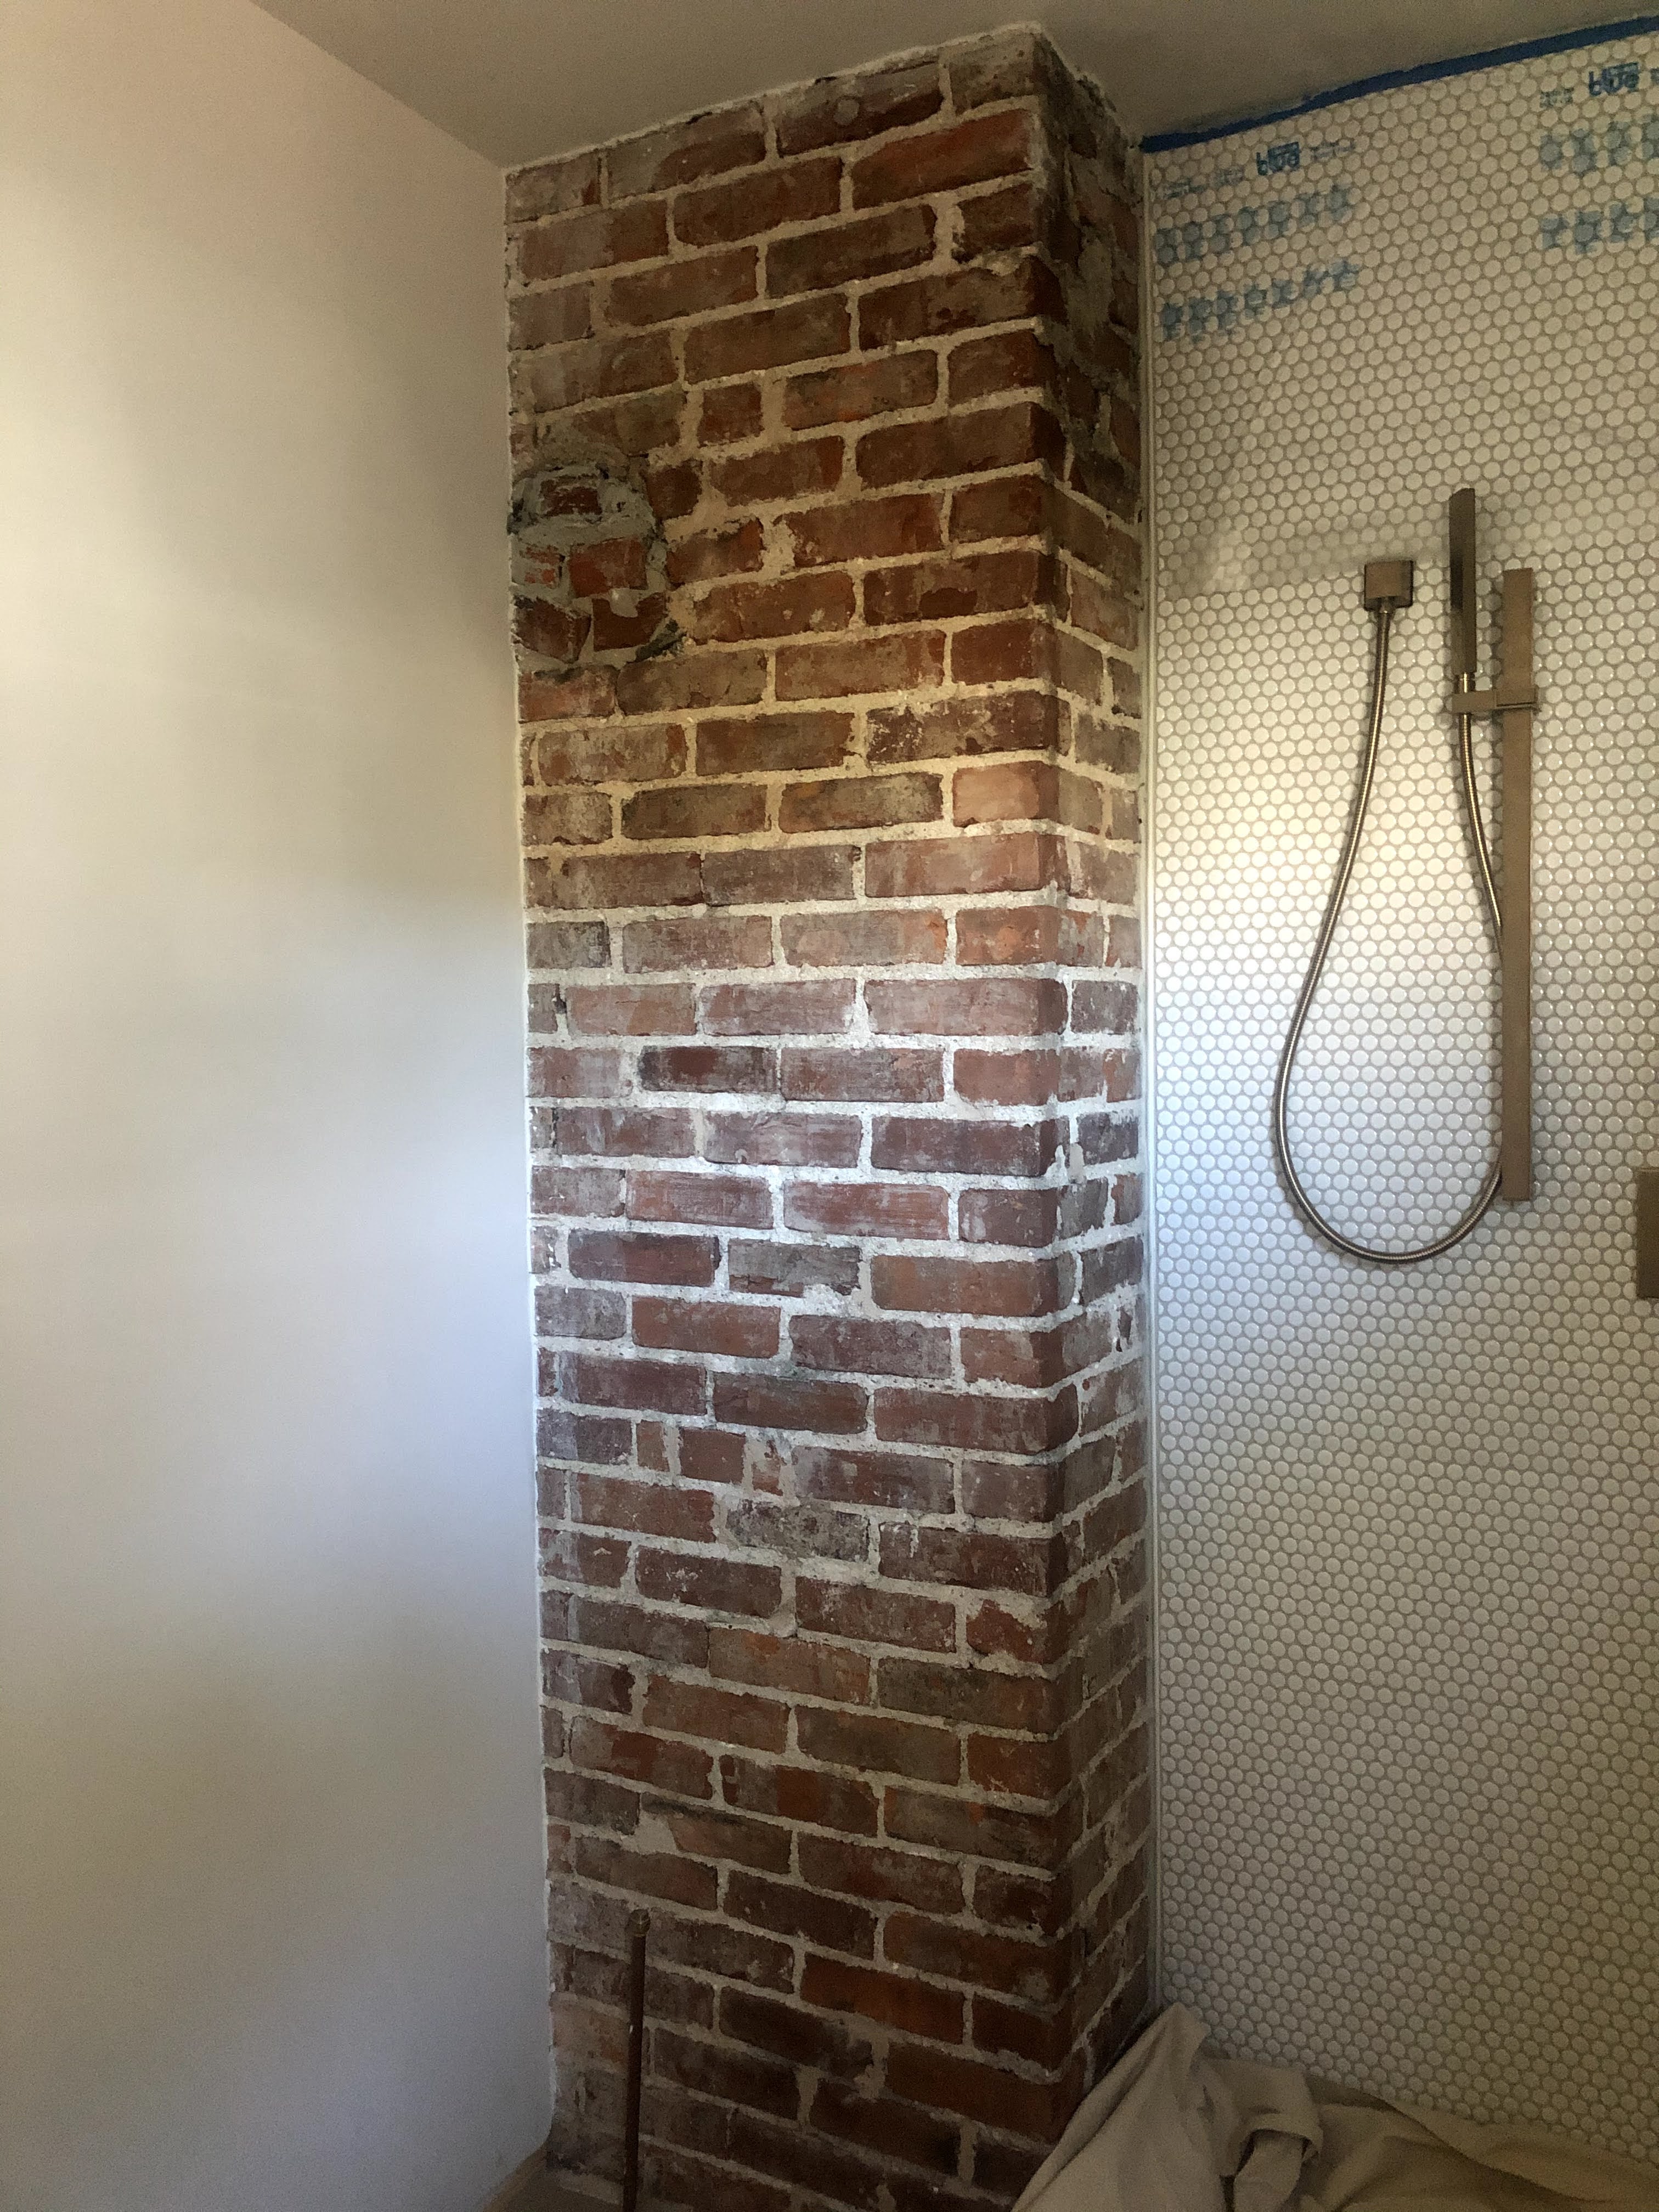
Now, how are we protecting it from moisture? First, this brick should not come into any direct contact with water because there will be a glass wall between the brick and the shower. Second, months ago I used a product called Lastiseal from Radonseal. Lastiseal is a penetrating sealer meaning that it gets absorbed by the brick. I chose the satin finish, but it also comes in flat. Lastiseal is a permanent waterproofer and should strengthen the brick as well. Prior to spraying this on, brick and mortar was flaking off constantly. Now, I can run my hand over the chimney and nothing falls off. I feel pretty confident that this has done what we needed it to and the brick is safe. But, only time will tell! - How difficult was it to move the plumbing for the new vanity?
We didn’t end up using any of the existing plumbing (water or drain lines) in here – it was all poorly done and in pretty bad shape. Once we had to pull up the sub-floor, it really wasn’t a big deal to run all new plumbing too. We decided to install a manifold system and run new water lines with pex which we will eventually expand to include the whole house as well as new drain-lines. I was very intimidated by plumbing when we started this journey and we got some help from Mito at DIY Assist. If you are in Nashville and need some help with a DIY project – I highly recommend you check him out. He was a huge help and gave us the knowledge we needed to continue on our own. He helped us through running our new drain lines for the room and talked us through the water line installation. Drain lines are fairly straightforward – you just need the water to run down-hill. Running pex is nice because you can do what is called a “home-run” meaning one hot and cold water line goes directly to each fixture. This makes for fewer connections and fewer chances for connections to fail. It’s always a good idea to check local codes before embarking on a DIY plumbing adventure. There is more detail about the shower plumbing specifically in another post here.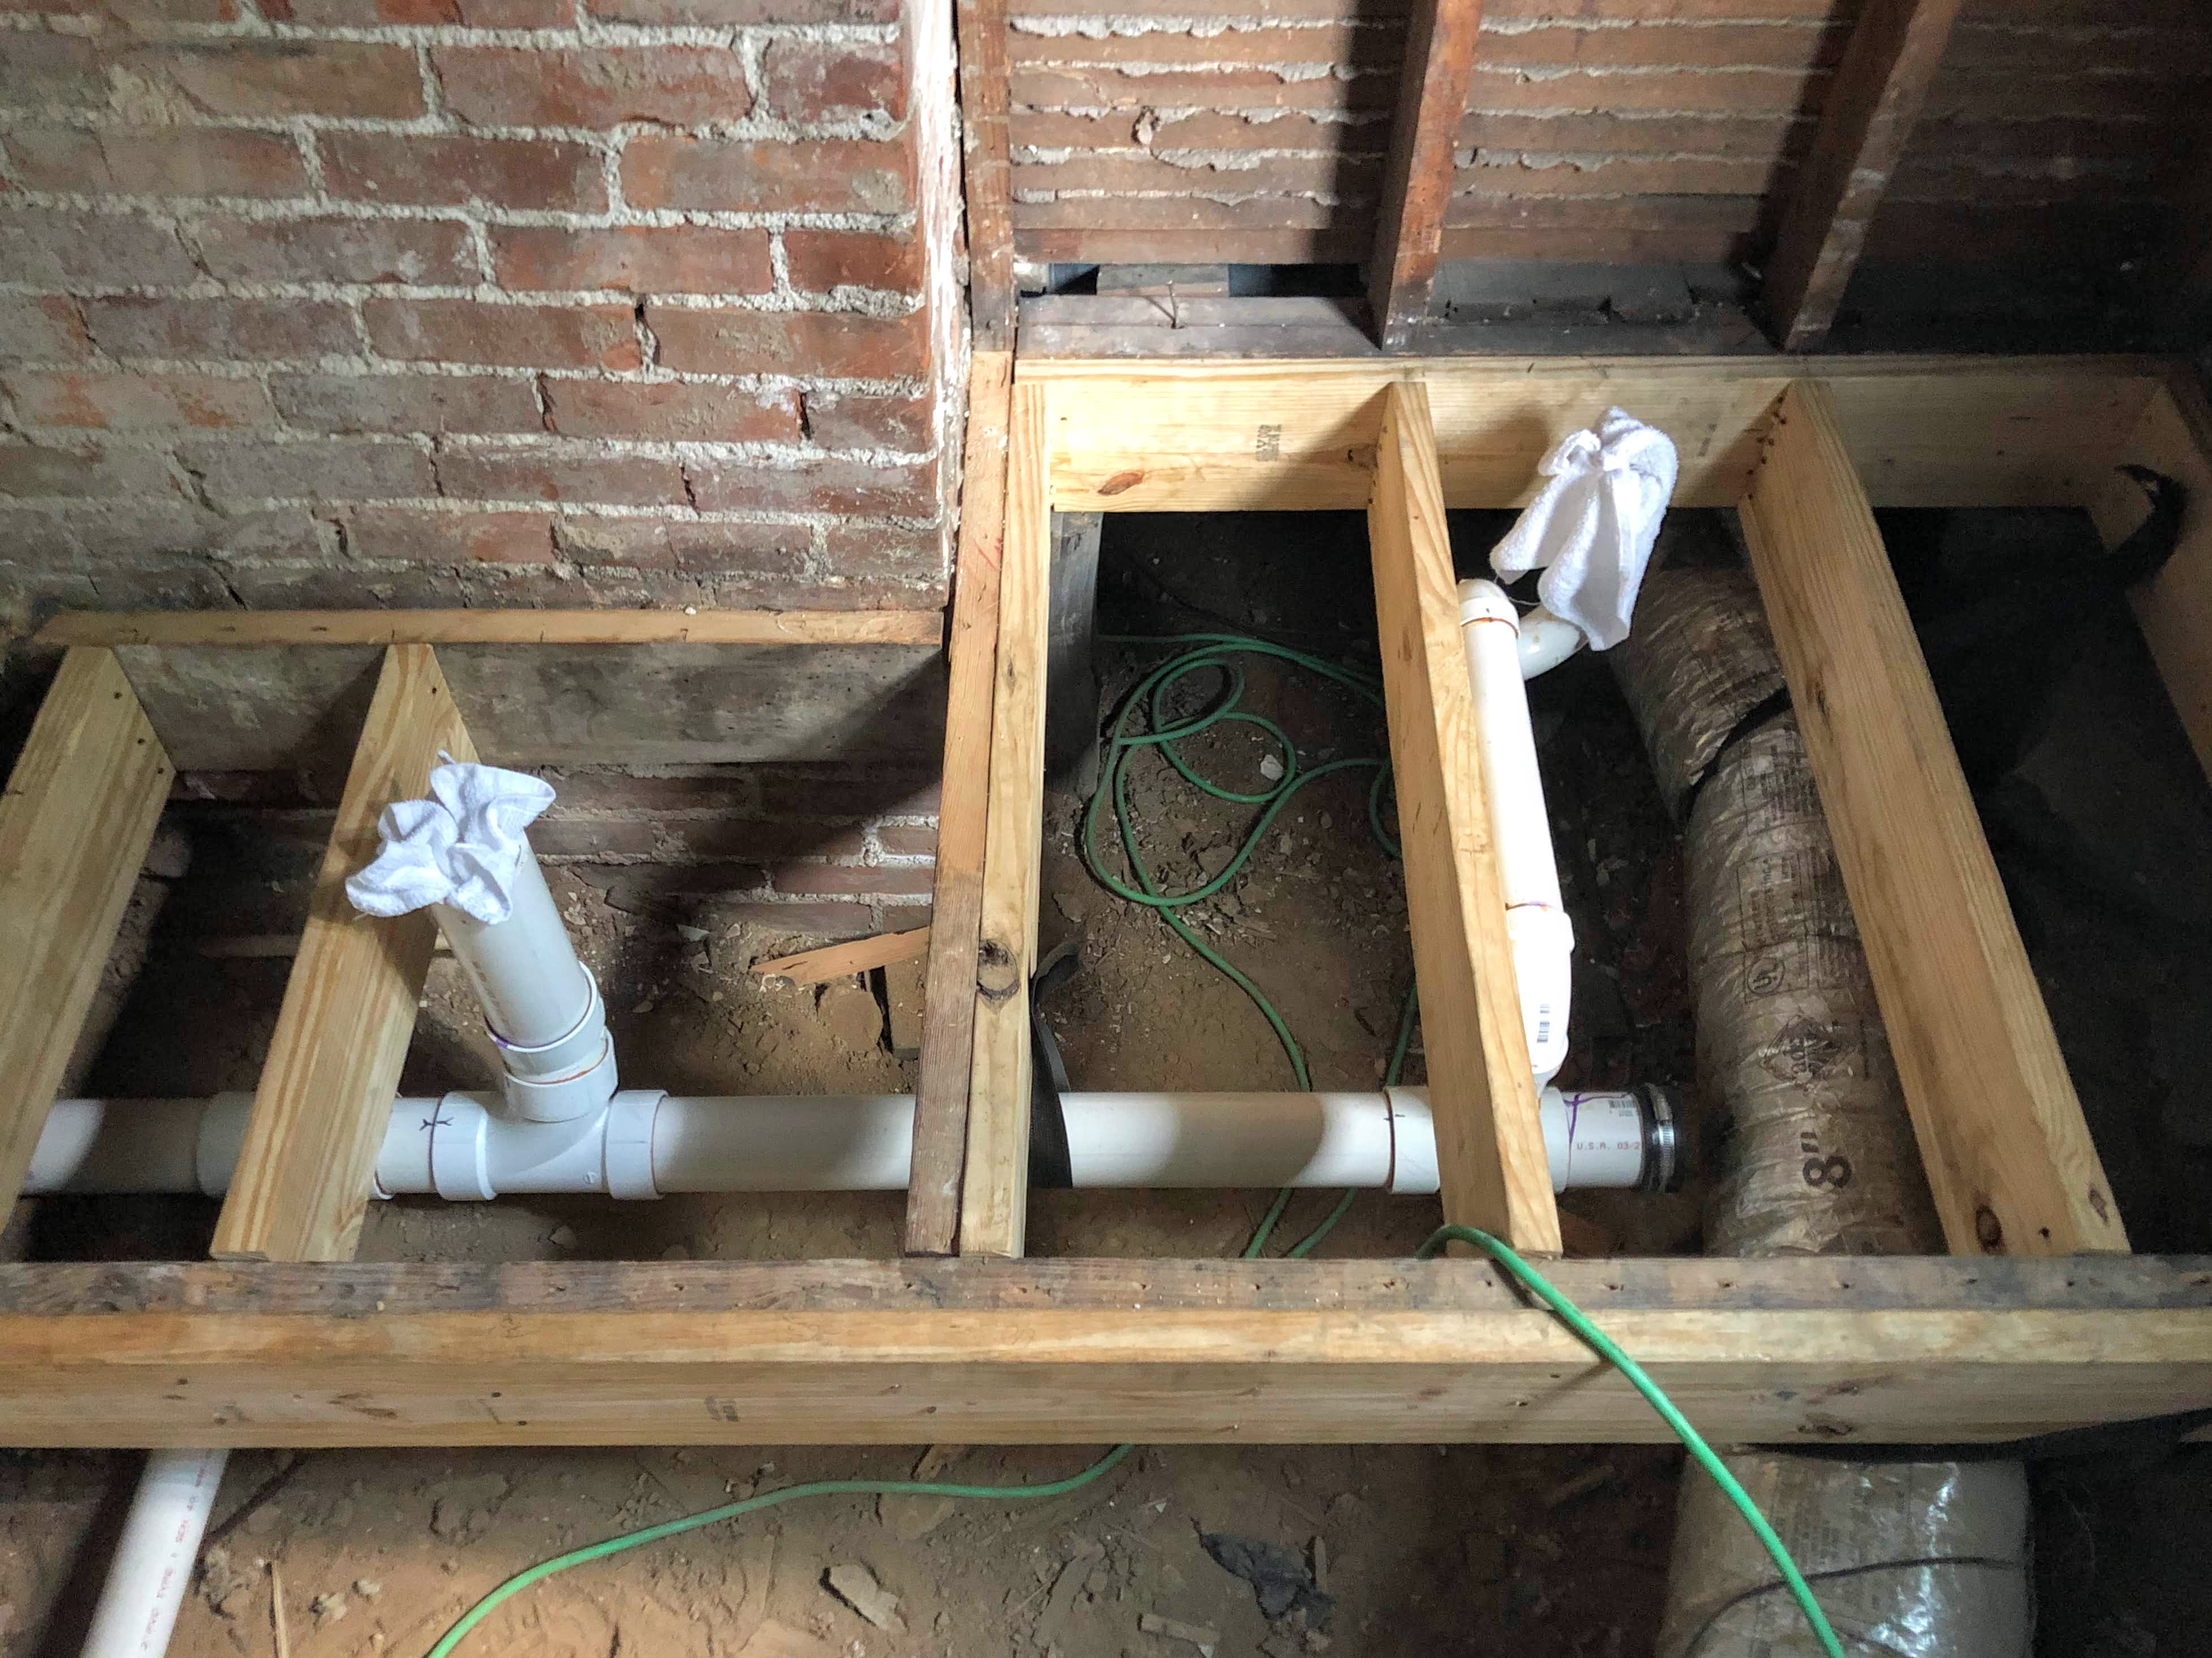
- What did you use to make the shower pan/walls watertight?
The short answer is we used Red Guard waterproofing membrane. Red Guard is pricey, but seems to be worth it from what I have read. The longer answer is that part of why I chose a prefabricated shower pan is so that I wouldn’t have to worry about waterproofing the shower floor. The pan we used is fiberglass and installed direct to the studs on top of the subfloor. The cement board on the walls of the shower sits on top of the pan and then that seam is taped off with fiberglass tape and thinset mortar. Red Guard goes on next. The tile and grout then covers that seam making it water-tight.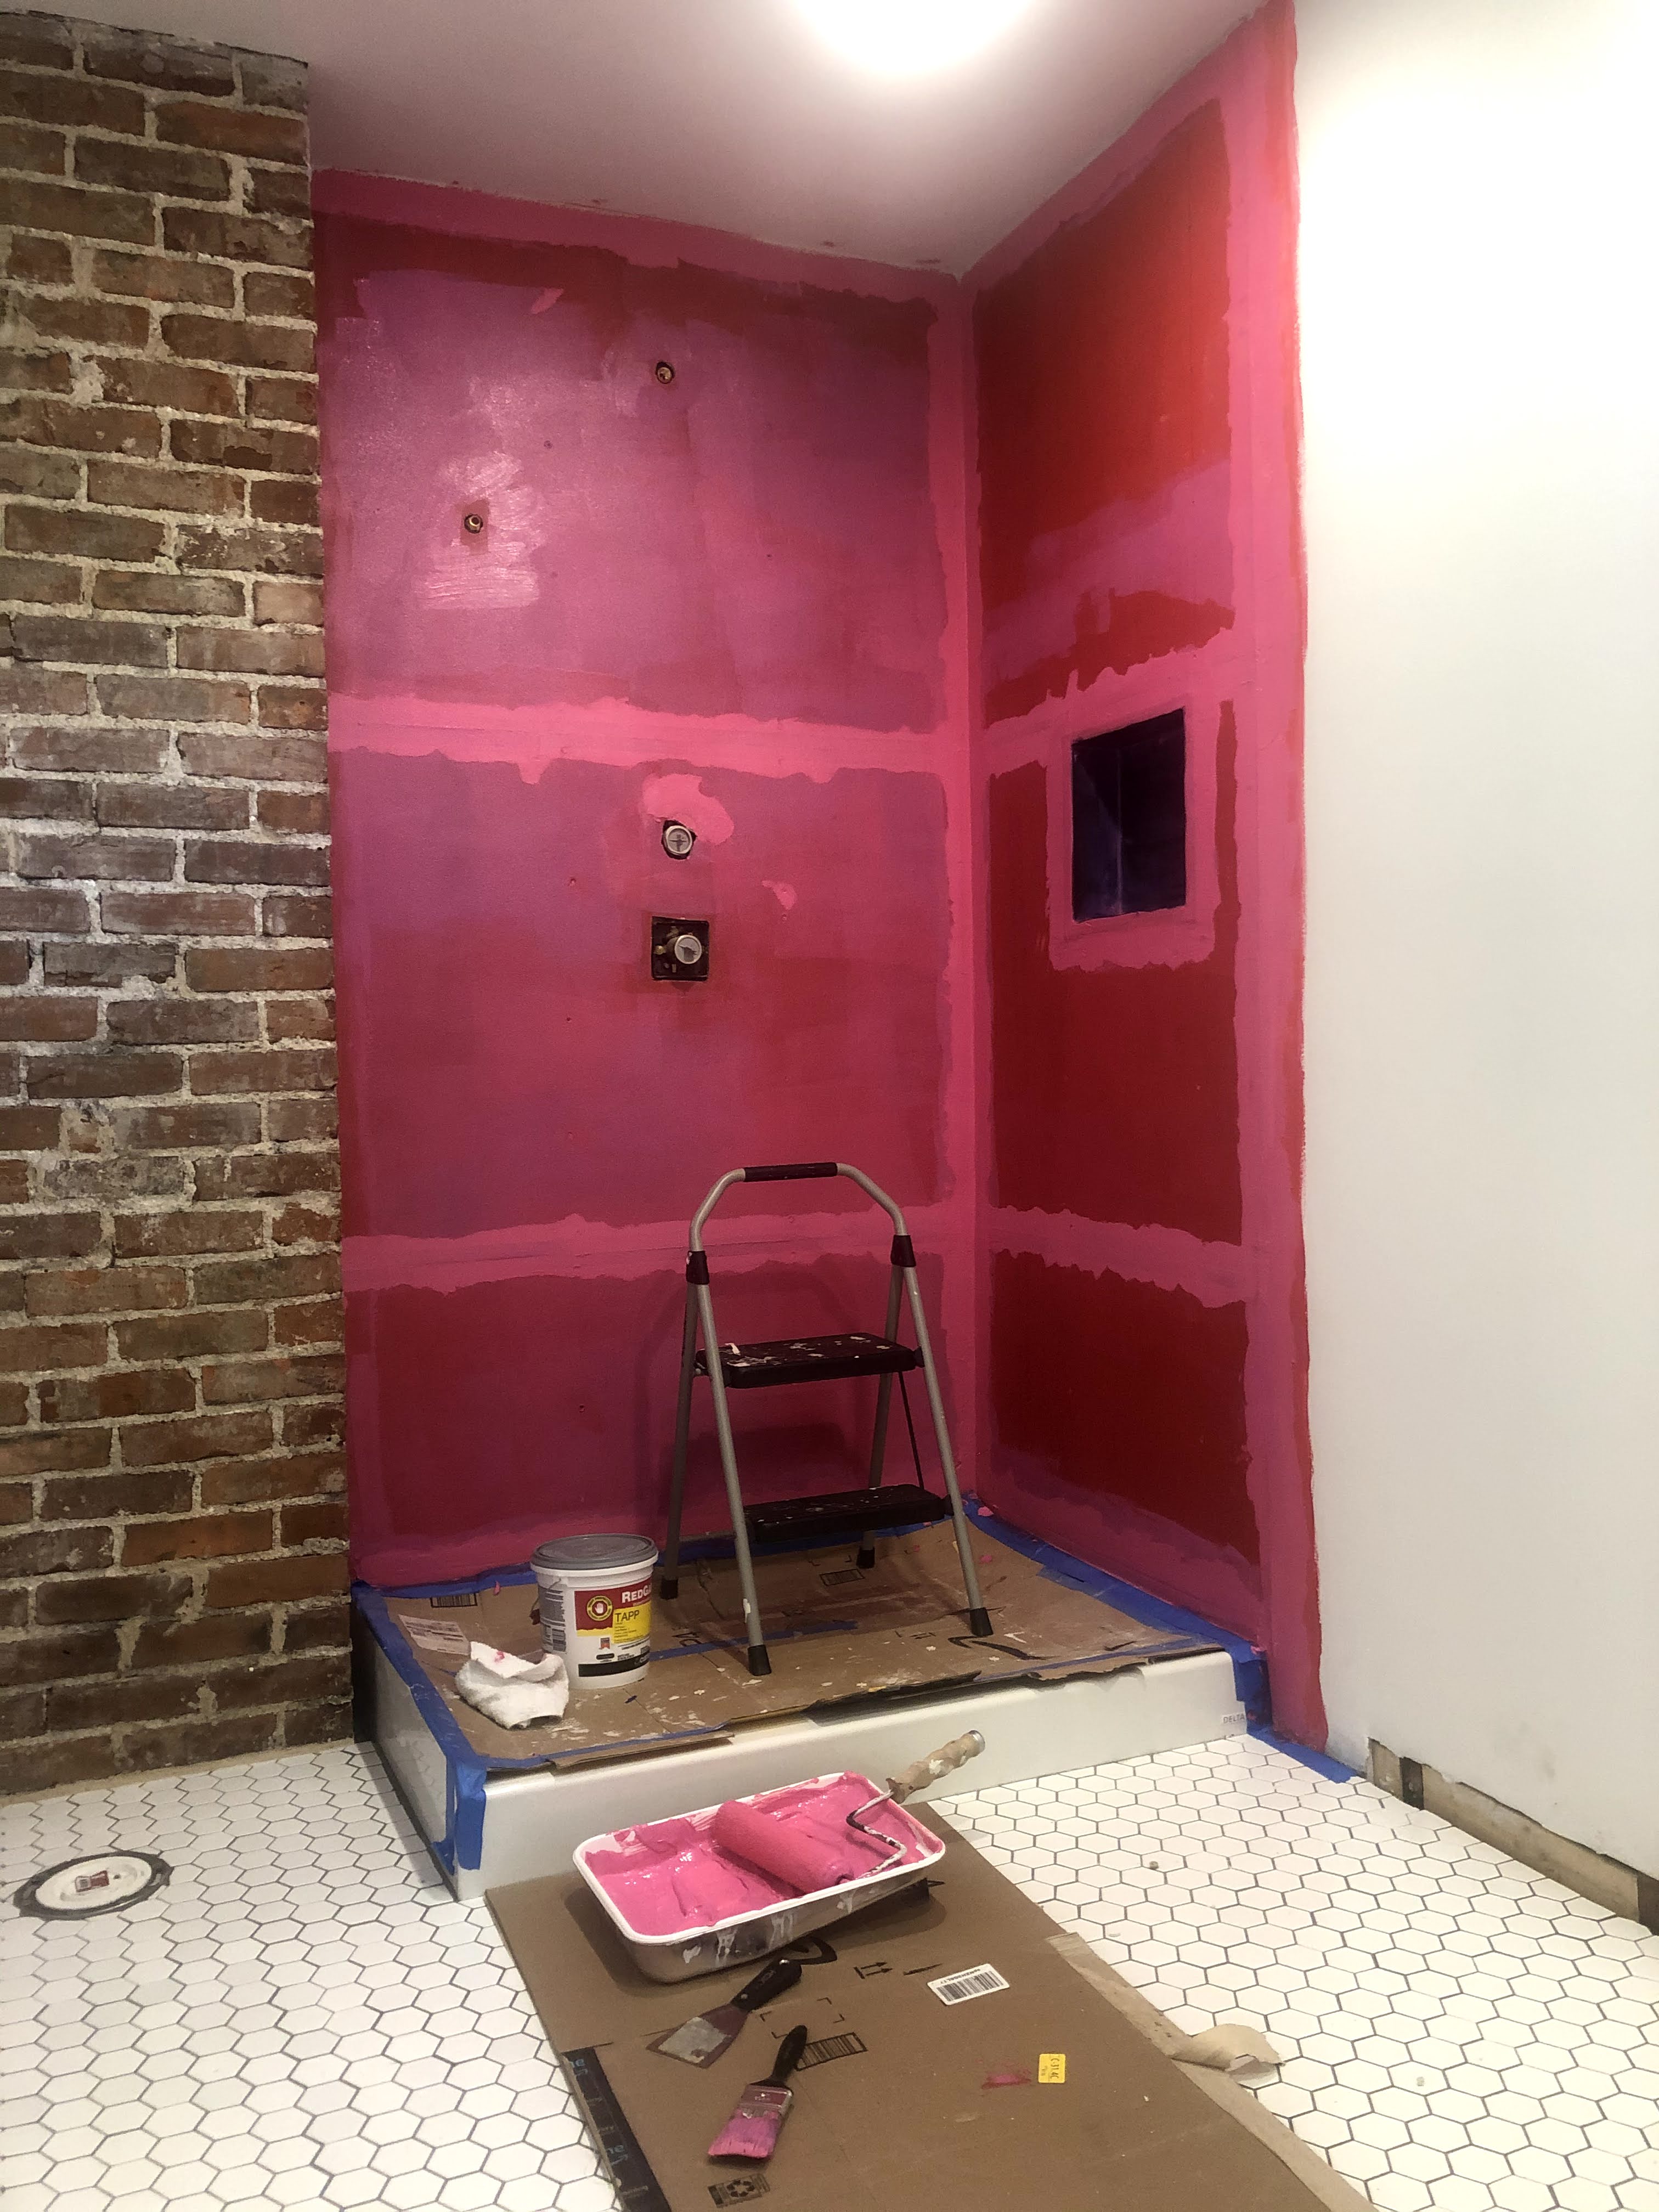
- Why did you have to pick the mortar out from between the penny tiles? Wouldn’t the grout cover it?
Here’s another one with a short and a long answer. Short answer is because I’m not very good at laying tile. The long answer is that I only had to do that in spots where I used too much mortar and it squished out between the tiles too much. Yes, grout will cover the mortar but you need clear edges around your tiles for the grout to adhere to. The grout is what makes the tile installation watertight, so you need to make sure that you have enough grout in each tile joint and that it is adhered around the tile. - How are you such a bad-ass?
This question just proves the rule that no one has your back like an instagram friend you’ve never met. Shout out to Erica @lifeonlaurielane – when the pandemic is over I’m coming to Memphis to thrift with you! But, if the spirit of this question was how do I do the stuff I do? The answer is that I am 100% flying by the seat of my pants always. I am someone who learns best by doing, and this past year and a half has involved a lot of learning. I am not an expert. Mistakes have and will be made.
The One Room Challenge ends on November 29th. So I have a few more weeks until the final reveal is due. I think we will get quite close to having a completely finished room by then. Today, I have started to paint which feels like a huge step to making this space no longer feel like a construction zone. After I paint, I will finish plumbing the vanity and then hopefully the toilet will be delivered and we will have a functioning bathroom! Before the shower is functional, we have to order and install the glass doors – and turn on the water and make sure all of the plumbing fixtures are installed correctly. I have a sinking feeling that the trim and door installation might not make the deadline… stay tuned!
As always, make sure you check out all of the participants of the One Room Challenge on instagram and on the One Room Challenge blog.

Make sure to keep up with the rest of the One Room Challenge Guest participants via their blogs and on Instagram. Find them here .
