New Year’s Eve always feels a bit bittersweet to me and this year is no exception. Right now, 2021 is shiny, new, and, full of potential. But standing on the precipice of this new year, sometimes I think about how tomorrow the year officially starts; it won’t be brand new any more and each day it will lose a bit of it’s potential. I think this feeling comes from the fear that I often have that I will not accomplish what I set out to do.
2020 was the year that I dove in hard to attempt to finally finish our ensuite bathroom renovation. We accomplished so much and have been using that bathroom daily for the last 6 weeks or so. It’s not 100% complete – still needs window trim and towel hooks and… a door… But, at the beginning of this year it was a construction zone with unfinished plumbing and electrical, no drywall, and no flooring. It’s a massive improvement.
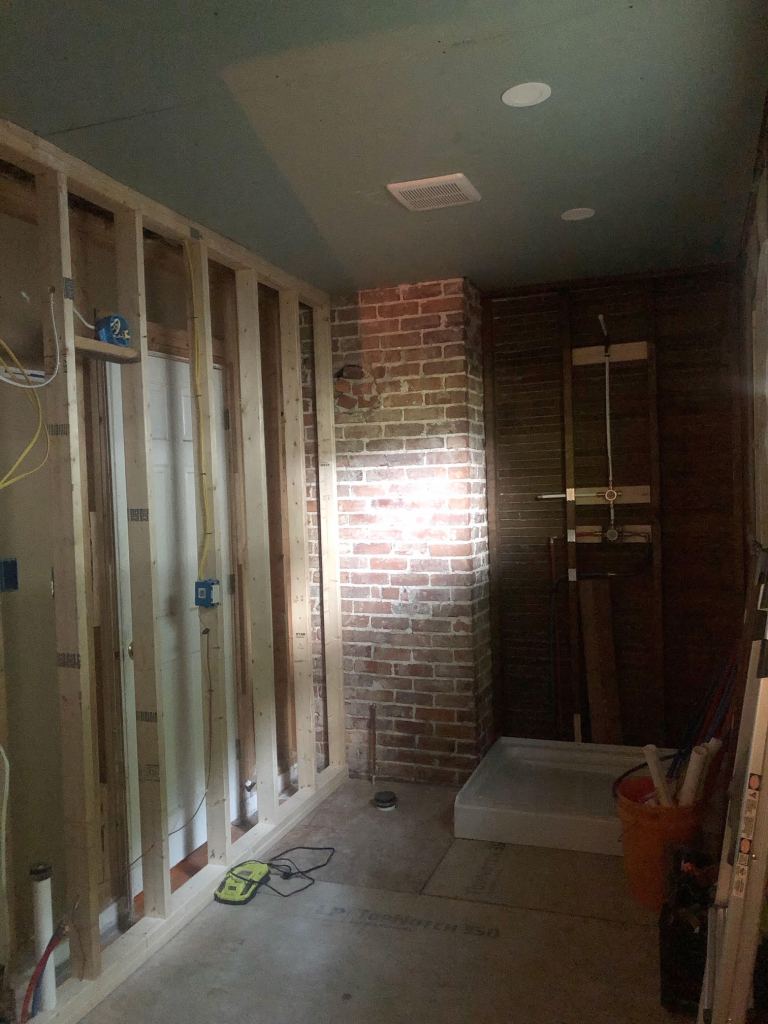
For 2021, my renovation goals are to finish finish the ensuite bathroom and renovate the hall bath as well. There are also some miscellaneous outdoor goals too – like making progress on the walkway and landscaping project we started this summer and have since abandoned.
As far as resolutions go, I have just two. Let’s get the one I probably make every year out of the way – I want to read more. My plan is to try to replace mindless scrolling time with reading a novel. The AT&T outage in Nashville on Christmas Day really helped me go cold turkey on the mindless scrolling as we were without internet or cellular service for a few days. Lets see how many weeks into 2021 I last, shall we?
My renovation resolution is related to that fear I have of not accomplishing what I have set out to do. I’d like to not let that fear of failure get to me as much in 2021. In The Great Tile Saga of 2020, I was so hard on myself for not having a 100% perfect tile installation. I felt like a failure, a hack, an imposter. Well, we’ve been using the bathroom for a few weeks now and, I can say for sure, I do not notice any of those imperfections. They don’t bother me at all. Now, I’m sure you’re thinking to yourself… “I told you it would be fine!” and yes, yes you did.
But the important bit here is that I let that fear derail me for a few days each time. I know that striving for perfection at all times is just part of who I am – especially when it comes to the aesthetic components of a project – and that isn’t a totally bad quality. What I have realized this year is that I was subconsciously relating not achieving perfection with some kind of moral failure (shout out to @domesticblisters on TicTok who taught me that keeping house tasks are morally neutral).
I think as a society we have this idea that if you’re not an expert at something, you shouldn’t do it, or at least you shouldn’t share it with others on the internet. I obviously don’t believe that as I have a blog detailing my amateur renovation and attempt plenty of things I have never done before – but sometimes big societal ideas can creep into our subconscious in ways that are unexpected (see also: racism, sexism, ableism…). So, all of that to say, my resolution is to be aware of when those ideas are creeping in and promptly tell them to go jump in a lake.
I am truly grateful this year for anyone who followed along with this journey and encouraged me along the way. I honestly could not have done it without you. Well, you and calling my dad on FaceTime.
I hope you’ll stick around this next year as we dive into another bathroom renovation. Maybe it will take less than 18 months to complete this one…
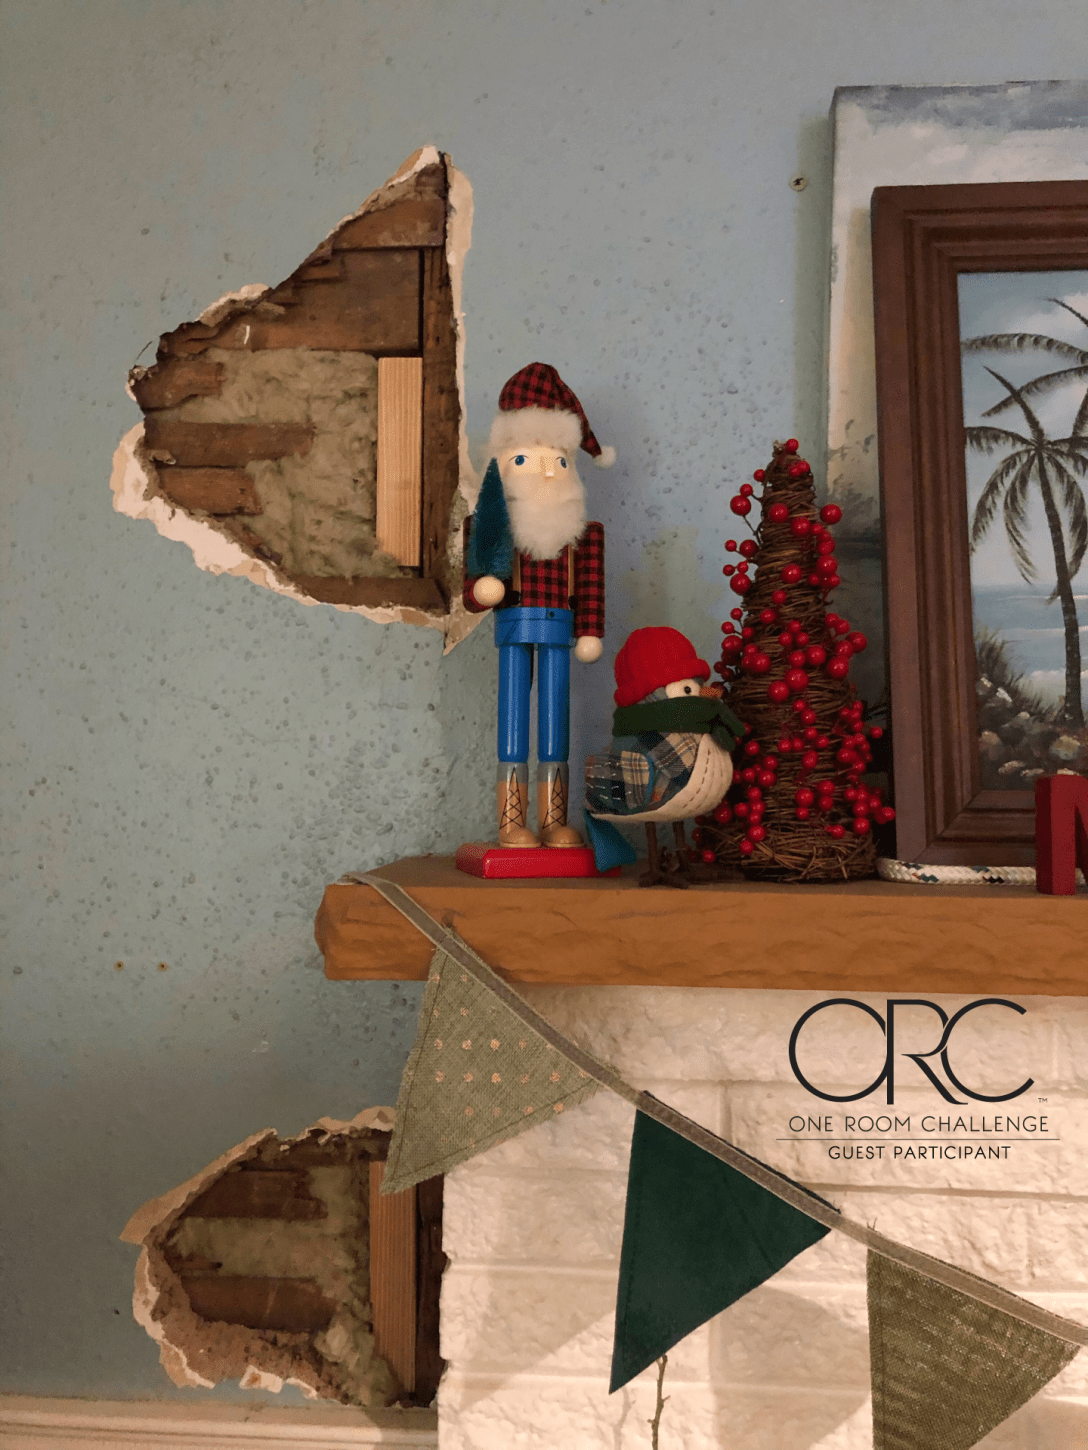
I almost pulled it off. It was down to the wire, but I really thought today we would finish installing the shower doors with plenty of time to take some pretty pictures. But, instead, we ran into some problems, the bathroom is currently a mess and, to top it off, I put some bonus holes in the wall in my living room. But that is all a story for another day. Today we reflect on the end of the Fall ORC.
I accomplished so much during this One Room Challenge: tiled and grouted the shower, including cutting my own niche out of marble, installed the shower fixtures, painted the walls, installed a new toilet, vanity and faucets, hung mirrors, and wired lights, and had a few meltdowns along the way.
I have been reflecting on why I am so emotionally invested in this renovation. Partially, I think I have redirected some of my pandemic related anxiety into working on it, but I think this bathroom renovation is connected to something else, as well.
In April 2019, we started demolition on this bathroom. April 2019 is the same month I was diagnosed with rheumatoid arthritis. My RA has taken a lot from me but, slowly and steadily, I have found myself again in this renovation. I have learned new skills and seen evidence of how capable I can still be.
We’ve been through some things, this renovation and I. We’ve had moments where we weren’t sure that anything was ever going to get better. She has waited patiently for me through days and weeks where I couldn’t hold my coffee cup, let alone a drill.
If you are familiar with spoon theory, I have given this renovation many spoons over the last 18 months – and I can’t get those back. Those were spoons I could have used for other things like cleaning my house or spending time with my family. As we near the finish line, my fear of having this room not turn out as I had envisioned, or worse – not finishing at all – can be all consuming. Because, maybe that means that I can’t still do anything I want, that I am not still capable and, that not only have I failed myself, but I’ve failed my family.
In my head I know this is not true.
But these are the fears that I have. And sometimes I can’t keep them at bay with logic.
Ultimately, I know that with a little bit more time, I will persevere. I will finish. I will be very proud of what I have done. I will prove to myself that I can still do things with my own two hands, that this illness hasn’t gotten the best of me.
And then we will rest. Just enough to gather the strength to start the next room.
I am planning to share the saga of installing the shower doors, the journey I went on making my own baseboards and window trim, and all the pretty pictures of the eventually completed room – so – even though the One Room Challenge is over, this story continues on.
After you have checked out all of the beautiful and impressive reveals at the One Room Challenge Blog, come back here to see how this story ends. Or follow on Instagram where the real-time emotional meltdowns (and also victories!) take place.
Sneak peak at the side of the room that looks pretty much finished. Not too shabby!
I’m sure I’ll see you in the spring with another project with an unrealistic timeline. Until next time, ORC.
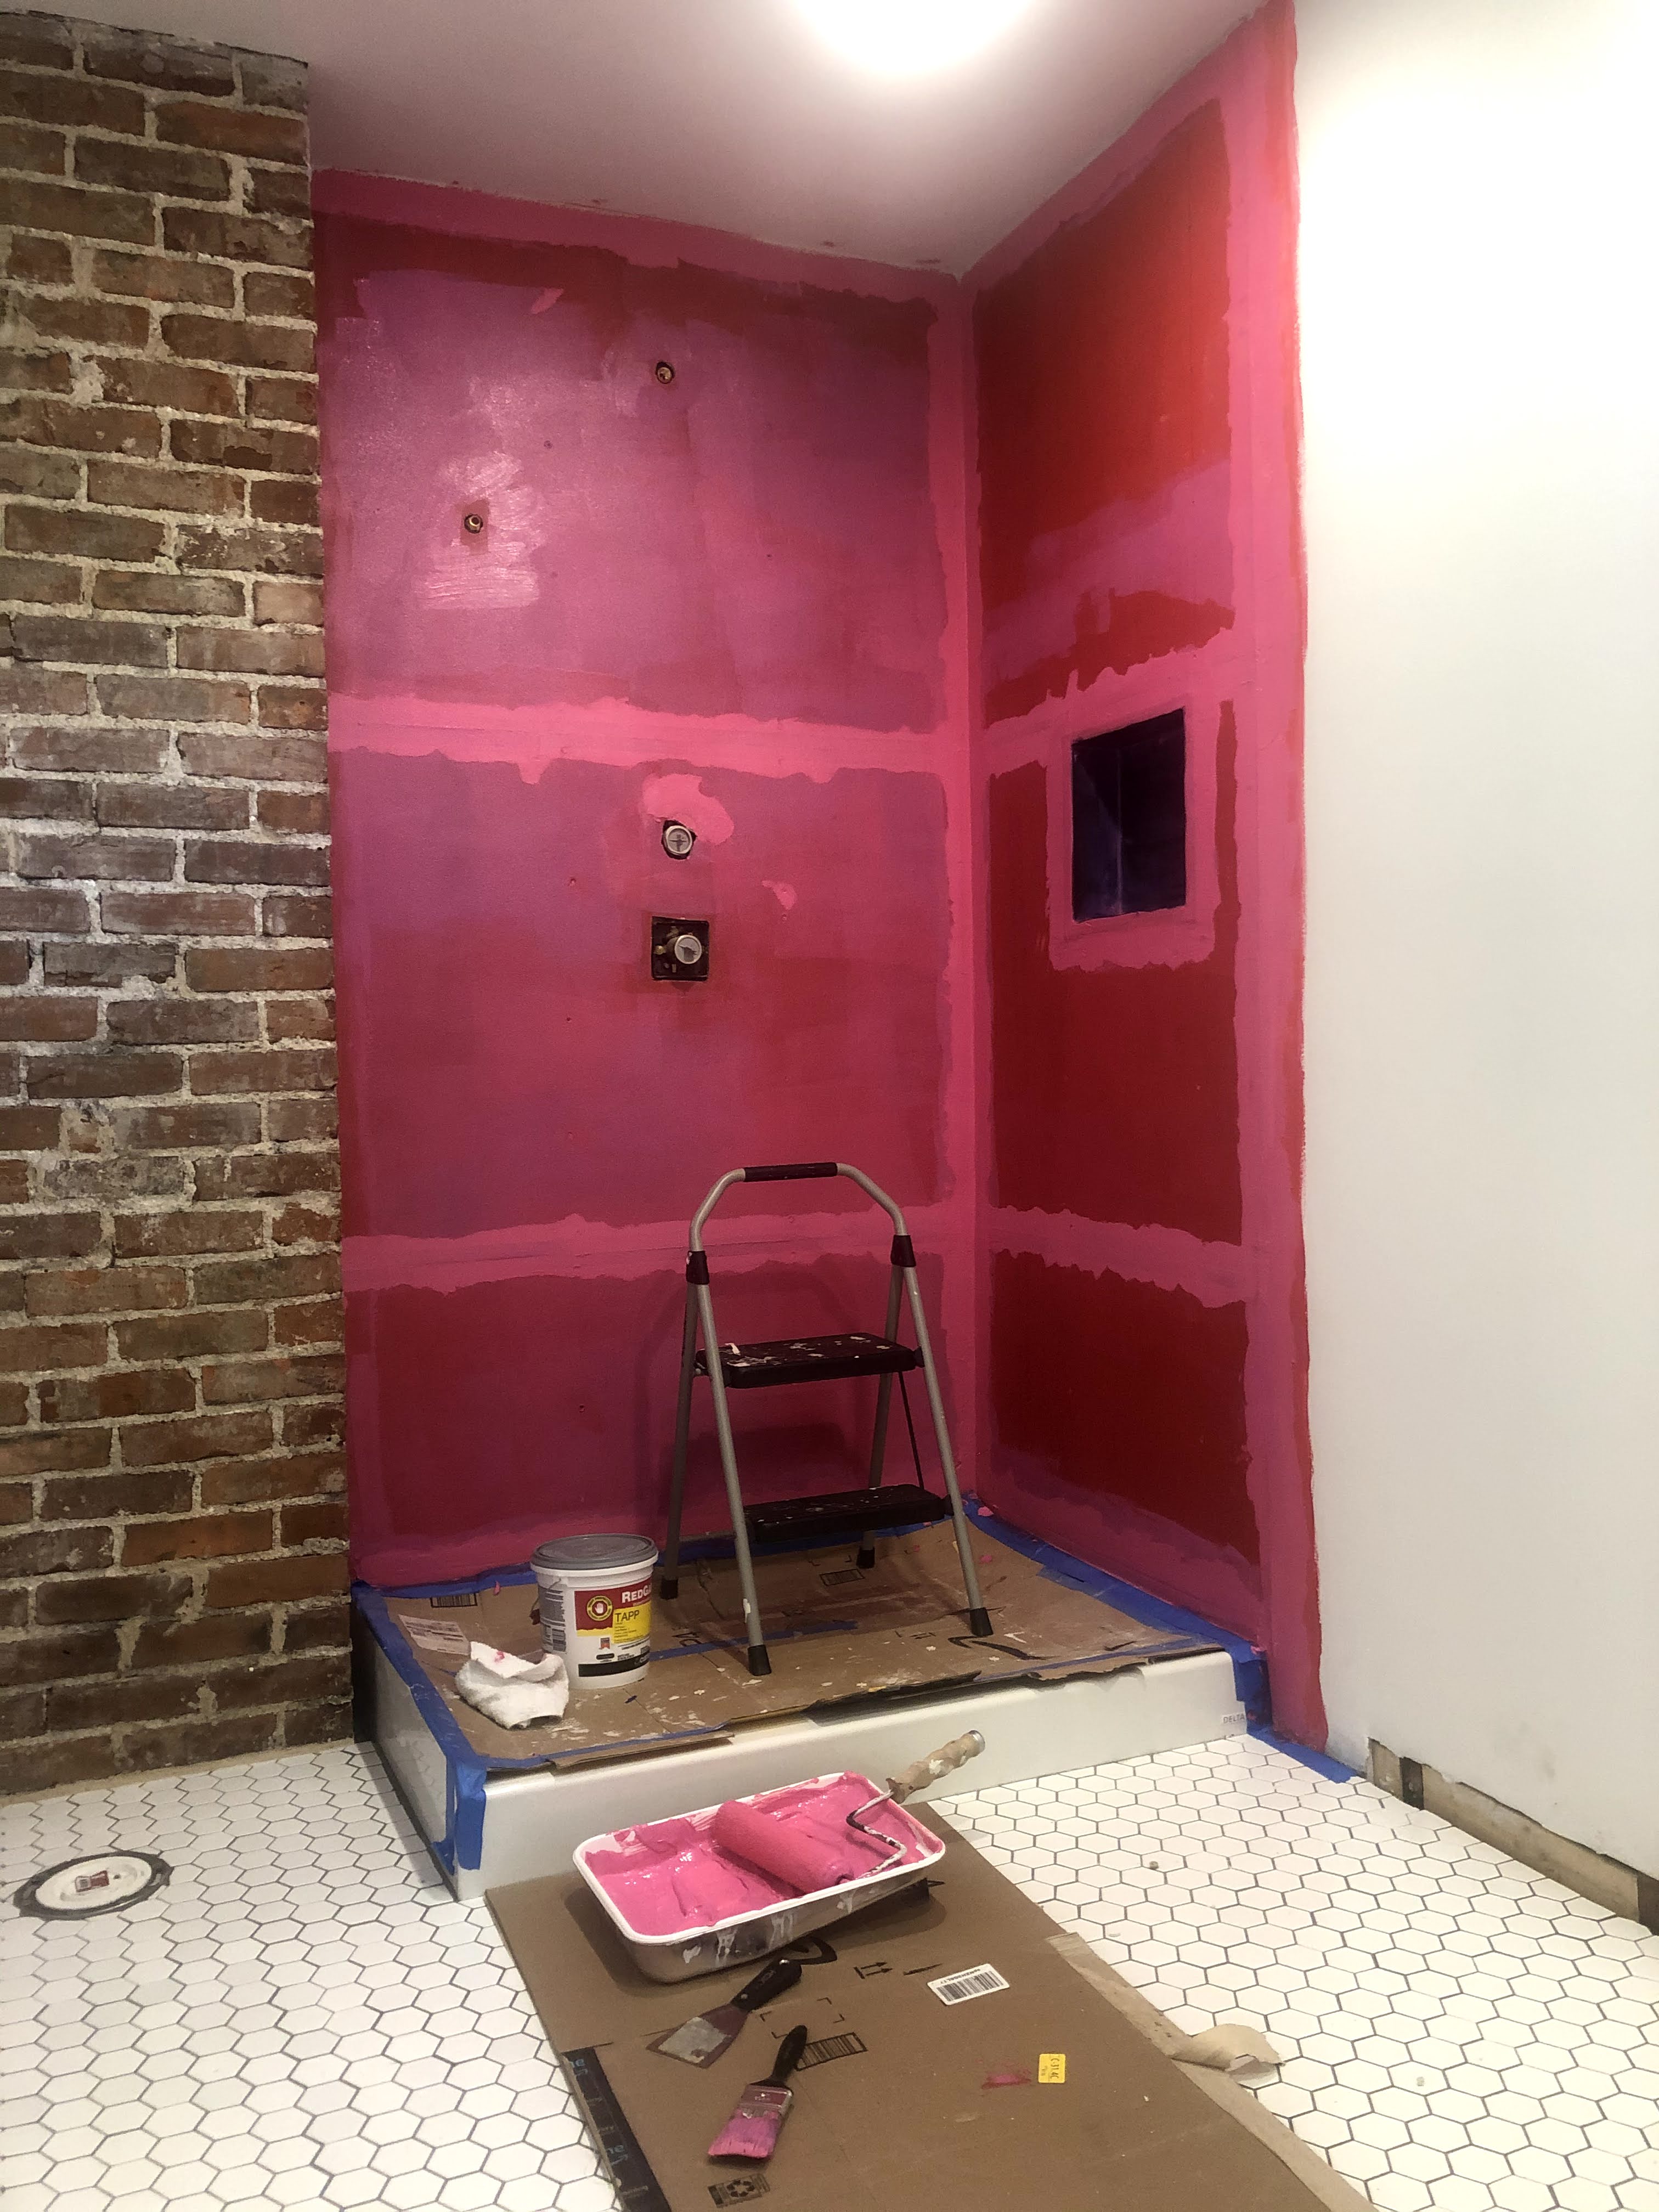
As of this writing, there are 10 days left until the absolute last day to reveal our One Room Challenge rooms and I am going to need every last minute of time. I finished painting at the end of last week which was week 6 of the ORC (technically final reveal week, but we won’t dwell on that). I thought I would do a run-down of what I used and what my process was.
Materials:
Zibra Precision Cut in Brush – I love Zibra brushes. They’re just better than everything else. I don’t know what to tell you. This is the one I use for cutting in.
Purdy Colossus 1/2” Roller Cover – This roller gives great coverage and a nice even texture. It also cleans up really nicely to use over and over again.
Shur-Line Easy Reach 5′ Adjustable Extension Pole – I really like my extension pole. It is easily adjustable so I can change the length to get exactly what I need. It has a comfy grip too and my hands don’t get too tired.
Paint:
Even though I had primed the walls months ago when we finished the drywall, it is important to prime shortly before painting, so I needed to do at least one more coat of primer over everything. I used Kilz PVA Drywall Primer. It is important to use a drywall specific primer over new drywall to seal everything in. Putting primer over drywall mud also allows you to see if there are any areas that need touching up. Part of why I primed the walls earlier this summer was because I kept messing up my drywall mud by trying to fix it. Painting it allowed me to make adjustments without messing up what I already had done.
Next, I painted the ceiling. I used Benjamin Moore Ceiling Paint in White. Boring, I know. First I cut in around the edges. I wasn’t too concerned about being precise since I still needed to paint the walls. Then two coats of paint with a roller making sure to back-roll. I think in the time-lapse video below you can kind of see the back-rolling process. Basically, after getting the paint on the wall, go back and roll all the way down in one motion and then overlap that line by about half a roller and repeat. It will give a more uniform finish. Another way to ensure good, even coverage, is to not paint in a “W” pattern that you see in all the paint commercials. Start a new line of paint about a half roller distance away from where you just were. Spread that out while trying to roll the whole length of the wall (or ceiling). My painting professional friend taught me that and I really think it makes a difference in the outcome of my painting projects.
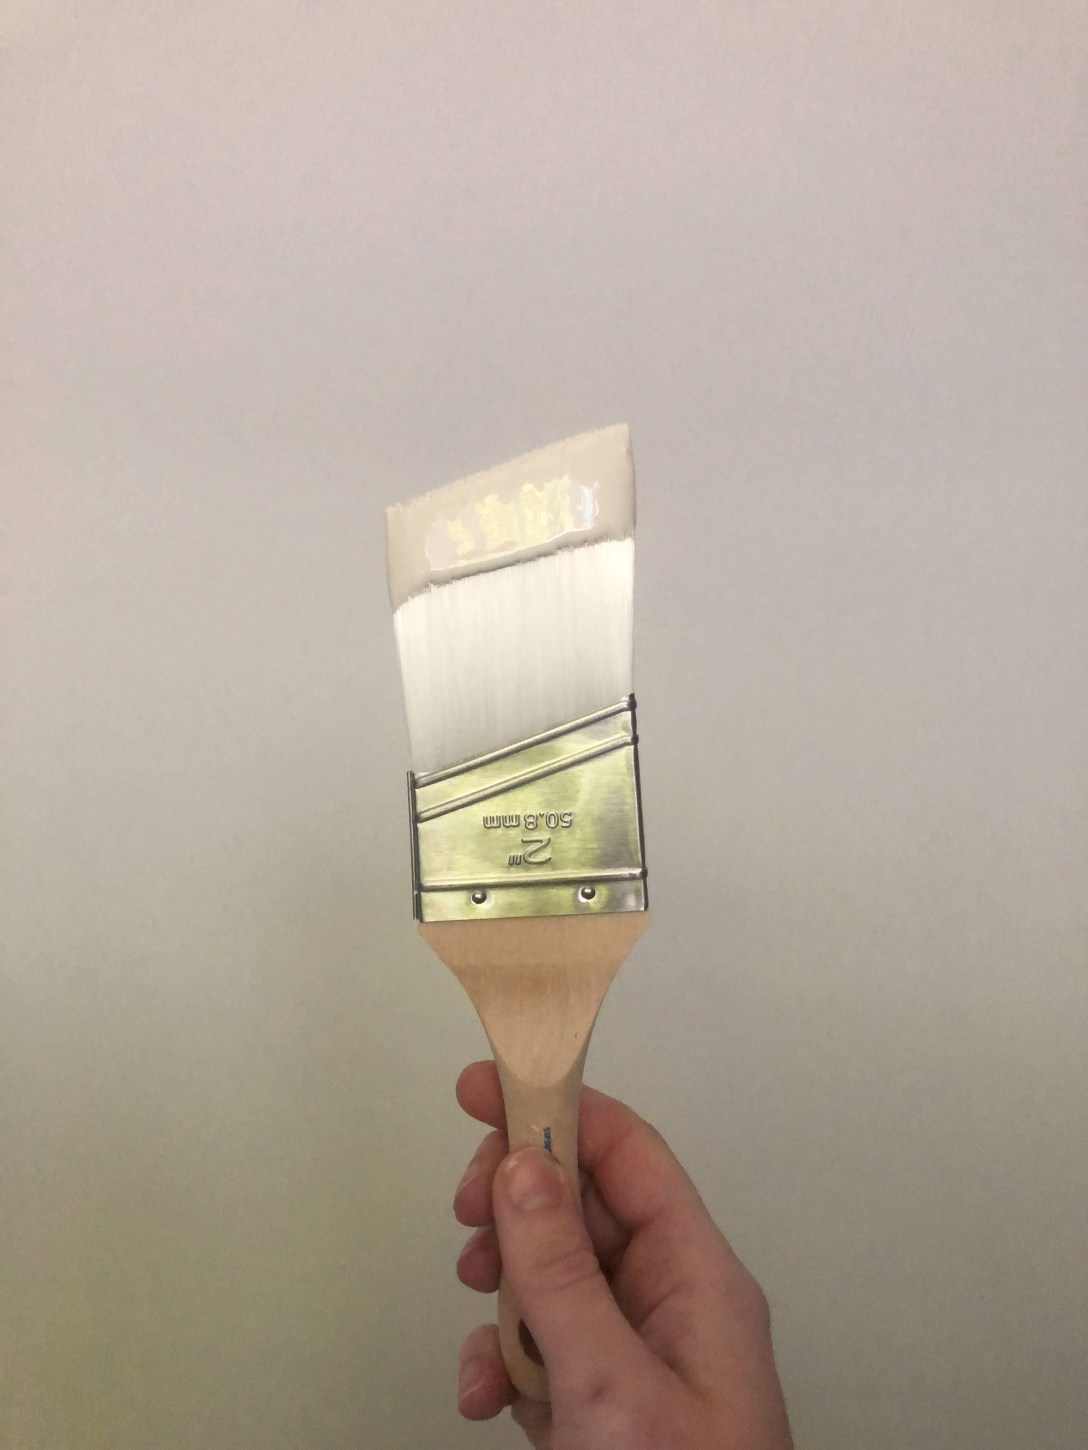
On the walls, I used Benjamin Moore Aura Bath and Spa paint in Revere Pewter. This paint only comes in a matte finish but is super durable and is also mildew resistant. Apparently the reason why it only comes in a matte finish has to do with that mildew resistant quality. It went on so smooth and covered really well. I was a bit hesitant about the matte finish as I usually use satin finishes in areas like kitchens and bathrooms but I can already tell this paint is not only beautiful on the walls, but durable too. As I’m writing this right now, I’m realizing that I probably should have chosen the Aura Bath and Spa paint for the ceiling as well due to the mildew resistant properties, so we’ll see how well the ceiling paint holds up in comparison to the walls.
I did not use tape for the ceiling corners and decided to cut in free hand. I made some mistakes, but it was easy enough to go back and touch those up later. I loathe taping things off to paint. It just takes so long and I never feel like it turns out right (and yes, I’ve heard of the painting over the tape trick). I’m not the best at cutting in free hand, but I figure, no better way to improve but to practice!
I didn’t stop to take any pictures of just the paint and rolled right into installing the sconces, vanity, faucets and toilet in the few days following finishing up painting. I am thrilled with how this room is coming together.
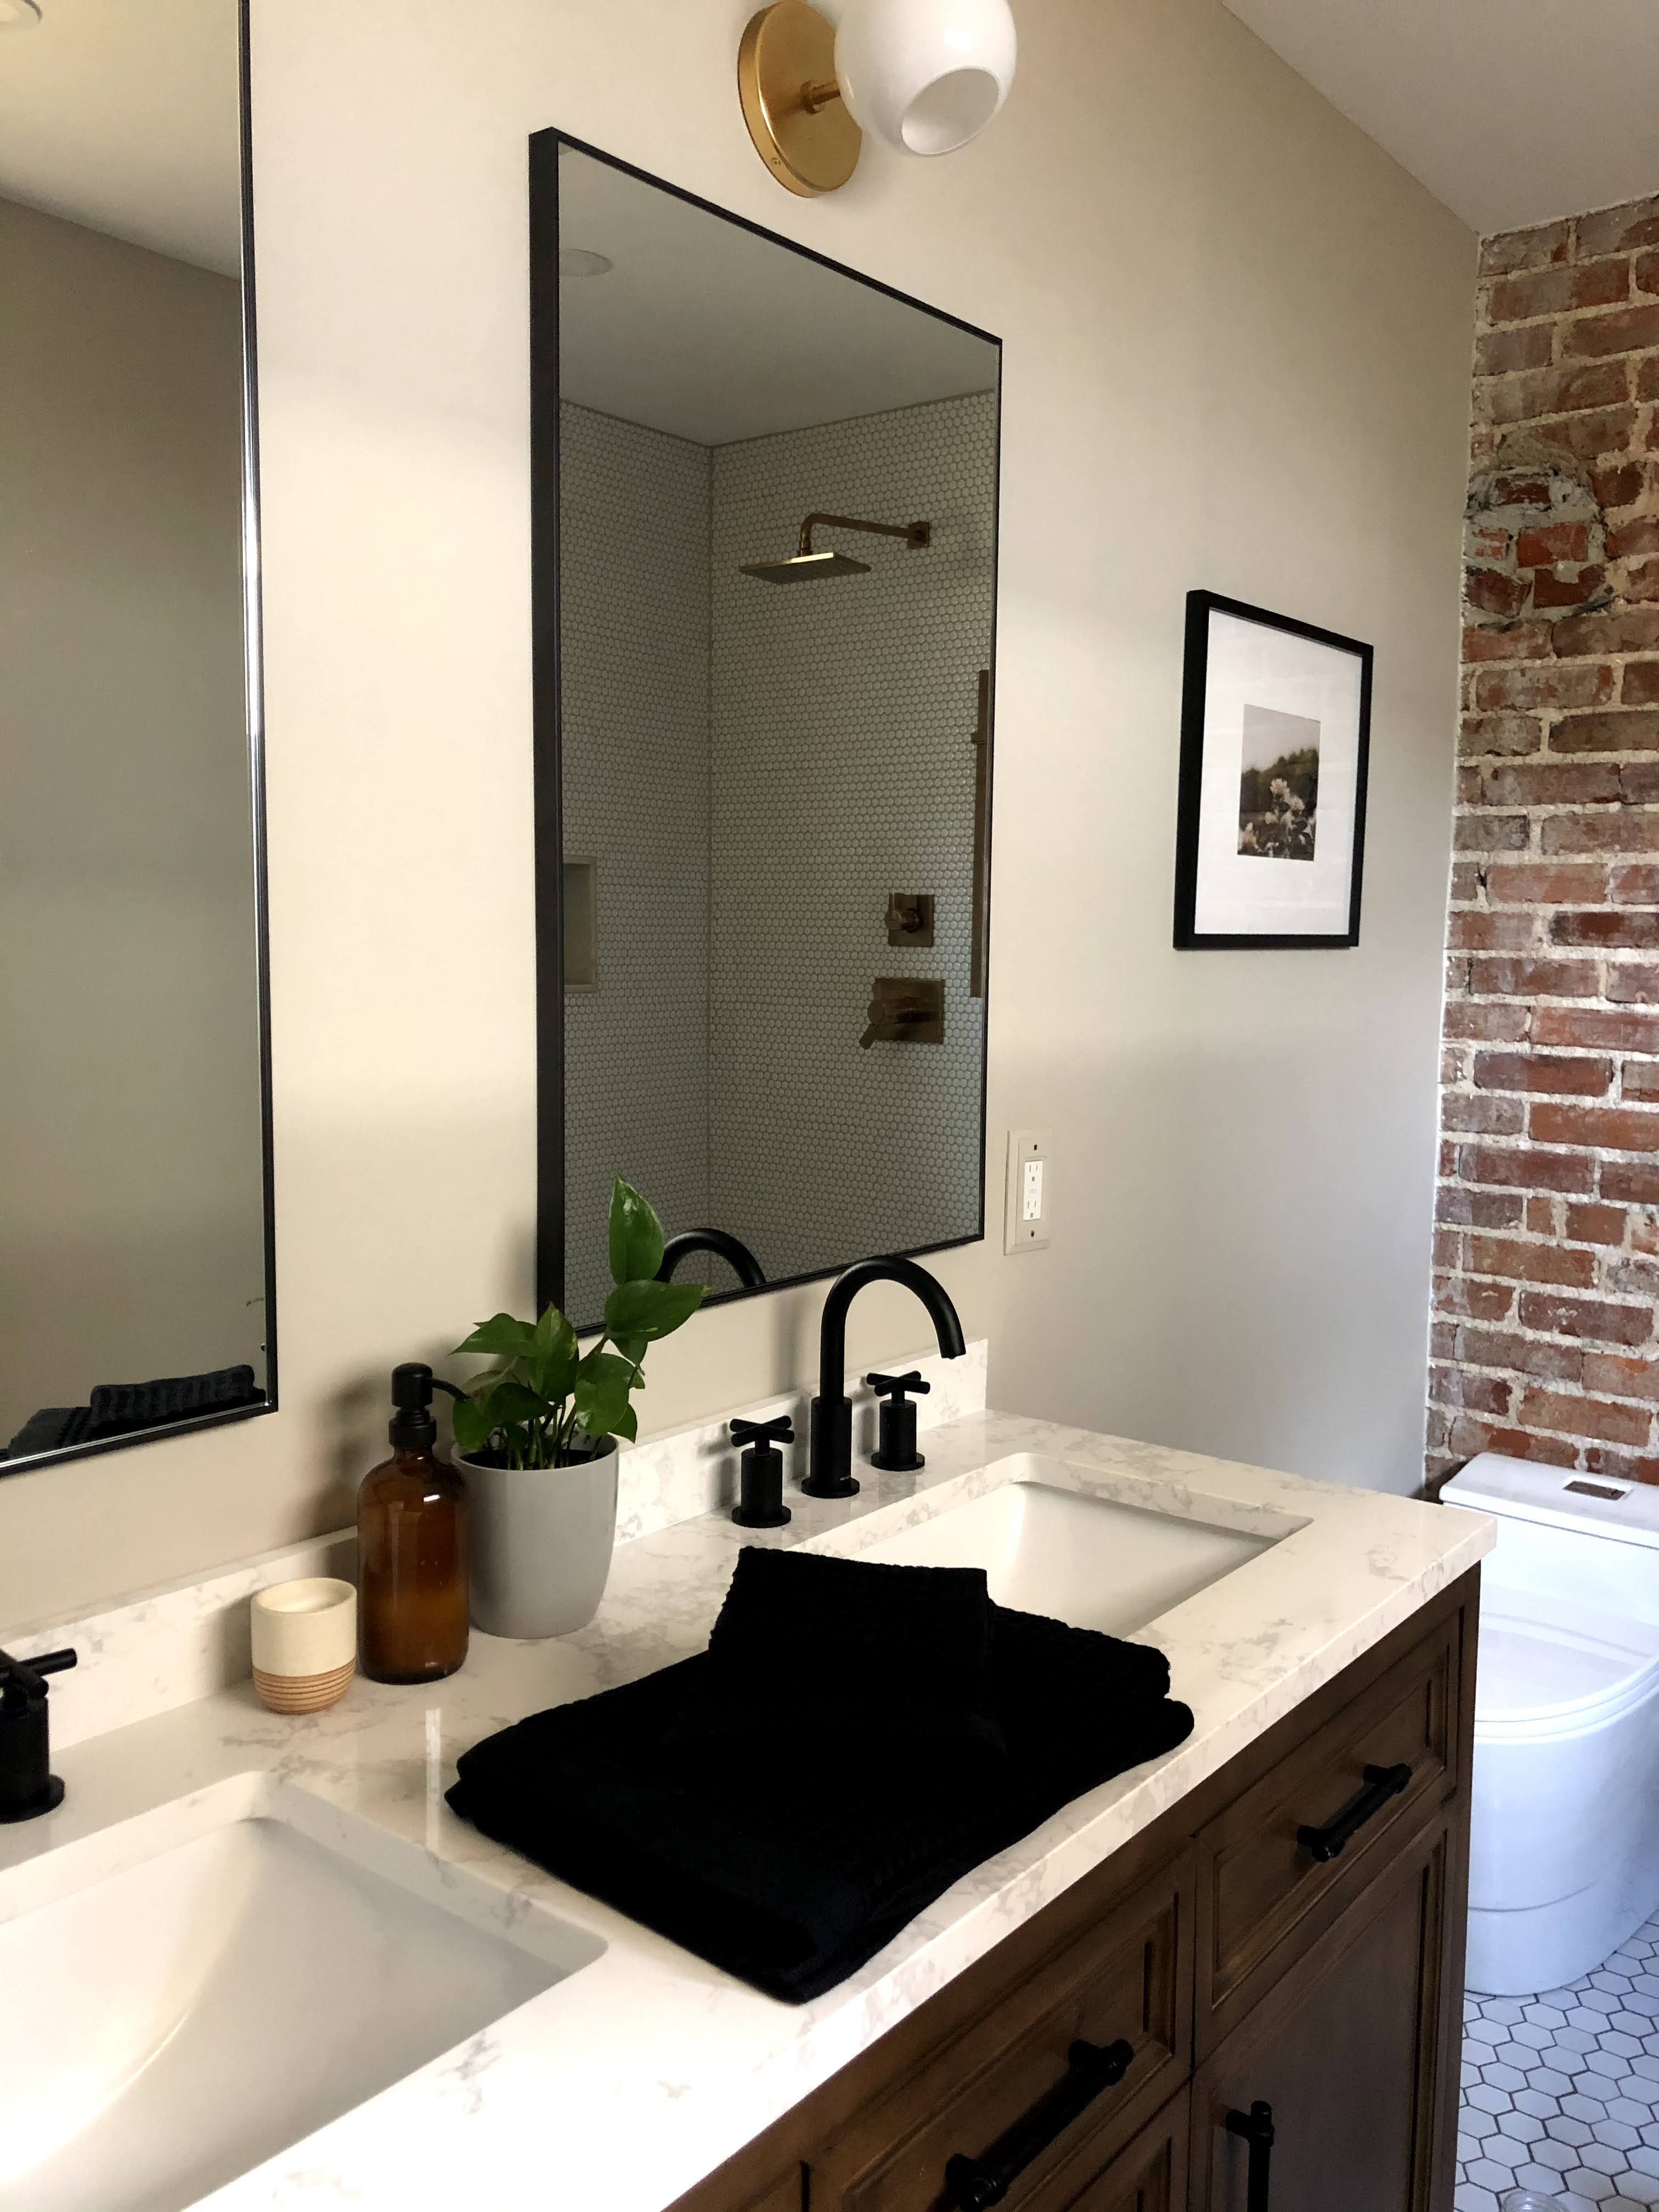
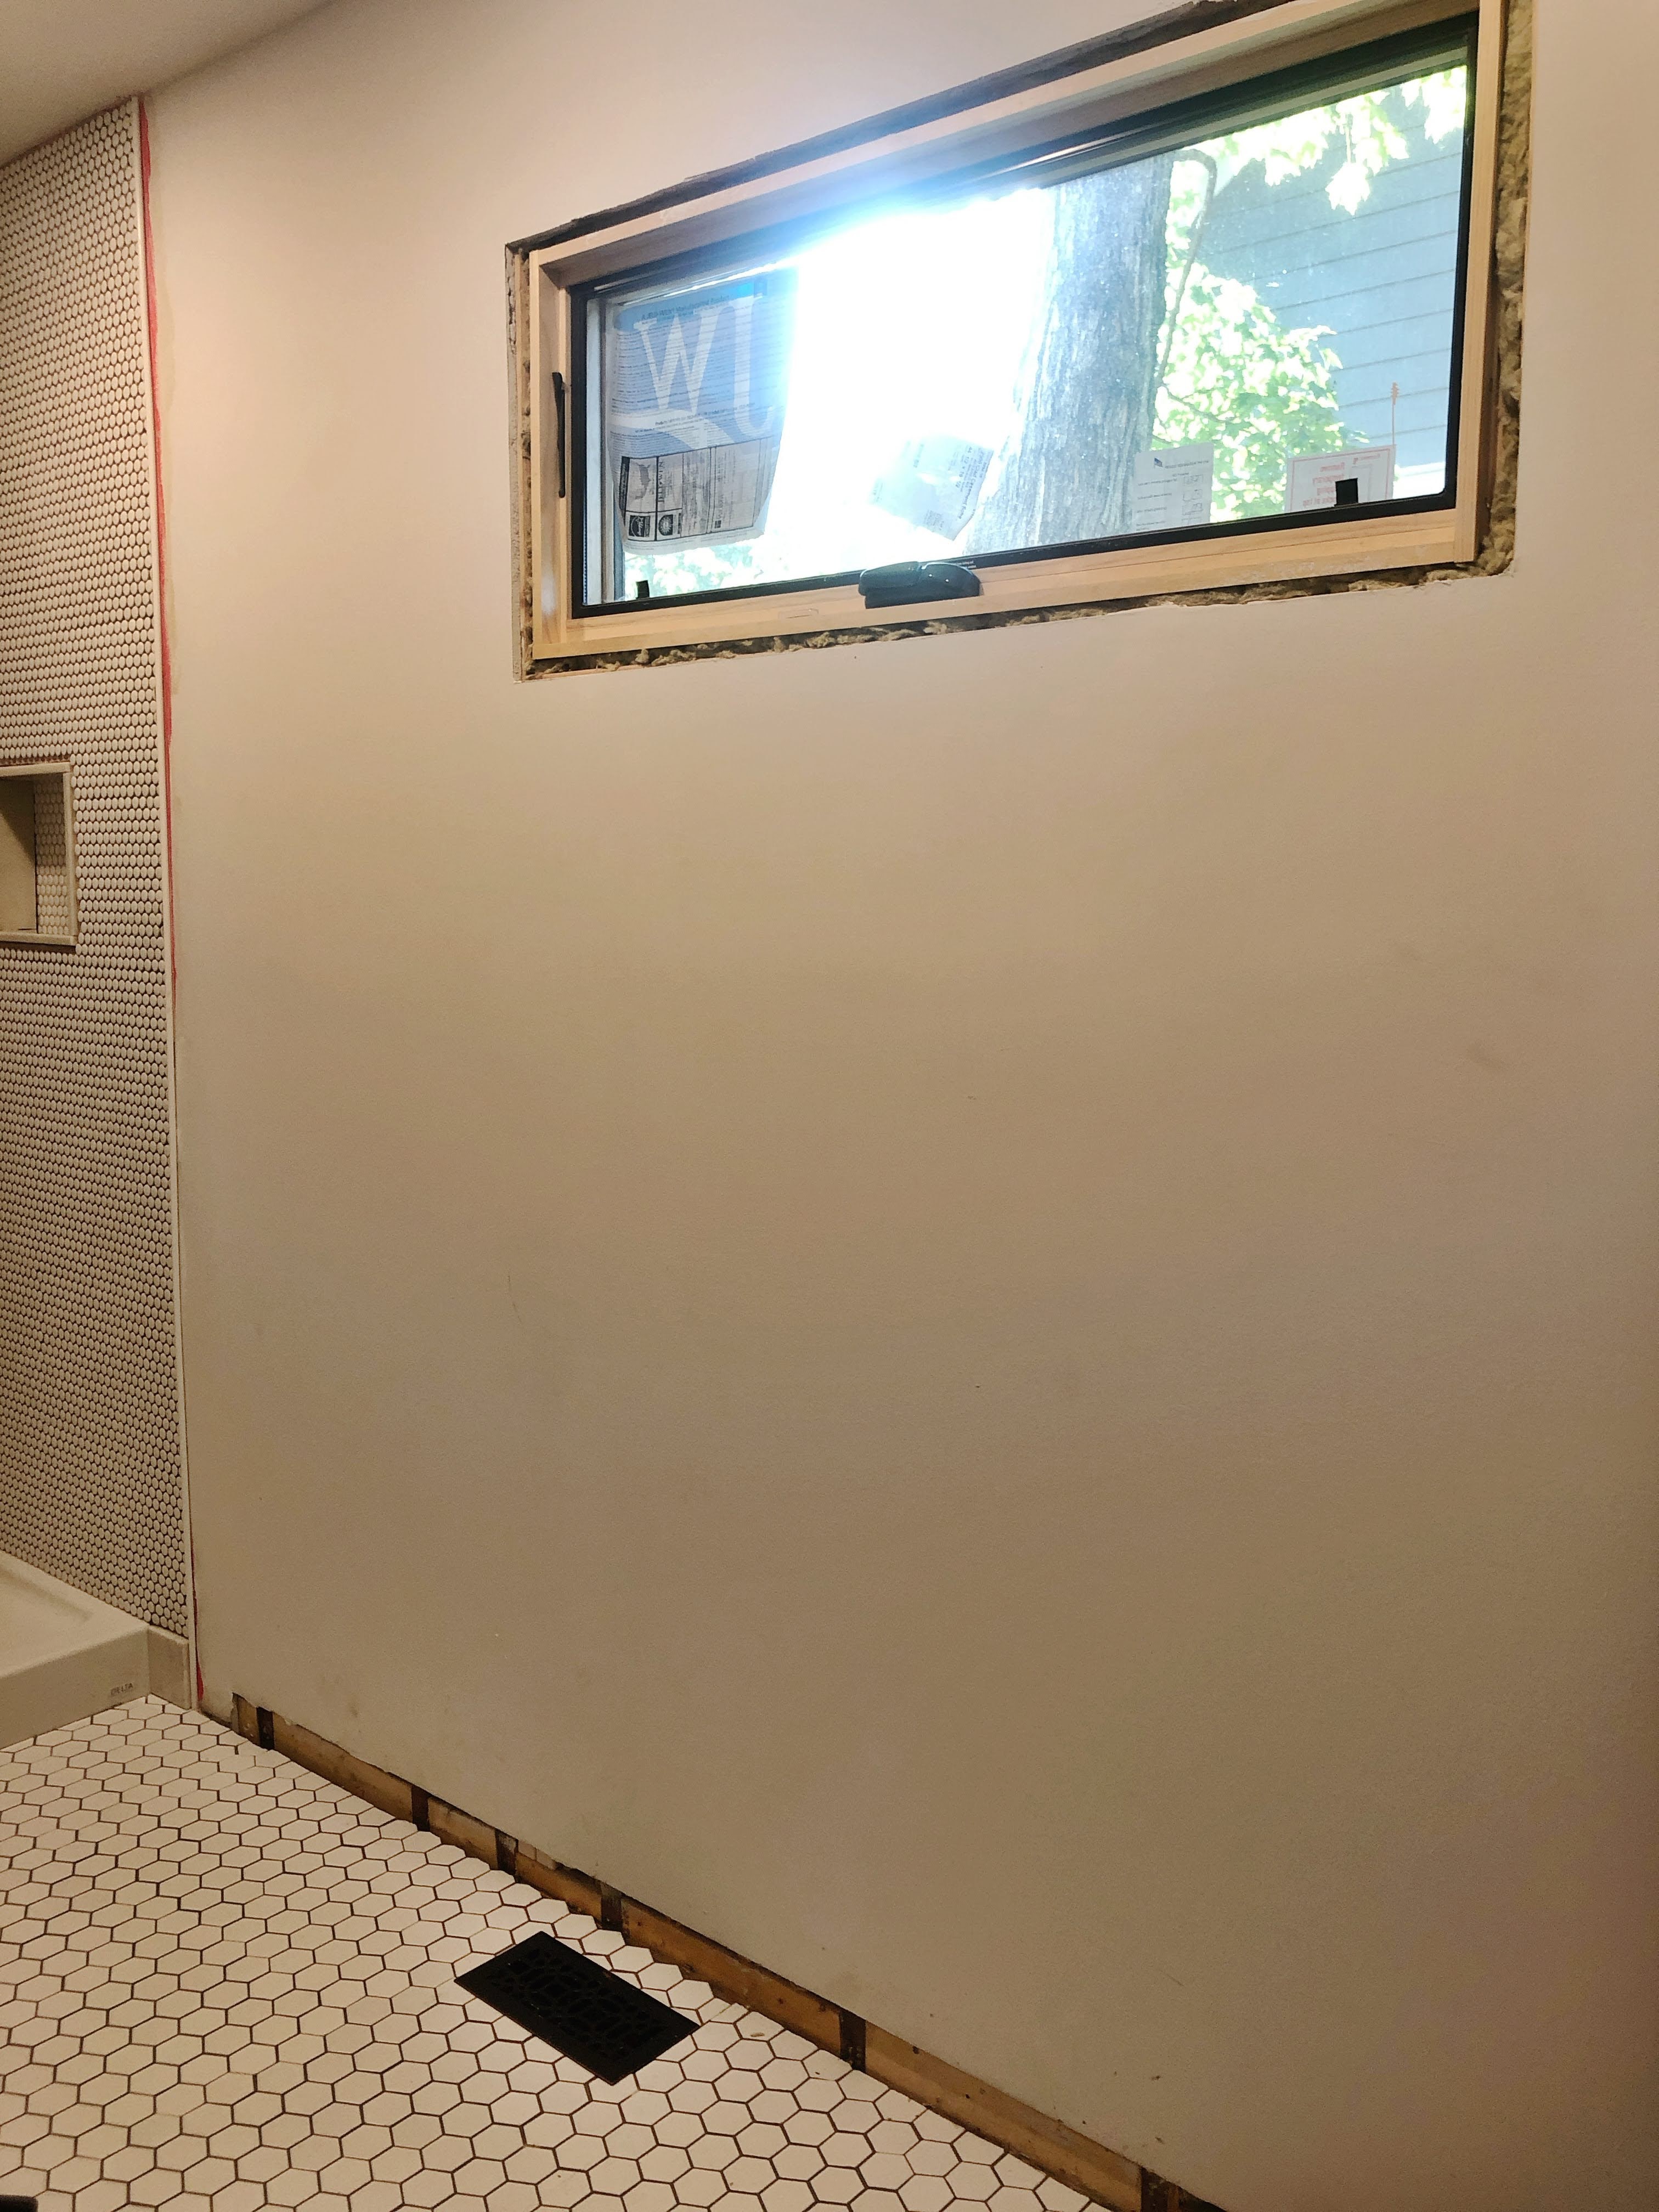
I love this picture because of the light coming in through the window and also that the shower wall and niche are reflected in the mirror. I picked the color Revere Pewter because I thought it would play well with the brick and it also matches the grout color of Alabaster from Mapei almost exactly! You can also see here I painted my outlet covers in the same color. I like that they blend in to the wall. Everything is coming together and feeling quite intentional. I was worried that since this project has taken me so long to complete that the choices I have made along the way wouldn’t work together well once they were all in the room together. I do not think that is the case!
So, what’s left? Finishing touches, mostly. I have ordered shower doors which may get here and get installed before the deadline to the One Room Challenge, but they might go in after. I also picked up some art earlier this week at a local shop and some maple 1×6 and 1×4 boards to make some baseboards and window casing trim. We still need some towel hooks and bathroom organization stuff too, but that may come later.
Stick around to see the dramatic conclusion to our One Room Challenge adventure!
I know, I know – this post is 3 days late. This week has felt strange for, among other reasons, although I’ve made a good bit of progress on the bathroom, it was all in “odds and ends” tasks that didn’t feel like enough to write about so I asked Instagram if anyone had any questions for me and I will answer five questions for week 5.
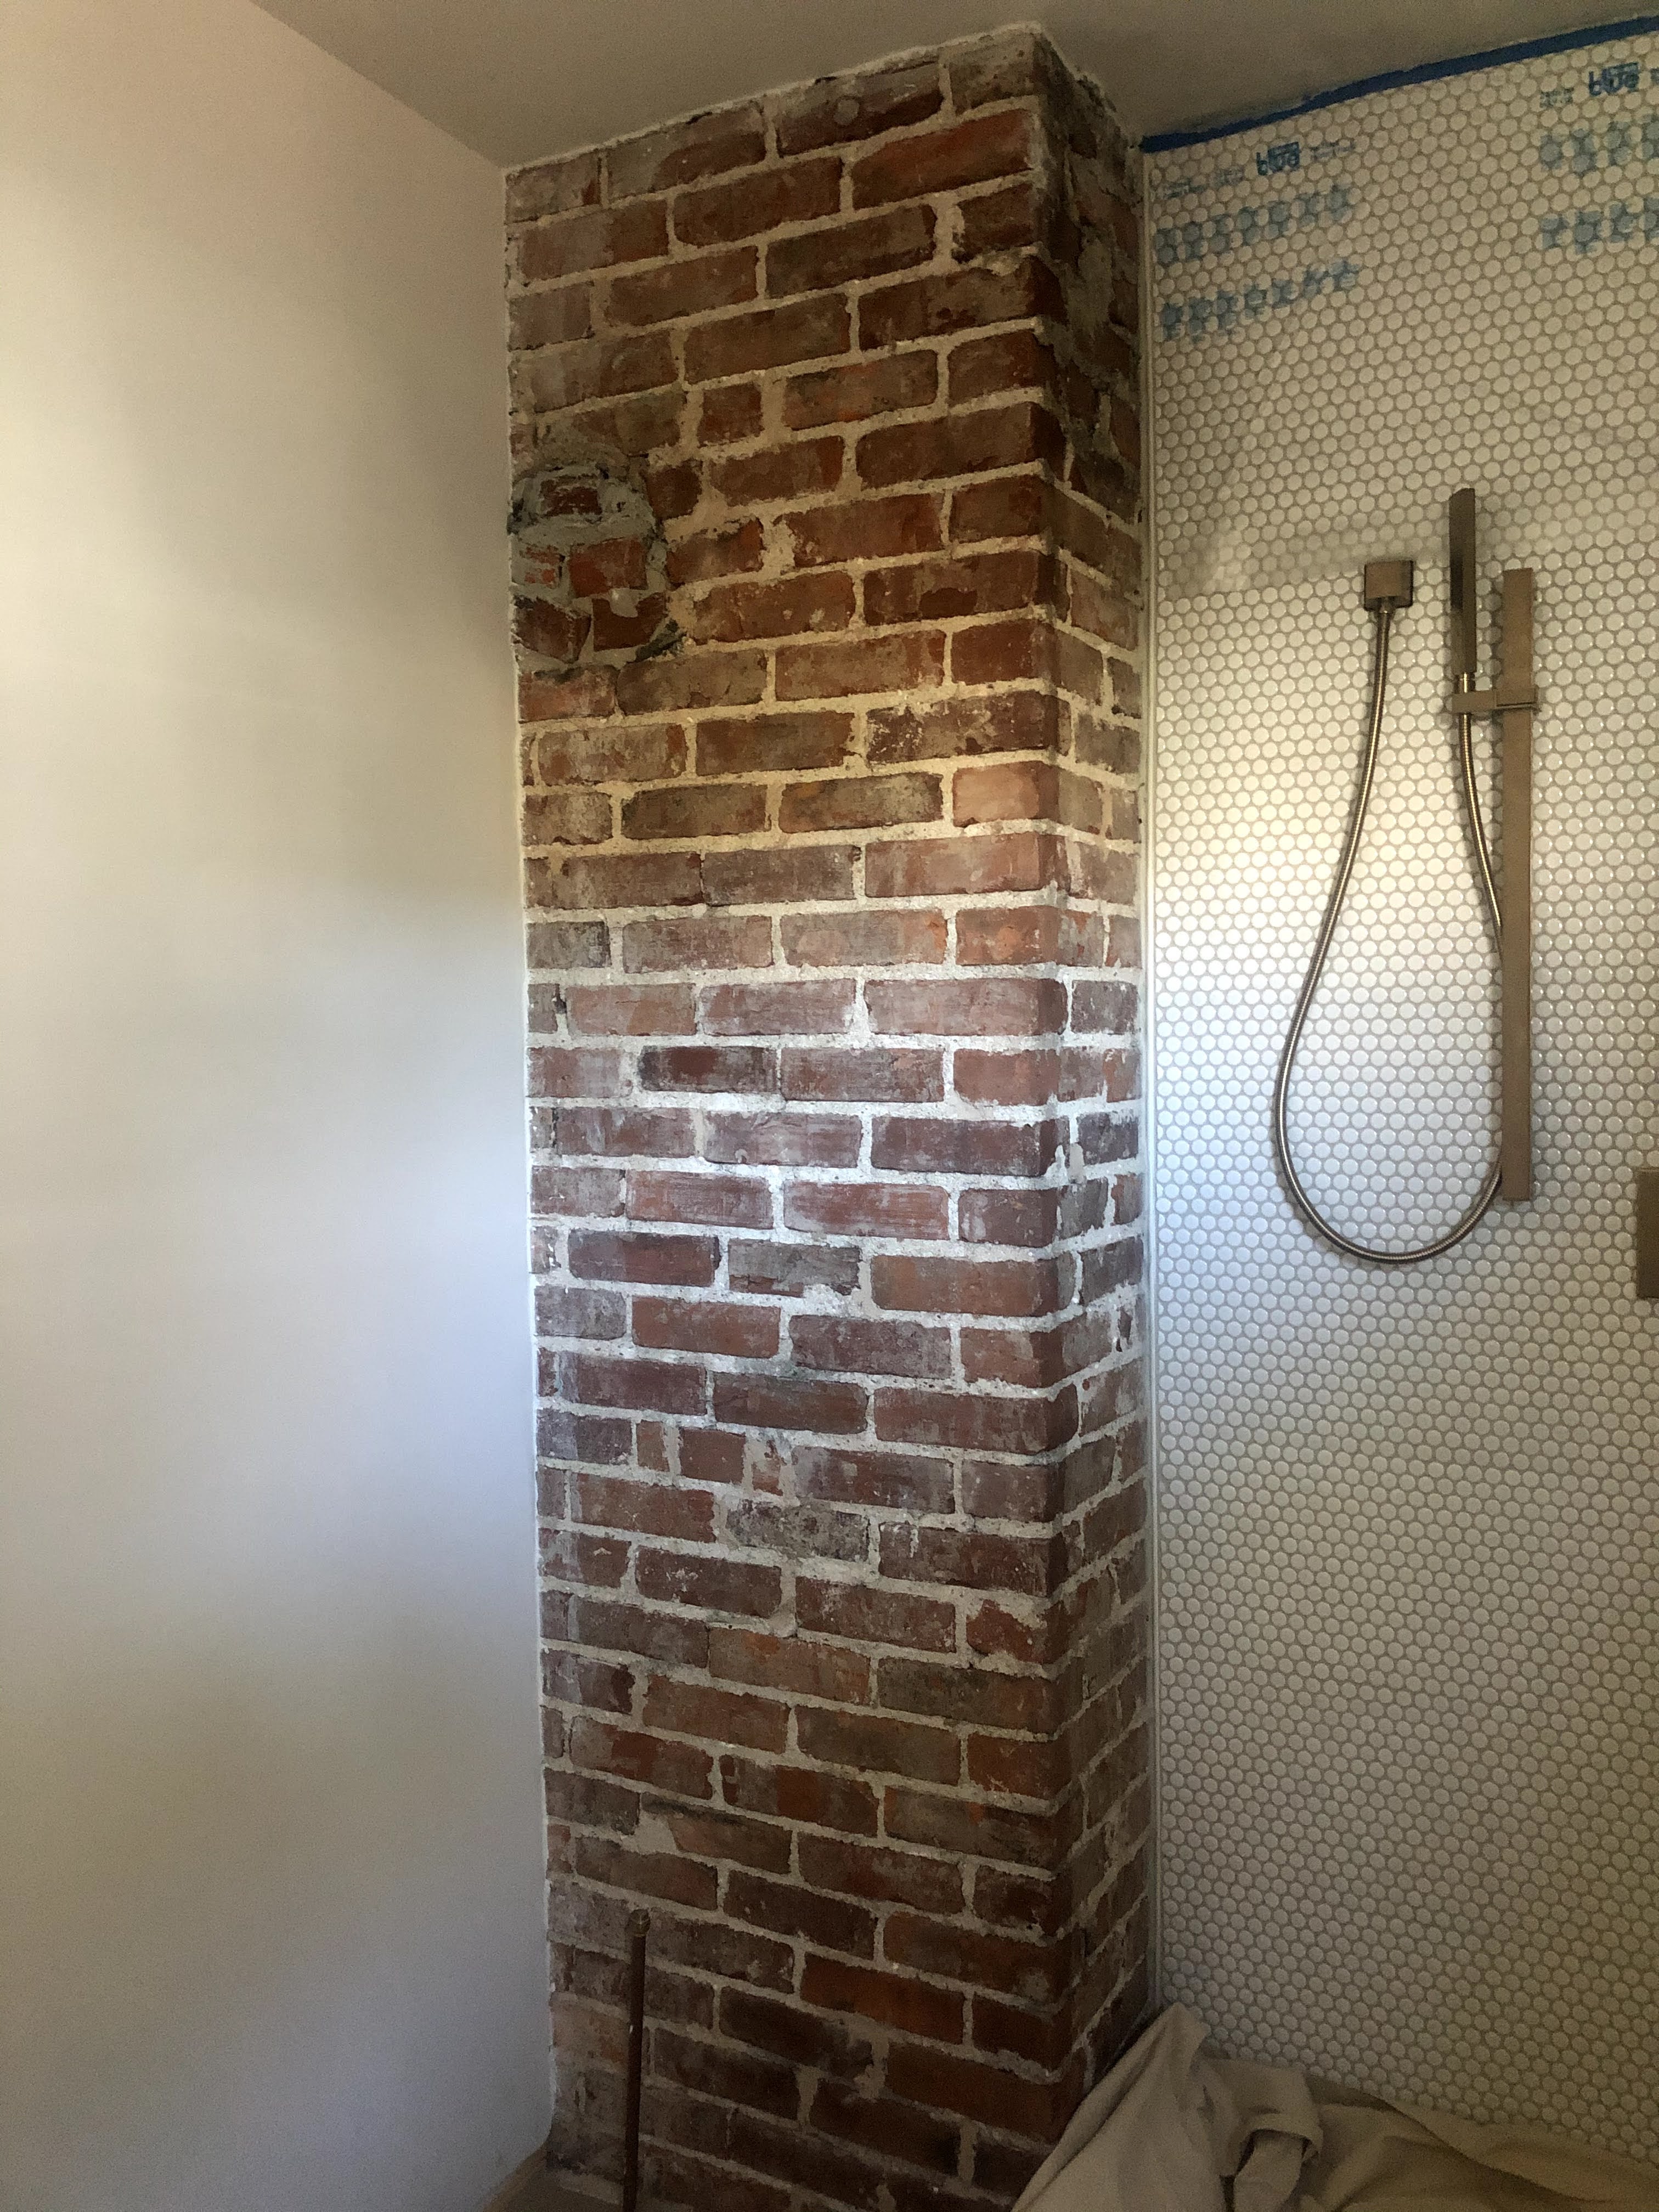
How will I protect the exposed brick from moisture? I know it is a bit controversial to have exposed brick in a historic home. Some people maintain that you shouldn’t expose chimneys because they would not have been exposed when the house was originally built. I get that argument and I think it can be the right call for some homes. My decision to leave this brick exposed has two reasons. First, it allowed us to fit a standard size 48” pre-fabricated shower pan into our design for the bathroom which saved us some money because we didn’t have to do a completely custom shower. Second, this room was not originally a bathroom. I think, in the original floor plan in 1924, it was probably the kitchen. The badly patched hole seems about right for where a wood burning oven would have been and there was a very shallow closet (with a matching one on the other side of the chimney) that seems like it could have held dishes at one point. By exposing the brick in here, we have a visual reminder that this house has been on a journey herself in her nearly 100 years of existence.
Now, how are we protecting it from moisture? First, this brick should not come into any direct contact with water because there will be a glass wall between the brick and the shower. Second, months ago I used a product called Lastiseal from Radonseal. Lastiseal is a penetrating sealer meaning that it gets absorbed by the brick. I chose the satin finish, but it also comes in flat. Lastiseal is a permanent waterproofer and should strengthen the brick as well. Prior to spraying this on, brick and mortar was flaking off constantly. Now, I can run my hand over the chimney and nothing falls off. I feel pretty confident that this has done what we needed it to and the brick is safe. But, only time will tell!
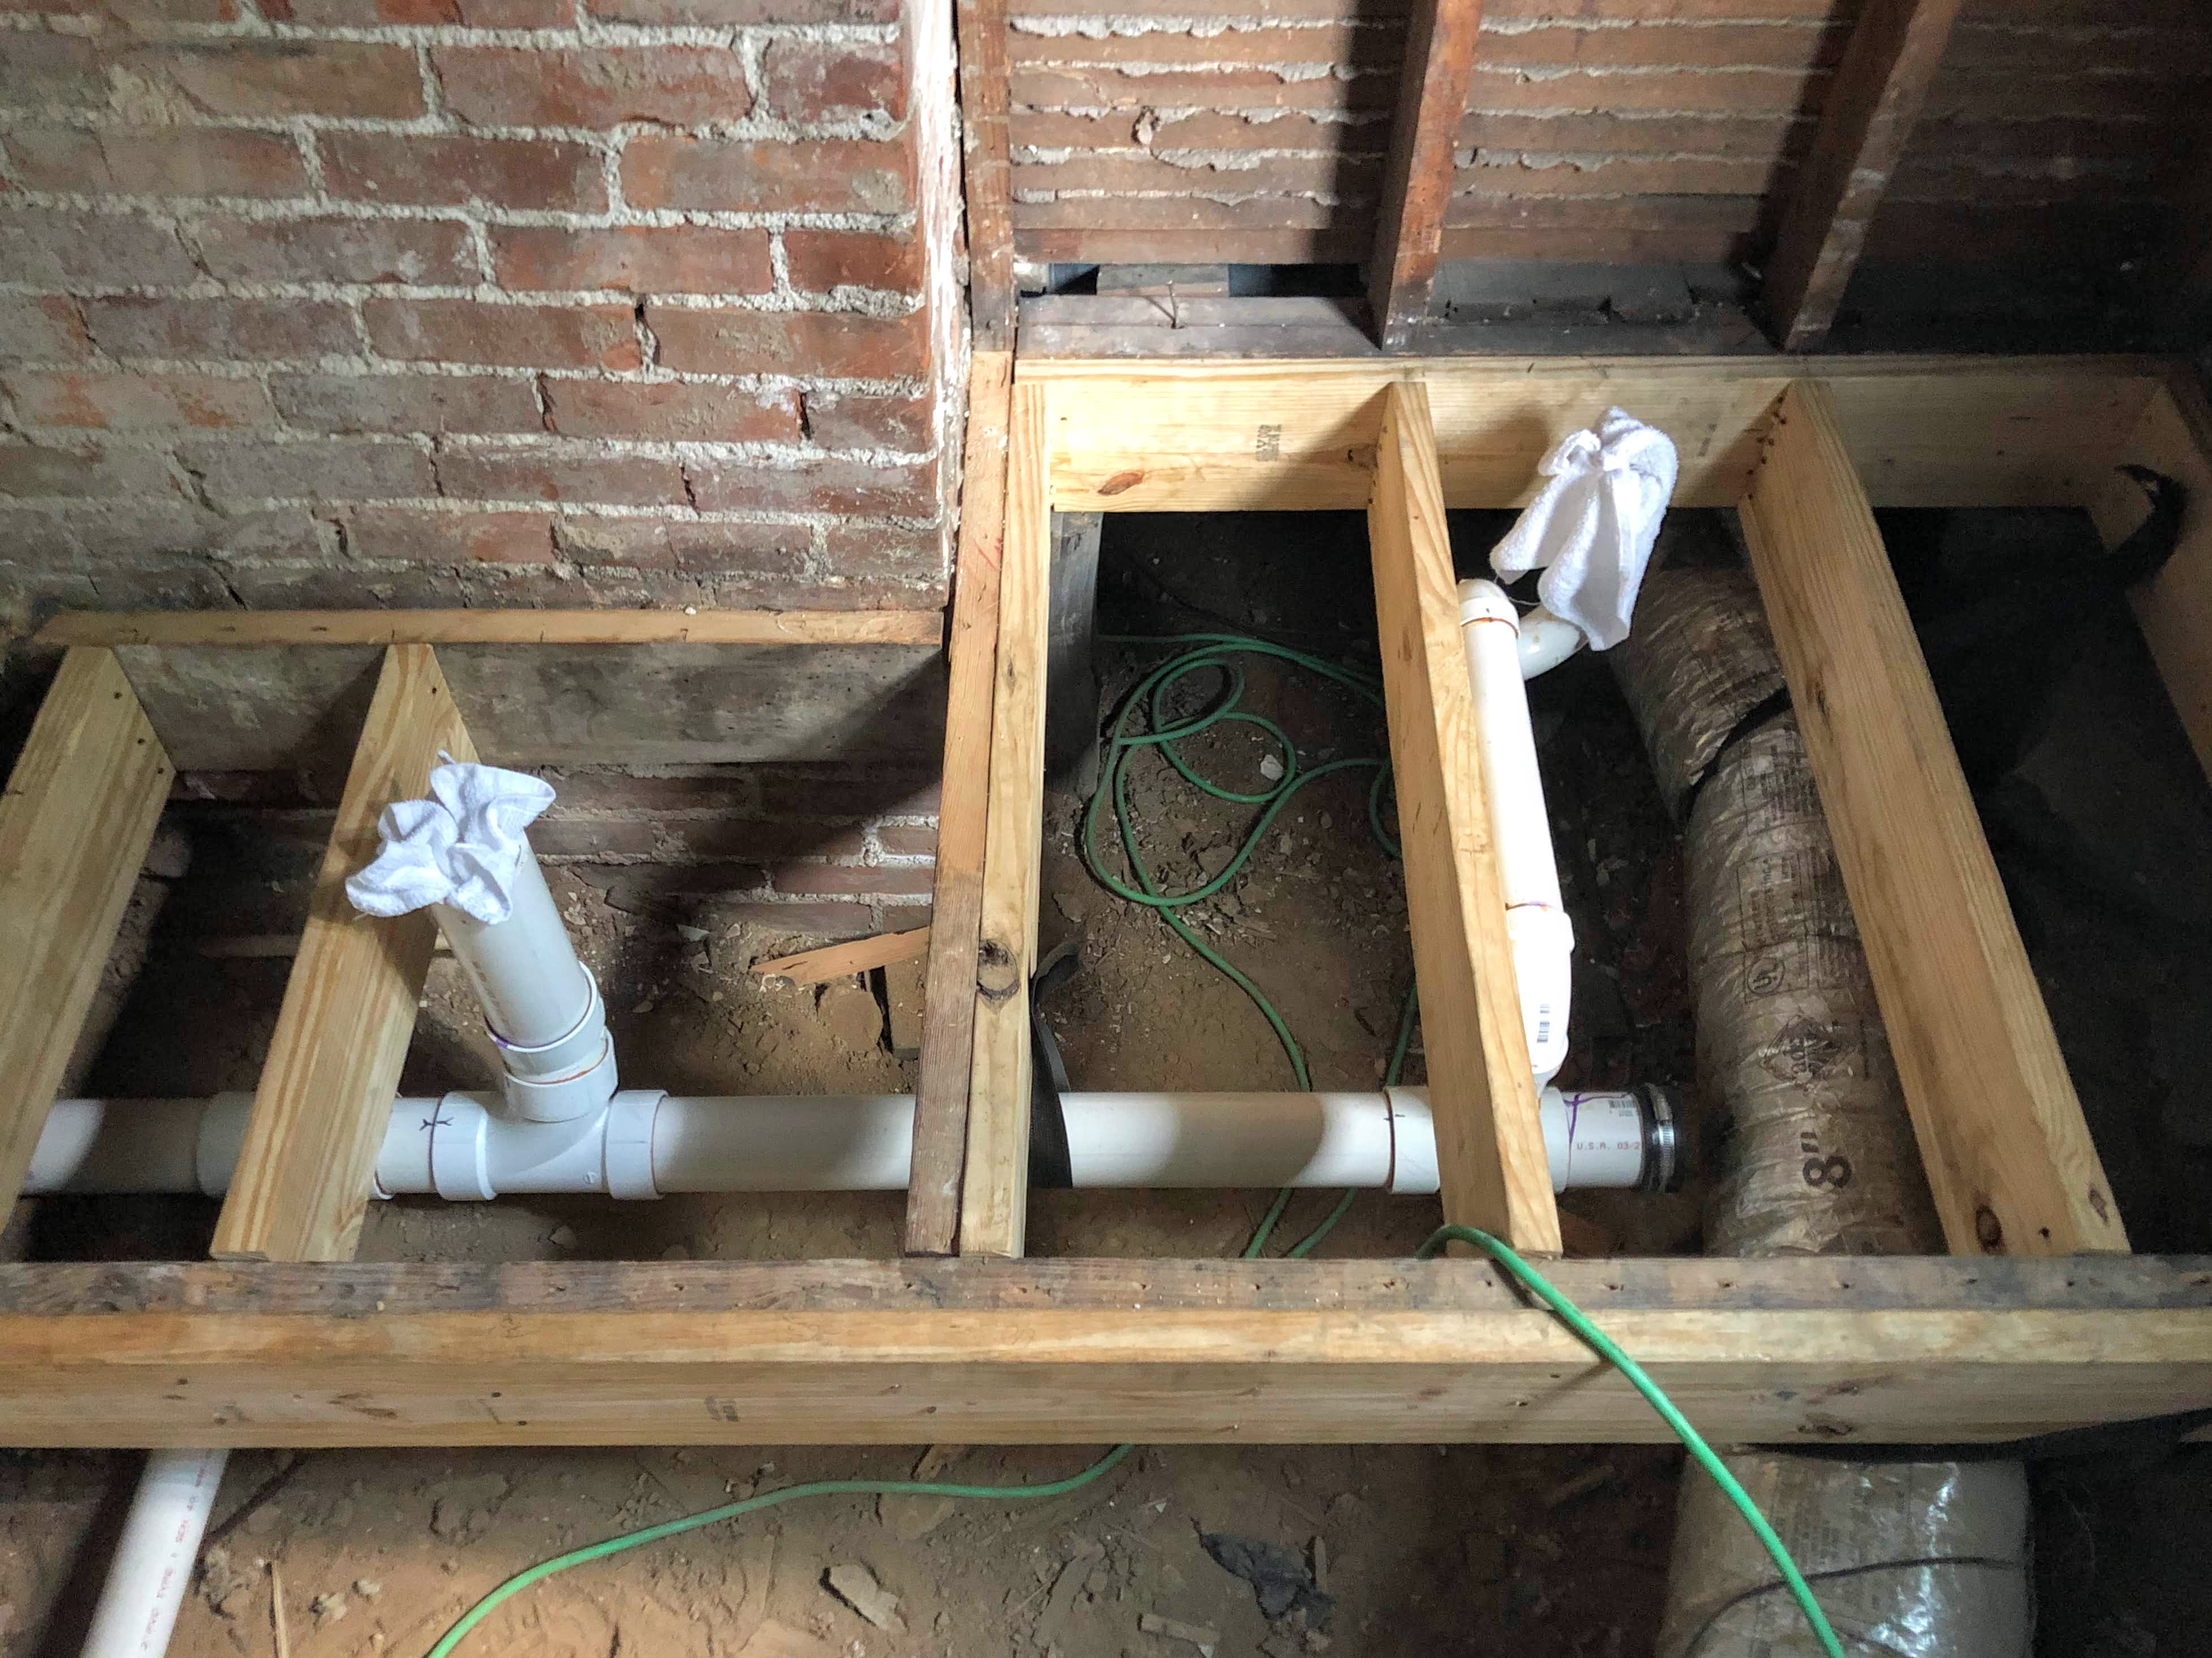
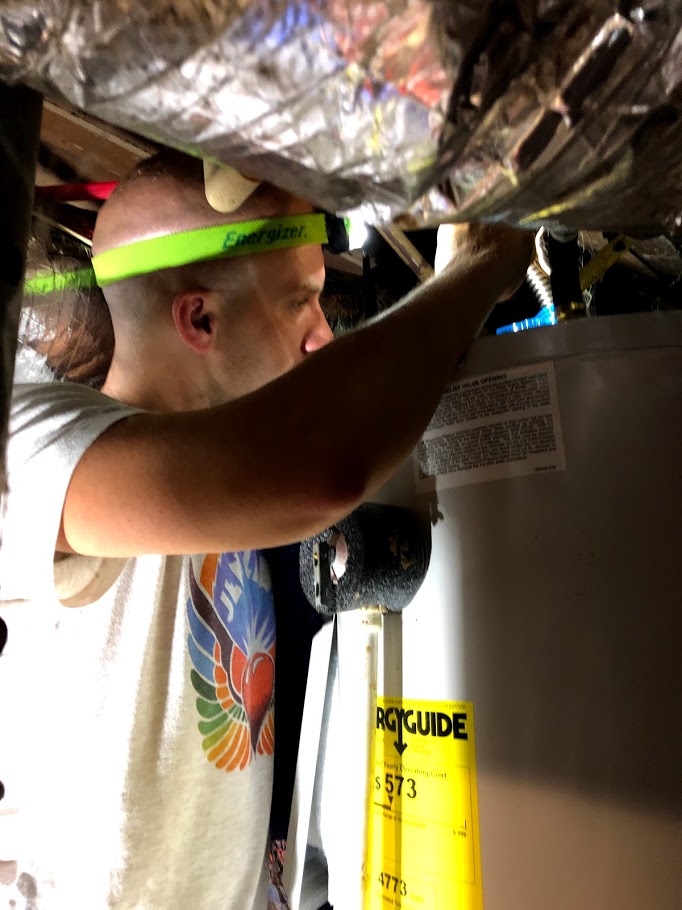
How difficult was it to move the plumbing for the new vanity? We didn’t end up using any of the existing plumbing (water or drain lines) in here – it was all poorly done and in pretty bad shape. Once we had to pull up the sub-floor, it really wasn’t a big deal to run all new plumbing too. We decided to install a manifold system and run new water lines with pex which we will eventually expand to include the whole house as well as new drain-lines. I was very intimidated by plumbing when we started this journey and we got some help from Mito at DIY Assist. If you are in Nashville and need some help with a DIY project – I highly recommend you check him out. He was a huge help and gave us the knowledge we needed to continue on our own. He helped us through running our new drain lines for the room and talked us through the water line installation. Drain lines are fairly straightforward – you just need the water to run down-hill. Running pex is nice because you can do what is called a “home-run” meaning one hot and cold water line goes directly to each fixture. This makes for fewer connections and fewer chances for connections to fail. It’s always a good idea to check local codes before embarking on a DIY plumbing adventure. There is more detail about the shower plumbing specifically in another post here.
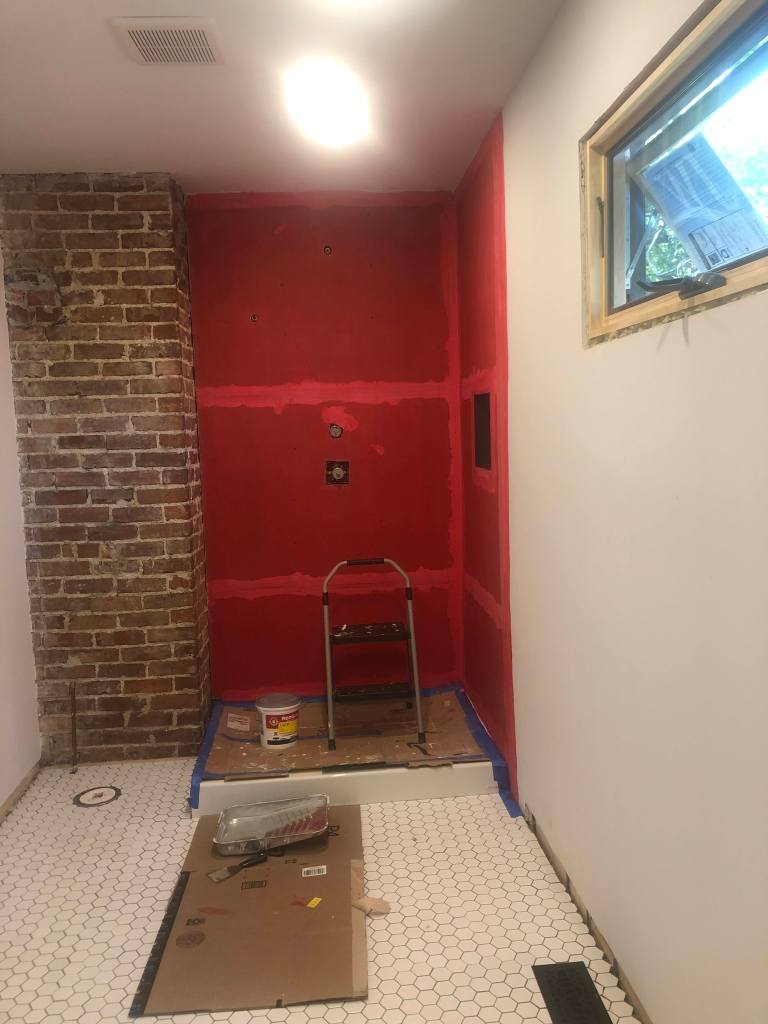
What did you use to make the shower pan/walls watertight? The short answer is we used Red Guard waterproofing membrane. Red Guard is pricey, but seems to be worth it from what I have read. The longer answer is that part of why I chose a prefabricated shower pan is so that I wouldn’t have to worry about waterproofing the shower floor. The pan we used is fiberglass and installed direct to the studs on top of the subfloor. The cement board on the walls of the shower sits on top of the pan and then that seam is taped off with fiberglass tape and thinset mortar. Red Guard goes on next. The tile and grout then covers that seam making it water-tight.
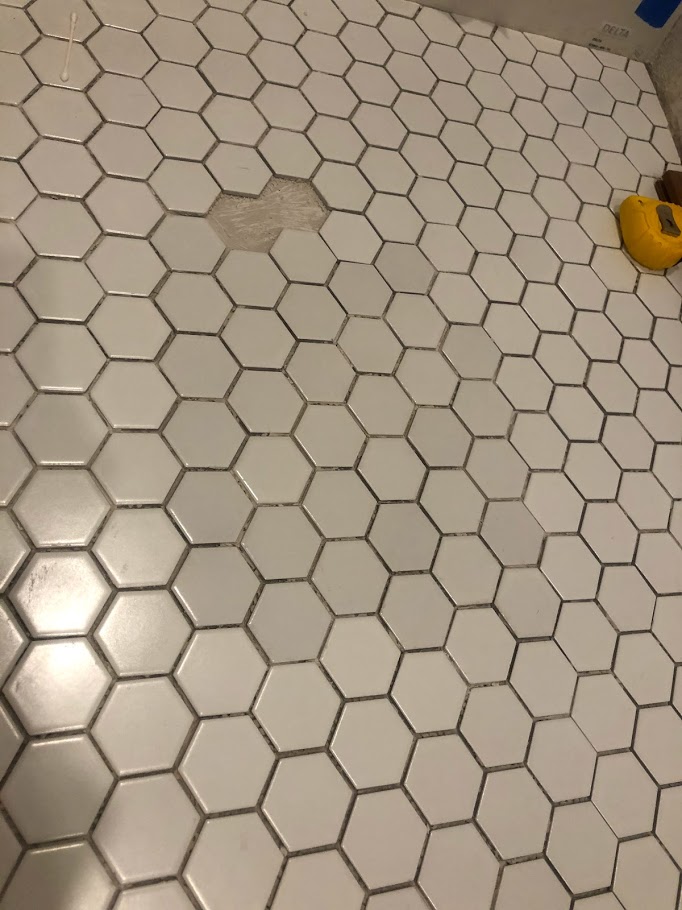
Why did you have to pick the mortar out from between the penny tiles? Wouldn’t the grout cover it? Here’s another one with a short and a long answer. Short answer is because I’m not very good at laying tile. The long answer is that I only had to do that in spots where I used too much mortar and it squished out between the tiles too much. Yes, grout will cover the mortar but you need clear edges around your tiles for the grout to adhere to. The grout is what makes the tile installation watertight, so you need to make sure that you have enough grout in each tile joint and that it is adhered around the tile.
How are you such a bad-ass? This question just proves the rule that no one has your back like an instagram friend you’ve never met. Shout out to Erica @lifeonlaurielane – when the pandemic is over I’m coming to Memphis to thrift with you! But, if the spirit of this question was how do I do the stuff I do? The answer is that I am 100% flying by the seat of my pants always. I am someone who learns best by doing, and this past year and a half has involved a lot of learning. I am not an expert. Mistakes have and will be made.
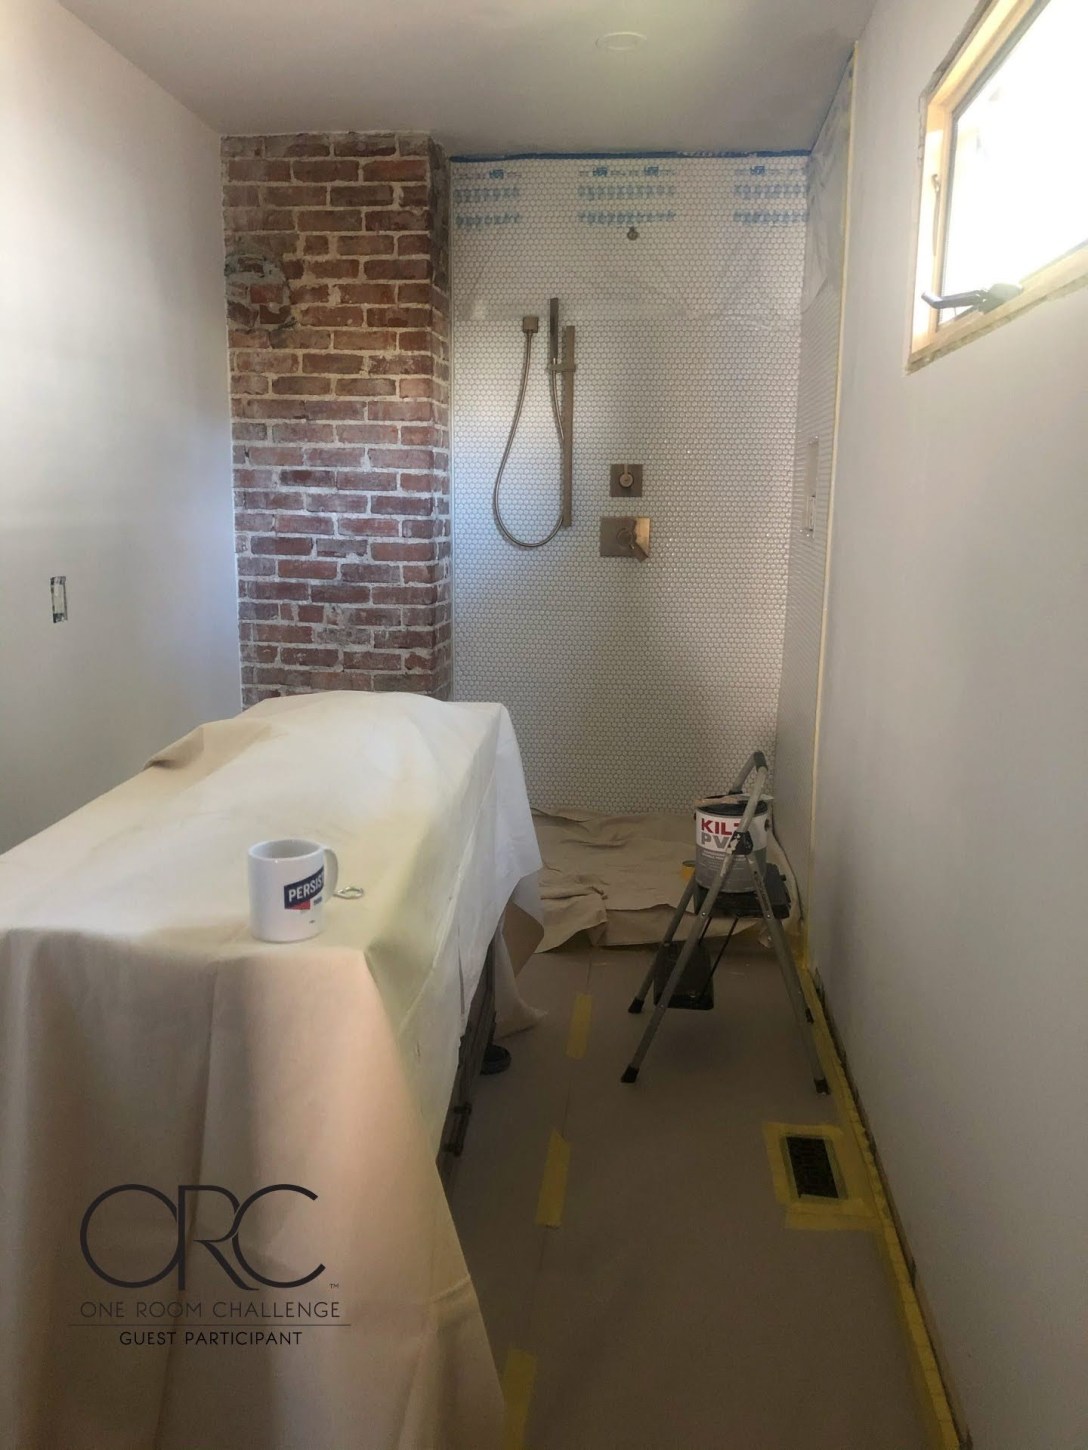
The One Room Challenge ends on November 29th. So I have a few more weeks until the final reveal is due. I think we will get quite close to having a completely finished room by then. Today, I have started to paint which feels like a huge step to making this space no longer feel like a construction zone. After I paint, I will finish plumbing the vanity and then hopefully the toilet will be delivered and we will have a functioning bathroom! Before the shower is functional, we have to order and install the glass doors – and turn on the water and make sure all of the plumbing fixtures are installed correctly. I have a sinking feeling that the trim and door installation might not make the deadline… stay tuned!
As always, make sure you check out all of the participants of the One Room Challenge on instagram and on the One Room Challenge blog.
Make sure to keep up with the rest of the One Room Challenge Guest participants via their blogs and on Instagram. Find them here .
My biggest accomplishment this week is that the shower is fully grouted! The shower is not done, but this is a big milestone. What is still left until we have a working shower?
caulk – I’ll be using Mapei silicone caulk in a color matched shade to the grout
install the bar to hold the hand-shower
finish configuring fixtures and turn on the water from the manifold in the crawlspace
install the glass walls and door – I have to be honest, I’m very nervous about this.
I keep telling myself that I am almost finished, but it sometimes it really seems like the to-do list will never end.
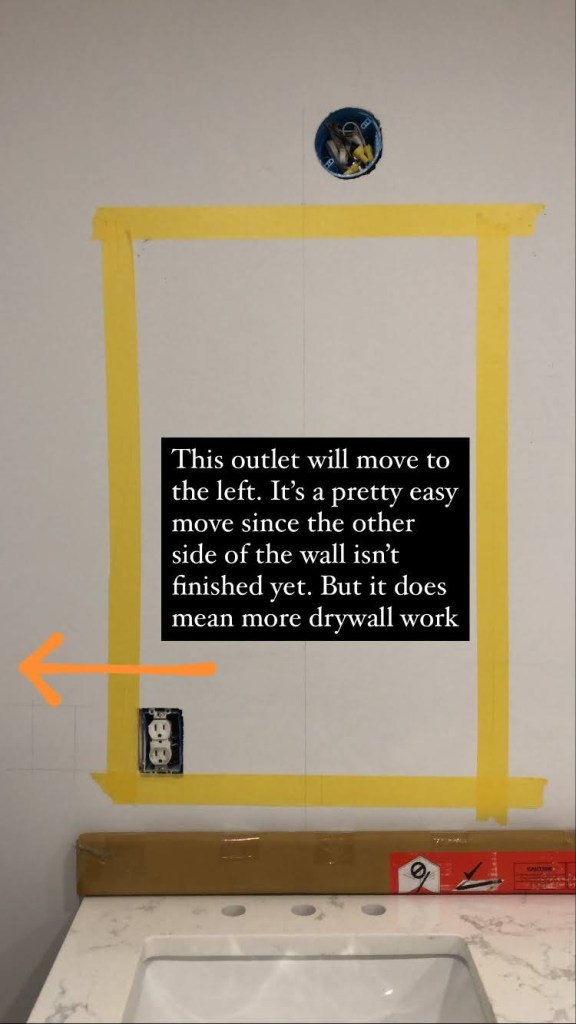
I thought I was just about ready to paint… but then I realized that the vanity light boxes were not in the correct place – so, that will have to be fixed which ultimately is not a huge deal, but is added time and a bit of a pain. The light boxes need to move up and out (the right one to the right and the left box to the left). I also need to move an outlet box so that it won’t be covered by the mirror.
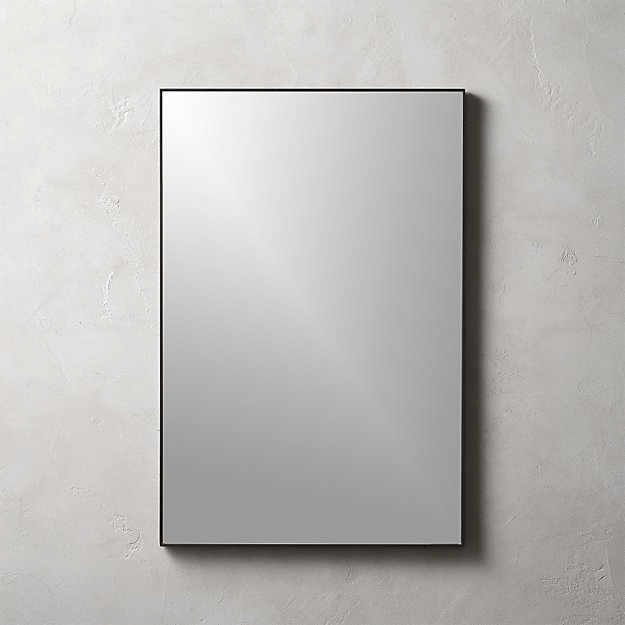
What mirrors do we have? Well, I’m so glad you asked! We found not one, but two CB2 gift cards from our wedding 5 years ago that we never used. So we used them last week to buy two of these mirrors:
Of course, this week, all mirrors at CB2 went on sale, because, of course.
Another exciting development is that we have finally decided on a toilet and ordered it. The toilet will be shipped to our local home depot and hopefully ready for us to pick up next week. We chose this one for a few reasons: it is standard height, has a round slow close seat and is skirted. Skirted means that the drain is concealed and I’m hoping this means it will be easier to clean. Standard height because comfort height is a travesty (this very well might be an unpopular opinion due to the lack of toilet options in standard height…) I also think that the low profile of this particular model will keep it kind of hidden behind the vanity and make sure that our exposed brick chimney stays visible.
This upcoming week I hope to be able to paint, but with the electrical changes and drywall work that entails, I’m not sure if I will actually get to it. I was planning on painting before we install the toilet so that I don’t have to paint in a tight space around it, but we’ll see.
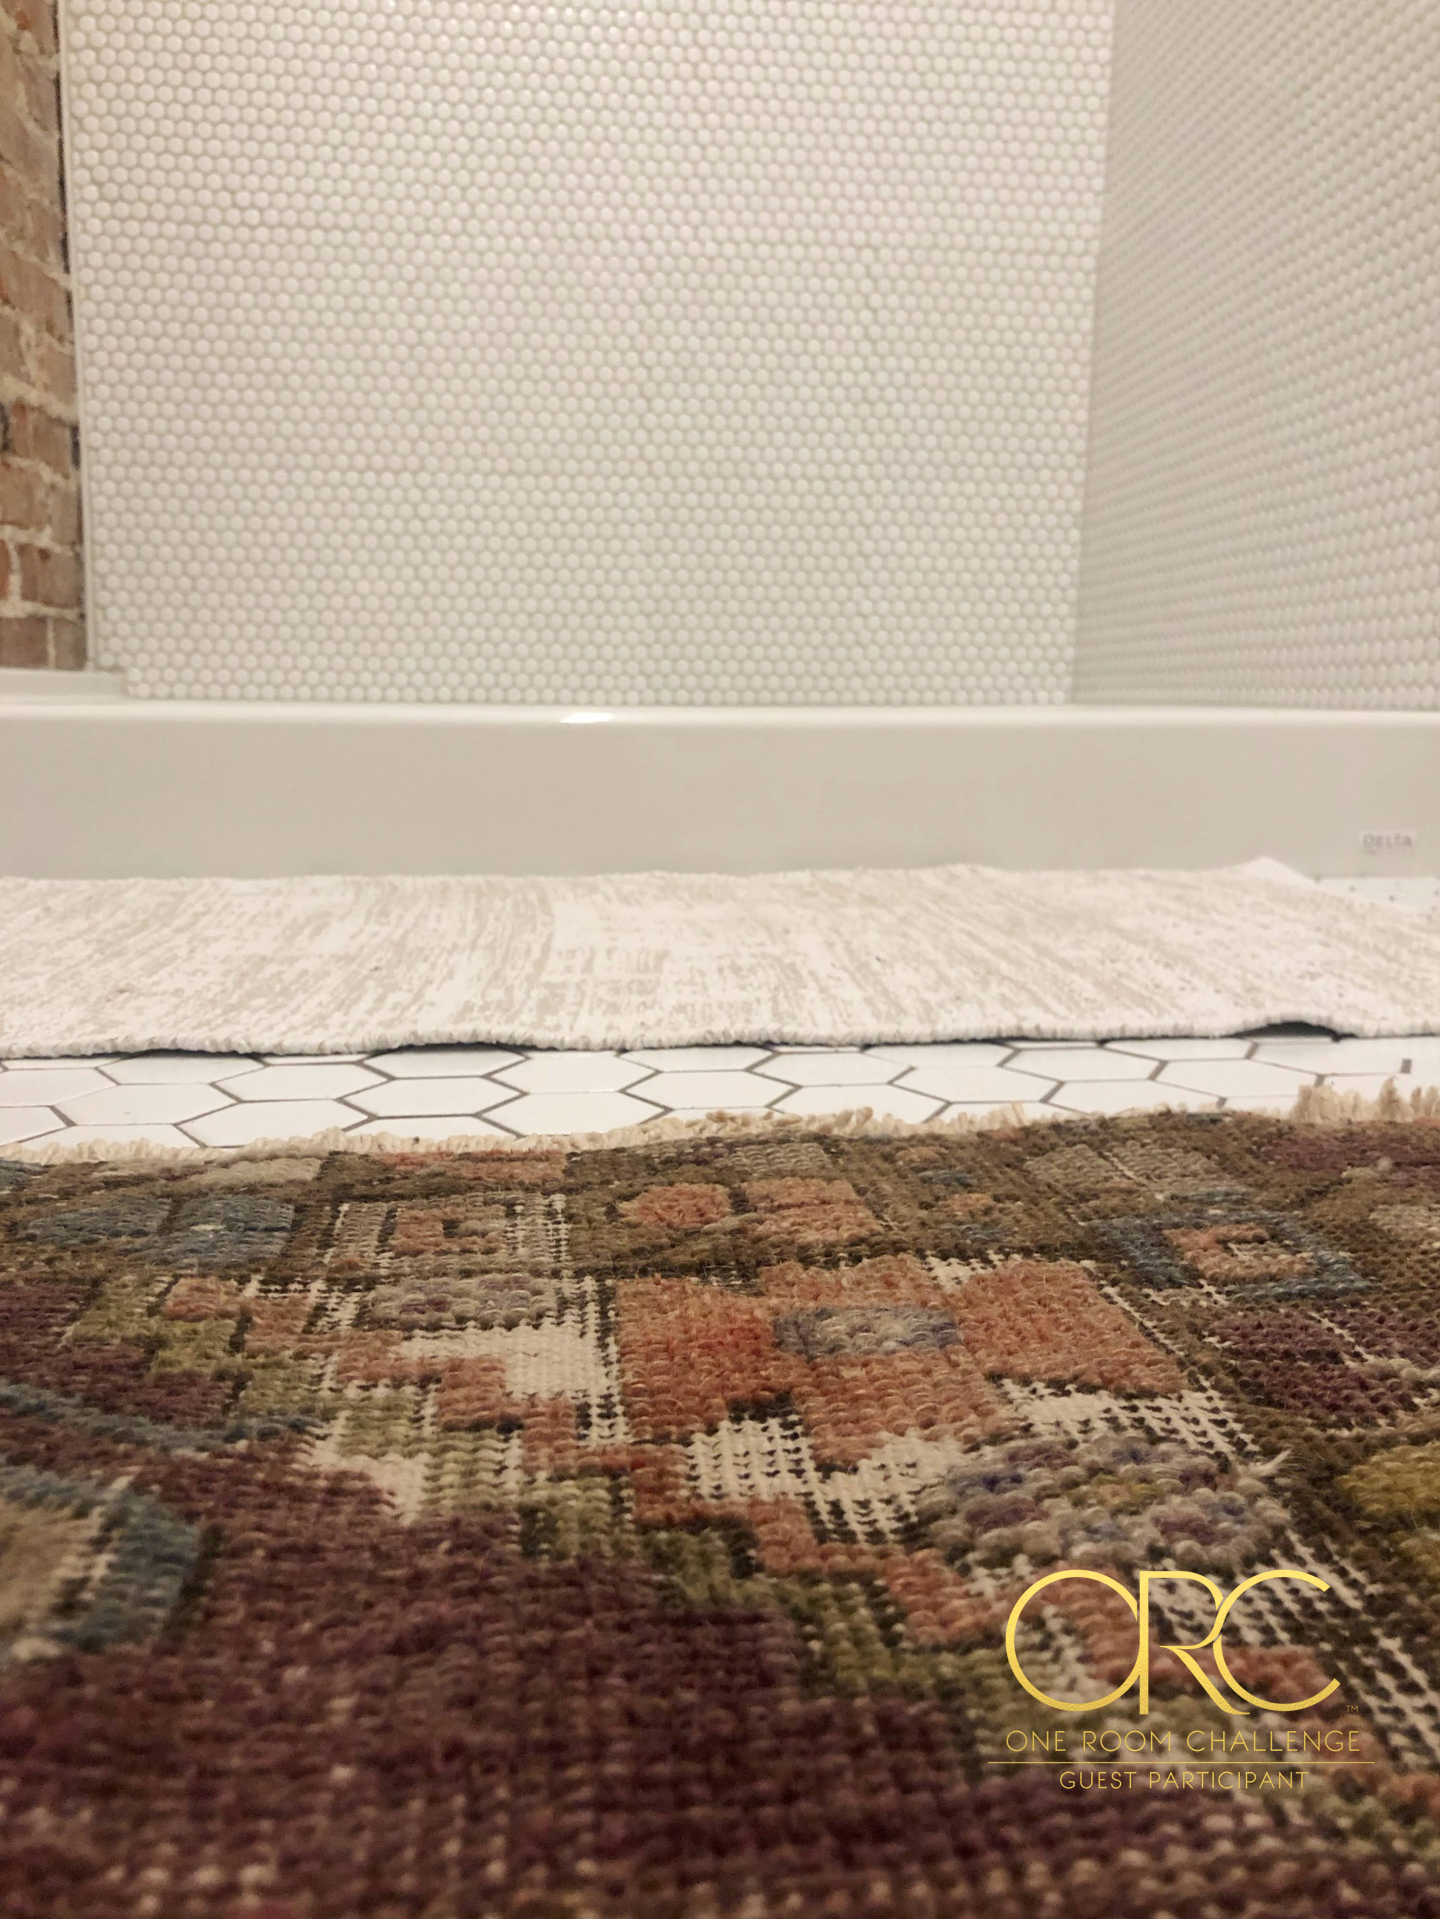
I ordered a shower mat and tried it out in combination with the other rug I’m planning to use. I think it works, but I’m not 100% sold just yet.
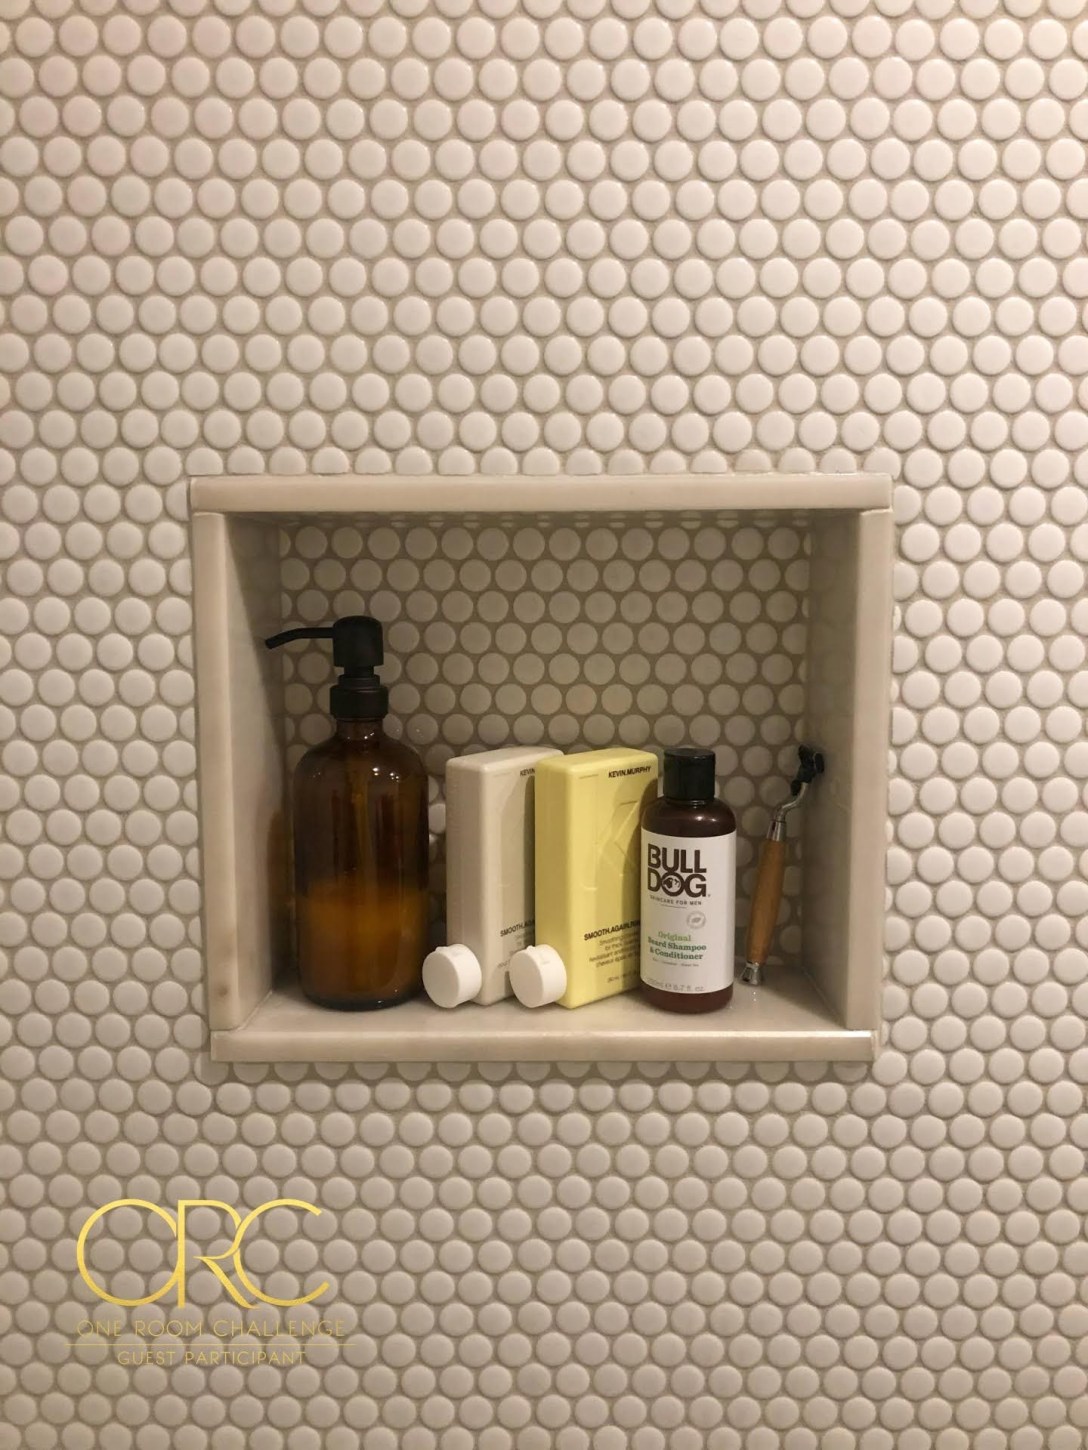
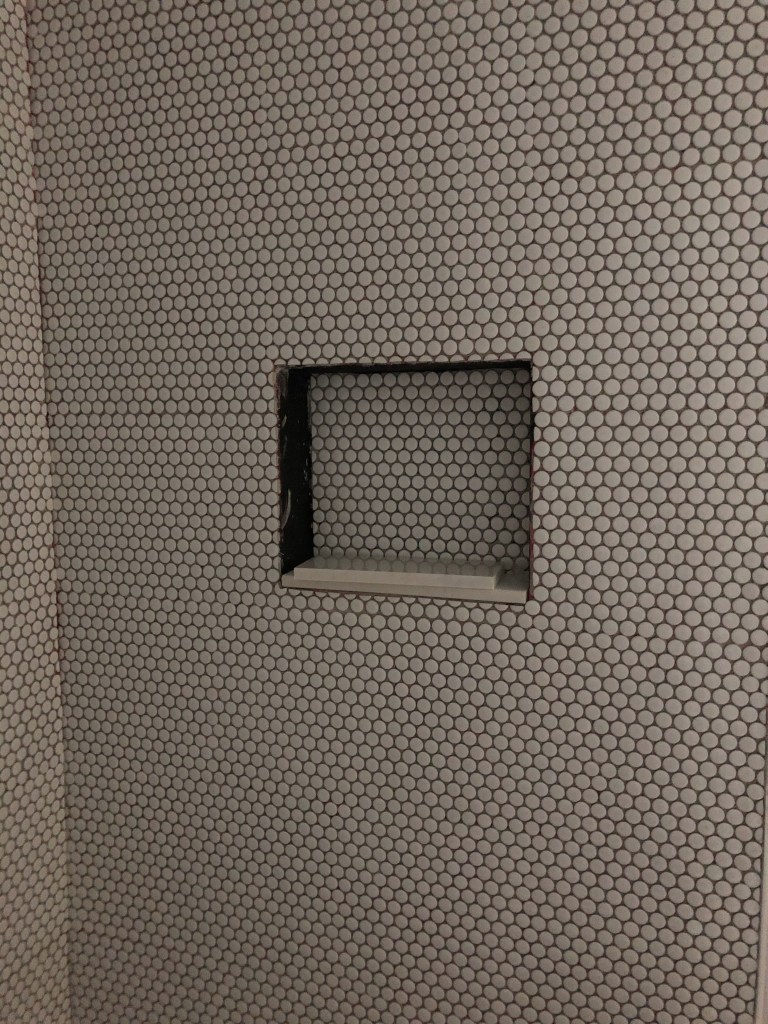
Just for fun, I put our toiletries on the niche just to get a glimpse into my future life and, it looks pretty darn good! Someday, very soon, I will get to enjoy this shower. And, until then, I will just keep repeating that statement to myself until it is true! Well, that and working my way through the never ending to-do list…
Keep following along in real time on Instagram @lifeinafixer:
Make sure to keep up with the rest of the One Room Challenge Guest participants via their blogs and on Instagram. Find them here .
On the one hand, I love learning new things, I think tile is beautiful, I am really excited about the tile choices I have made in this design.
On the other hand, tiling is difficult, I’m not very good at it yet, and the tile choices I have made result in an extra difficult task and lots of small errors and imperfections.
Tile going up represents the beginning of the end of this project. I am no longer just working on something structural that no one will see – we have entered the realm of design and I’m having feelings.
This week I have gone from being very zen about the imperfections in my tile job in the shower to having a complete meltdown and contemplating ripping the whole wall down and starting over (Iknow… it wasn’t my finest moment).
One of the hardest things about being a DIY renovator is the moment when the project you have been working on for months starts to come into contact with reality.
This bathroom and how it will look has lived solely inside my head for the last two years. I have not had to come to terms with how any of my design choices actually look in reality until now. And reality – isn’t perfect.
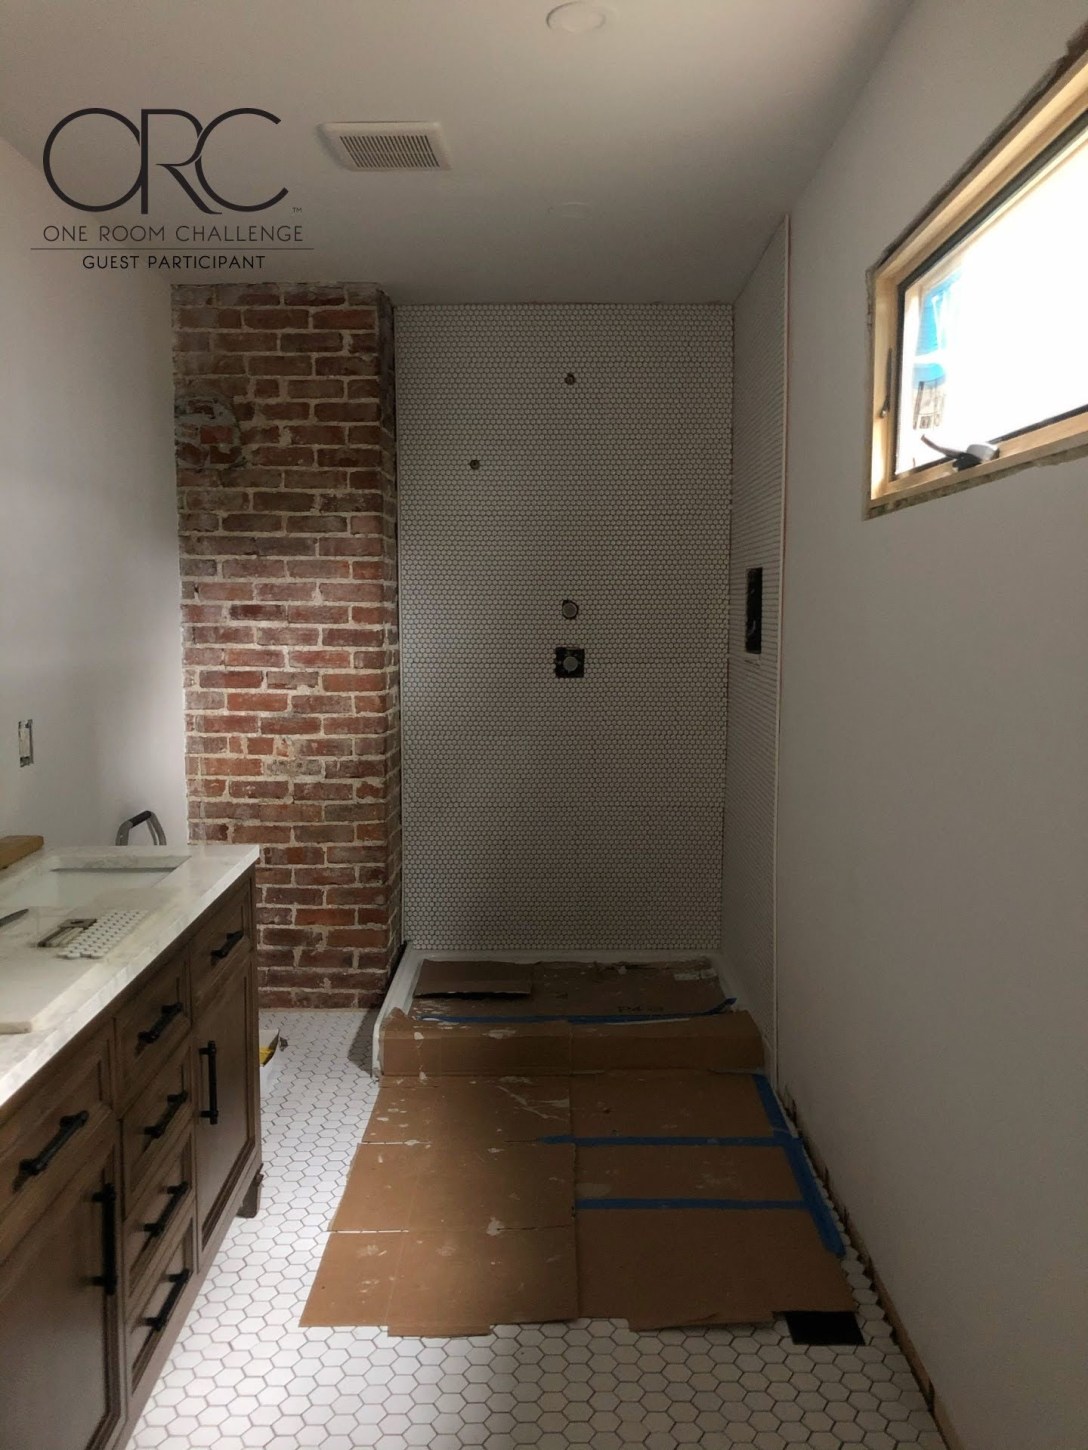
I found myself thinking, “Why did I ever think I could take this on in the first place?” The answer is “because we needed to renovate the bathroom.” I sometimes need to remind myself that this room has come so far. Here is a fun before/after shot of the same angle from one year ago this week vs. today:
Same view, one year apart: Slide the bar to go back in time! It’s like having your very own TARDIS
Perfect is the enemy of done
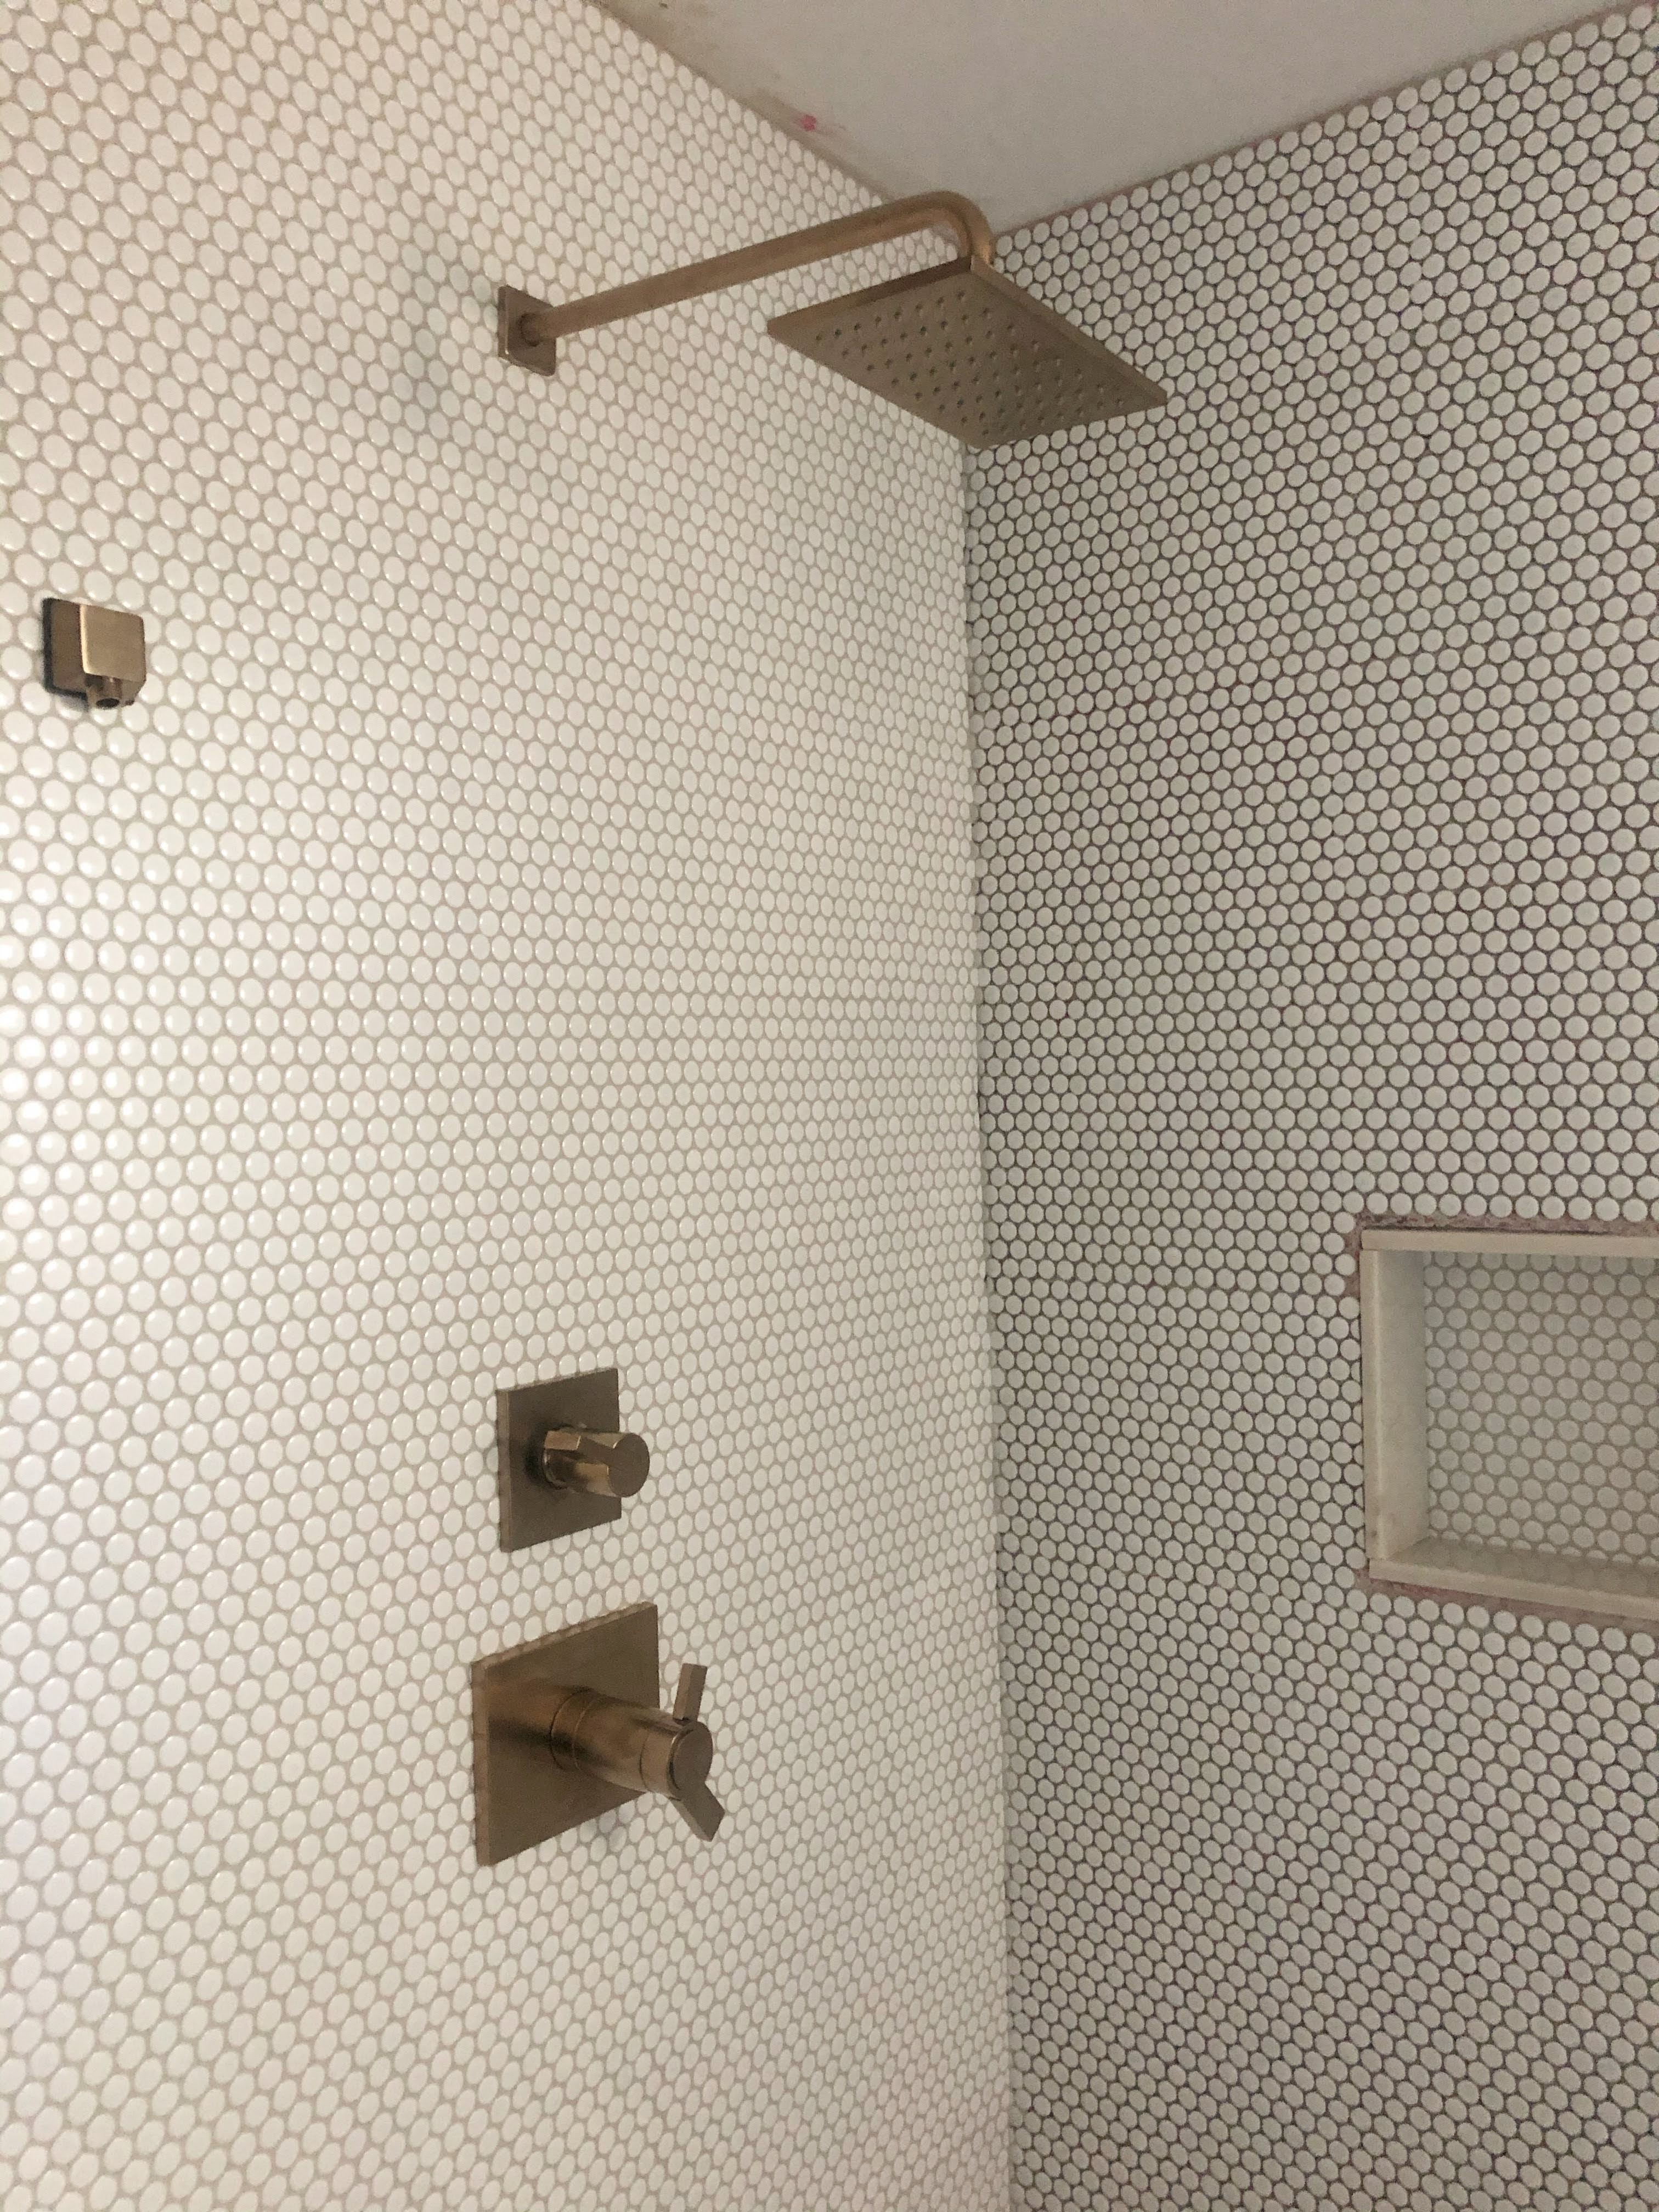
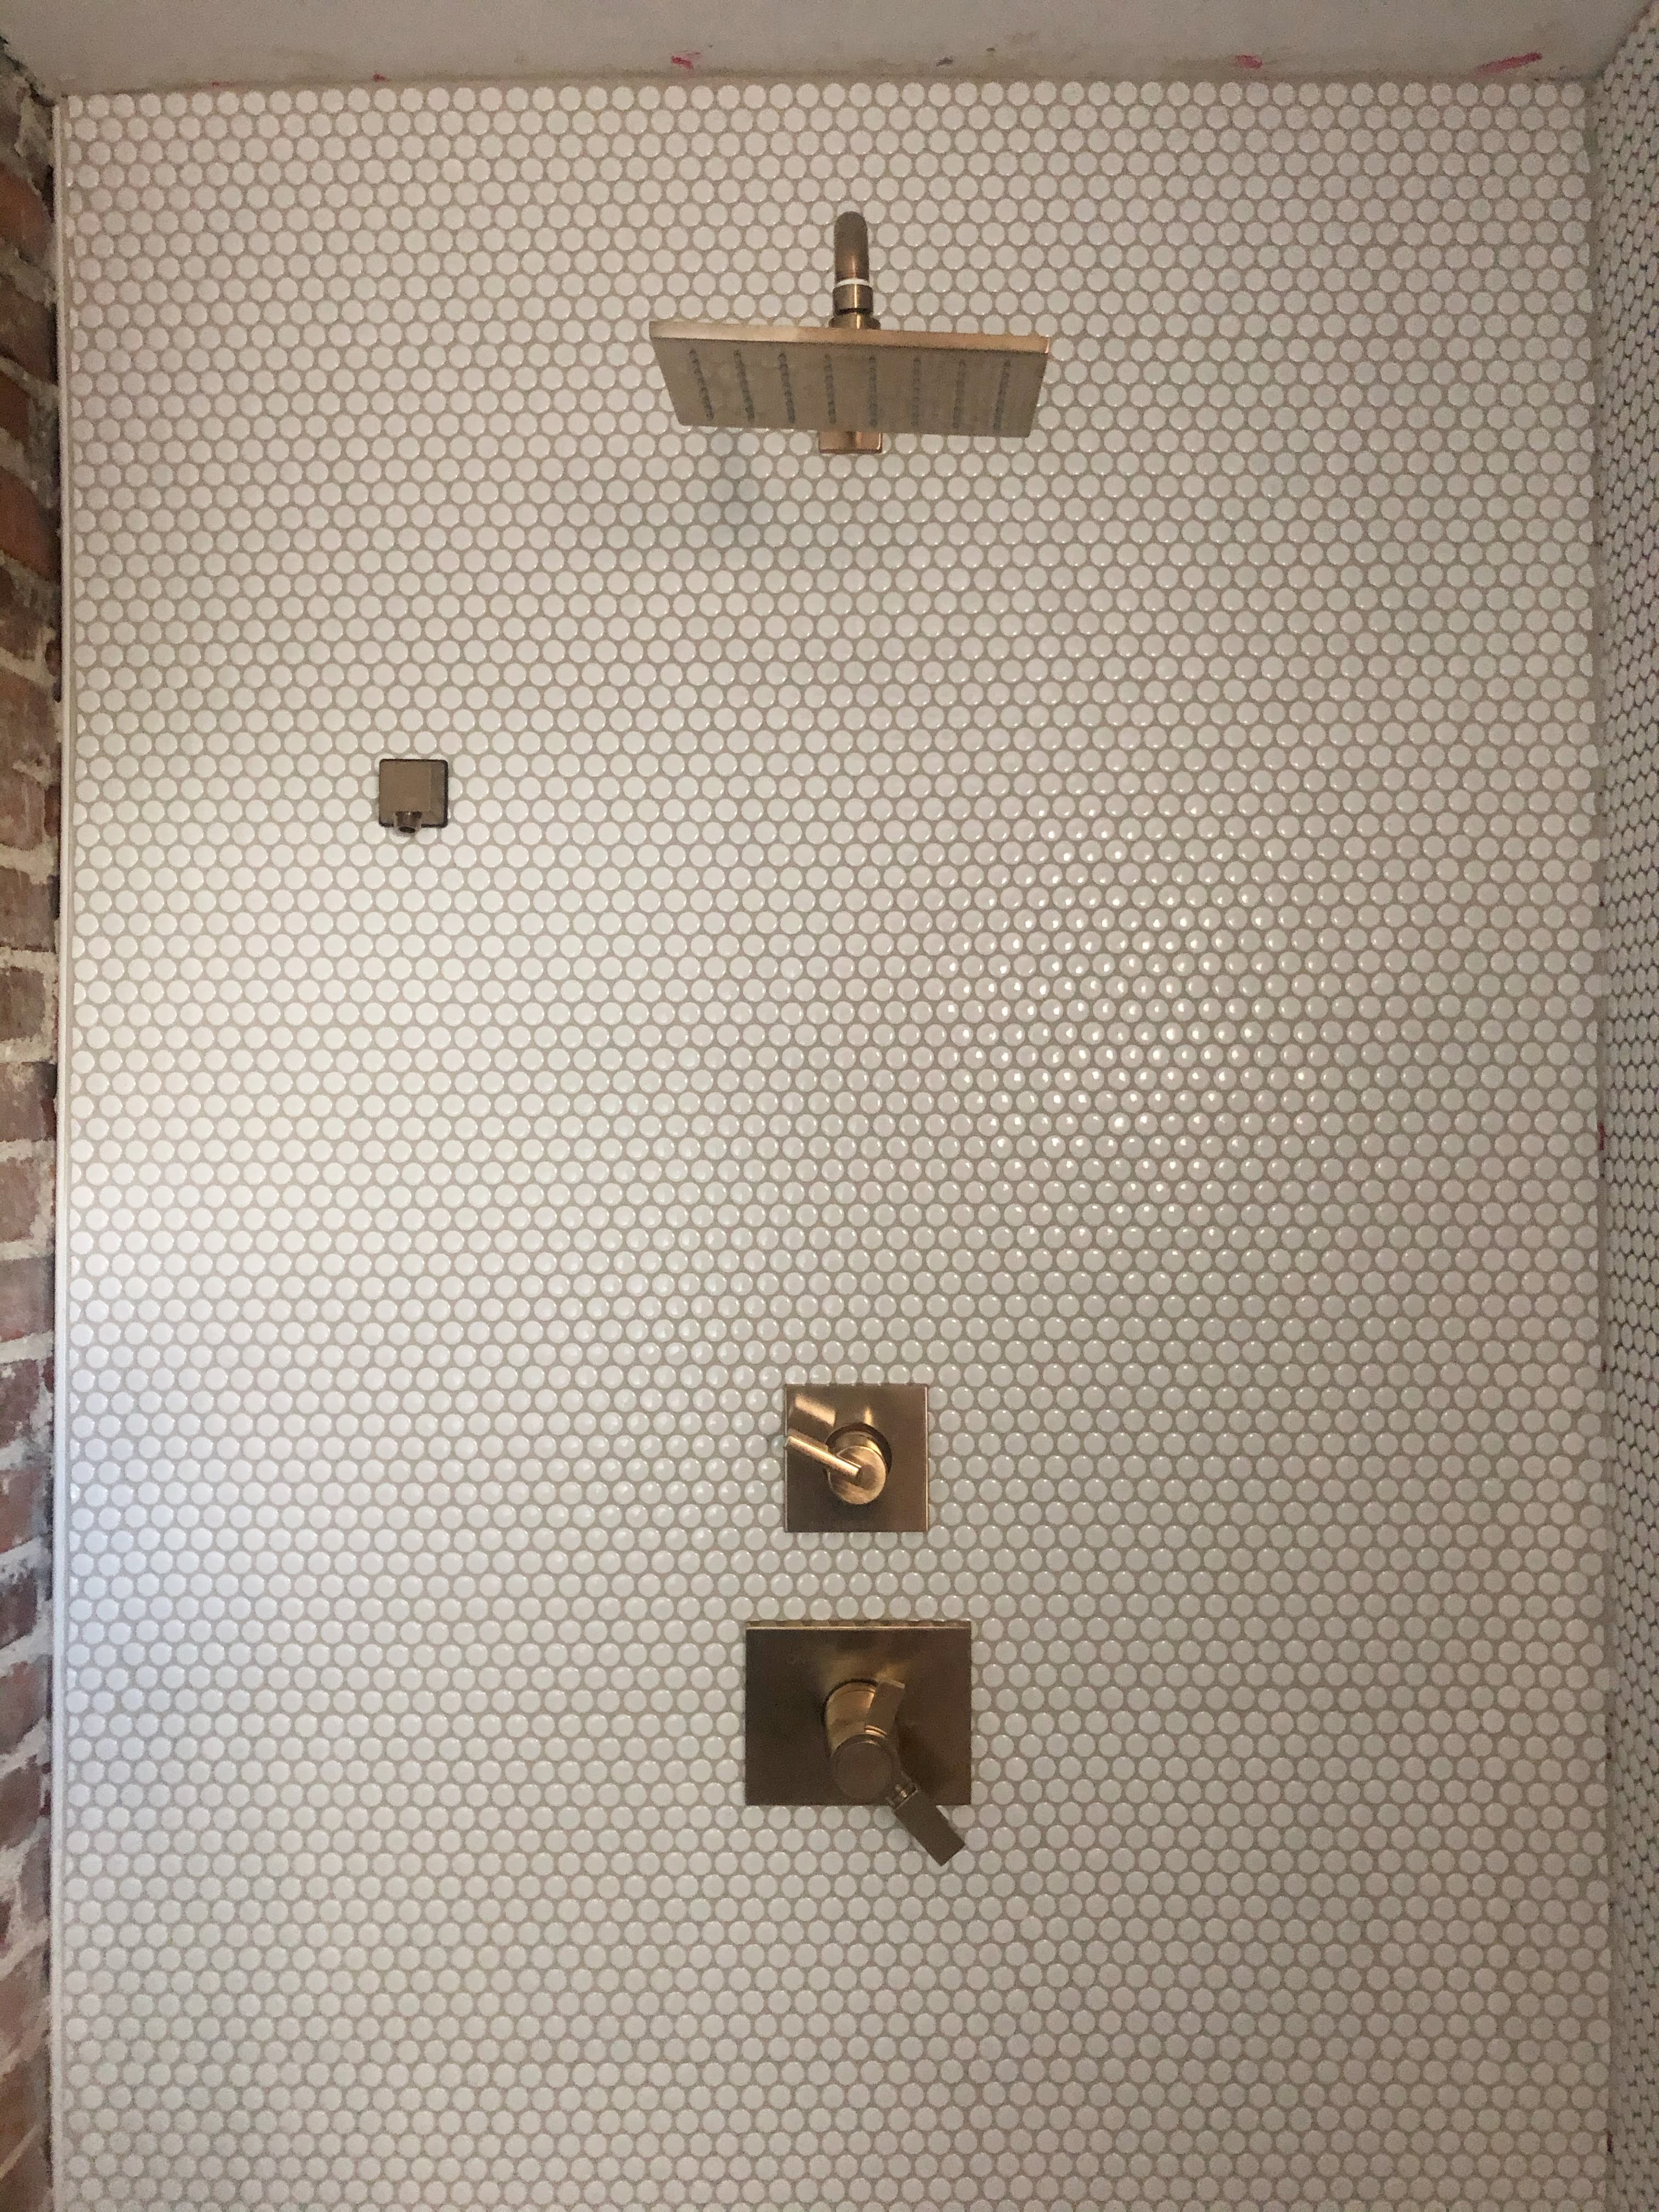
Some of my very wise friends on Instagram this week reminded me that “perfect is the enemy of done.” I need this bathroom to move toward being done. My family needs this bathroom to be done. My toddler is quickly outgrowing being bathed in the sink (to be honest, this ship has probably sailed long ago but we’re still making it work…). As I was agonizing over the imperfections in my penny tile job when I realized that since that wall of the shower now has grout – I can put up the shower fixtures. Which is definitely a step toward finishing this bathroom. I painstakingly sourced these fixtures at a massive discount from eBay over a several month period last year and they have been living in boxes in the barn ever since.
I did not put up the bar that will hold the hand shower either because I couldn’t find my masonry drill bits or I couldn’t find my nerve to drill into the tile – I’ll let you choose. I will still need to do some tweaking of them once we’re ready to turn the water on but I just needed to see it. And, let me tell you, it’s good.
So there it is. The shower is coming together. My anxieties are somewhat calmed. I’m feeling proud of my work again and its on to the next item on my list. Here’s what I have to do to get the shower all the way finished:
Cut new tiles and lay them around the niche
Grout the other wall of the shower
Fix a few spots of grout on the back wall
Install the bar to hold the hand shower
Check the installation of the fixtures for leaks and calibrate the diverters and temperature controls
Caulk
Acquire and install the shower wall/doors
Be sure to check out all the other participants of the One Room Challenge here and on Instagram by following #oneroomchallenge. Give them some extra support during this difficult time of birthing a design into the real world.
Keep up with my progress and emotional meltdowns in real-time @lifeinafixer
Make sure to keep up with the rest of the One Room Challenge Guest participants via their blogs and on instagram. Find them here .
If you’ve stumbled here from the ORC, Hello! I’m Annie, and this is the story of my life in a fixer-upper. I live in a 1920’s Craftsman in Nashville with my husband, our son, two cats and two dogs. After living through a renovation as a teen, I once maintained I would never put my family through that when I became an adult… and the rest is history. Contractors in our area were too expensive, so we’re taking the long way around and doing it ourselves. We initially gutted this bathroom way back in April 2019. Catch up on last week’s post here.
This week, my goal was to, at minimum, start laying tile on the back wall of the shower. In a dramatic turn of events – I actually completed this! No small thanks to the in-laws for taking our toddler for a full 24 hours over the weekend.
Laying penny tile seems like it would be simple, right? In my head it seemed simpler than trying to do a pattern with larger tiles or even laying individual subway tiles. It’s a bunch of small tiles, but they’re in 11’x11′ sheets so how hard could it be? Reality? It’s really hard to get those sheets lined up in a way so as to not show the seams between sheets. I read about it. I watched some videos, I thought I knew what I was doing and it still felt like I was reinventing the wheel. My technique improved throughout this project, but I have immense respect for professional tilers because my finished project is far from perfect. Tiling really is an art.
I did learn some lessons from tiling the floor a few weeks ago. I learned that I need to have a bucket with clean water in it and a few rags to keep excess mortar off of my hands and thus off of the front of the tiles. I learned that I should go back once the mortar has hardened some but not all the way and make sure I clean up any excess mortar between the tiles so I’m not stuck chipping away at mortar for what seems like years before I can grout.
It’s far from perfect but its still okay. It is done. It is tile and it is on the wall. It is not flawless, but it is progress toward being able to use that shower someday. And, hopefully, grout will camouflage the imperfections well.
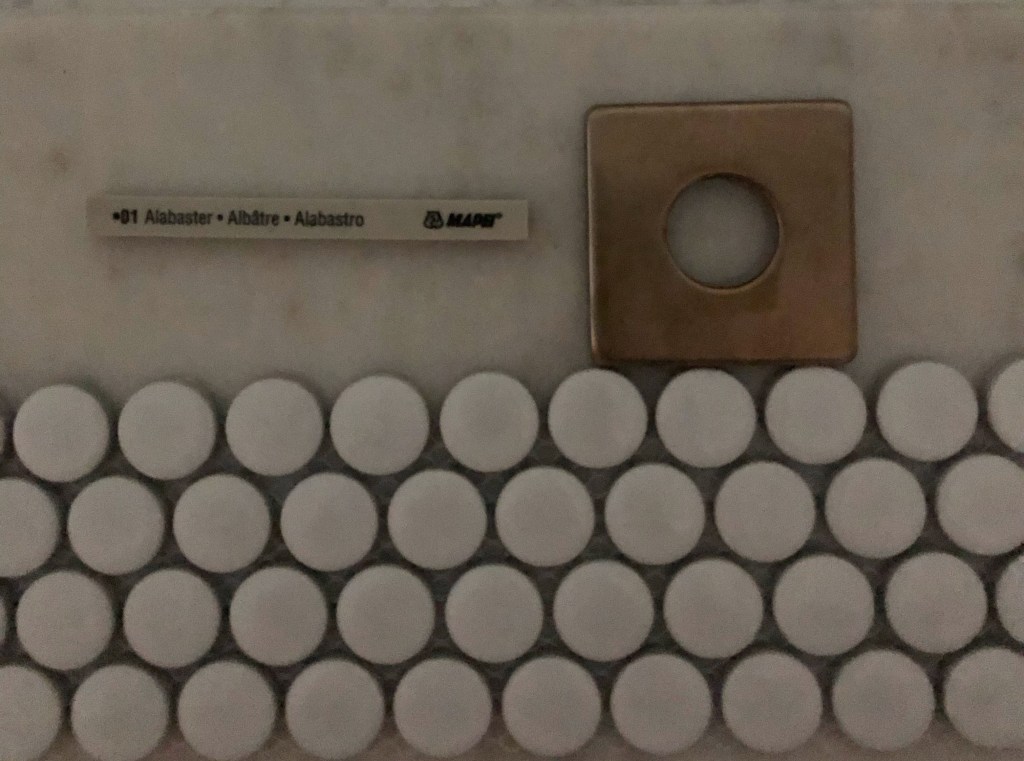
Speaking of grout, we made a decision on grout color and I picked it up from Floor and Decor on Wednesday! We went with Mapei Flexcolor CQ Premixed Grout in Alabaster. Is this much more expensive than powdered grout? Yes. However – for me, it makes the task of grouting so much less involved. Trying to fit in projects in between working and parenting means that if a task requires a lot of prep, I often can’t even think about starting it until I have a big block of time… which may or may not ever come. Premixed grout allows me to say “hey! Looks like I have an hour, lets do some grout!” I had a great experience using this product on our floors, so I’m hoping it will be the same for the shower walls.
Alabaster Mapei Grout sample next to champagne bronze shower fixture, white penny tiles and marble for the niche.
Before I’m ready to grout I still need to finish cutting and installing the marble for the niche surround and seal the marble. Hopefully I’ll be able to finish grouting by the end of the weekend.
Head over to Instagram for real time updates of my progress and, hopefully, a satisfying grout time-lapse video sometime in the next few days. While you’re there, don’t forget to check out the #oneroomchallenge posts and stories to keep up with everyone else participating!
Make sure to keep up with the rest of the One Room Challenge Guest participants via their blogs and on instagram. Find them here .
I have joined the Fall 2020 One Room Challenge as a guest participant, and the room I am working on is … the very same bathroom I worked on for the Spring 2020 One Room Challenge! Keep up with all of the other participants this round here: One Room Challenge Blog
If you’ve stumbled here from the ORC, Hello! I’m Annie, and this is the story of my life in a fixer-upper. I live in a 1920’s Craftsman in Nashville with my husband, our son, two cats and two dogs. After living through a renovation as a teen, I once maintained I would never put my family through that when I became an adult… and the rest is history. Contractors in our area were too expensive, so we’re taking the long way around and doing it ourselves. We initially gutted this bathroom way back in April 2019.
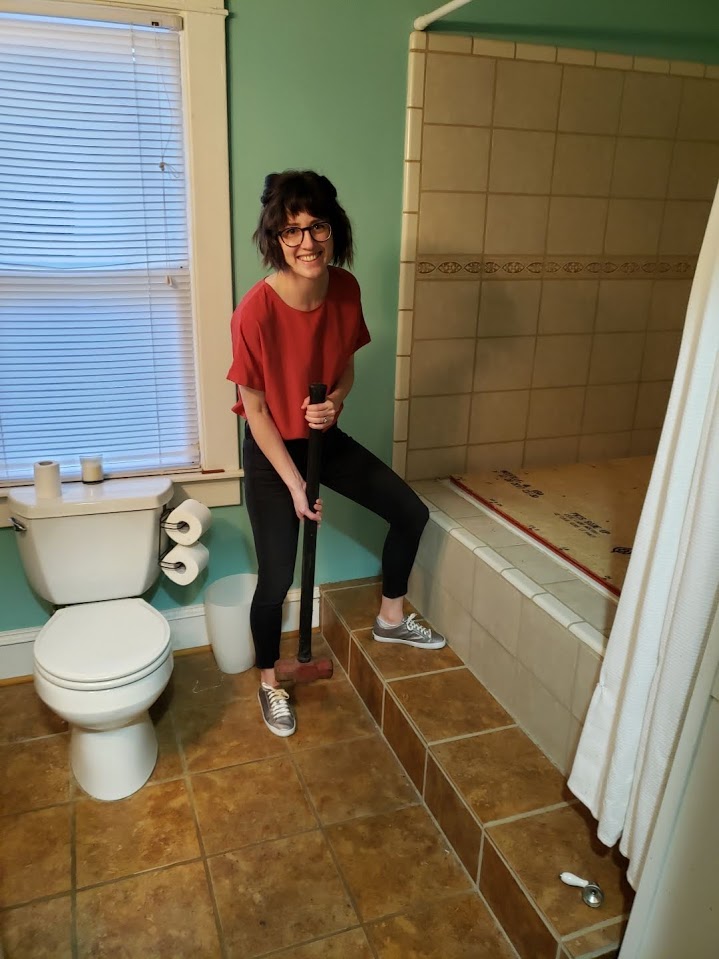
To put into proper perspective how long ago that is, when we first took a sledgehammer to our old bathroom, Joe Biden had not yet announced he was running for president in a campaign that feels like it’s been going on for approximately 10 years.
Completing a massive DIY Renovation while also working full time and parenting and losing access to childcare because of a pandemic takes a very long time. If you missed it, check out this post for the 22 steps that you too can take to gut renovate your bathroom in just 18 short months. I really enjoyed the community I found during the Spring ORC and the structure it gave me to make a ton of progress on our bathroom. Here is a little recap of where we came from and a rundown of what I hope to accomplish in the next 6 weeks.
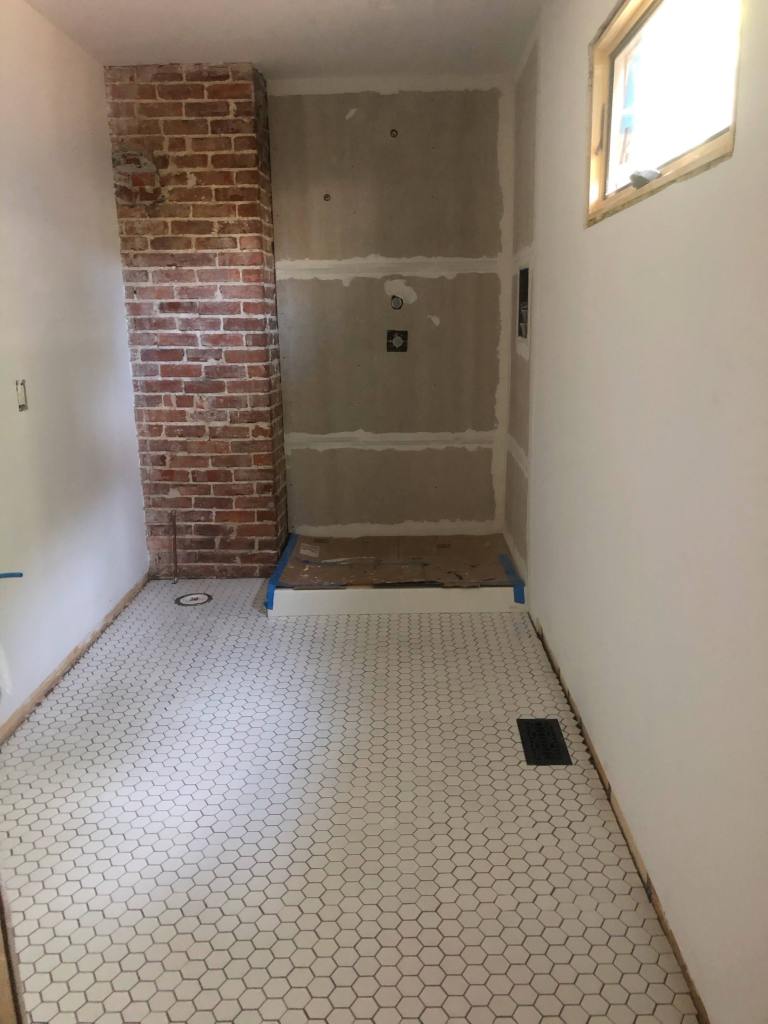
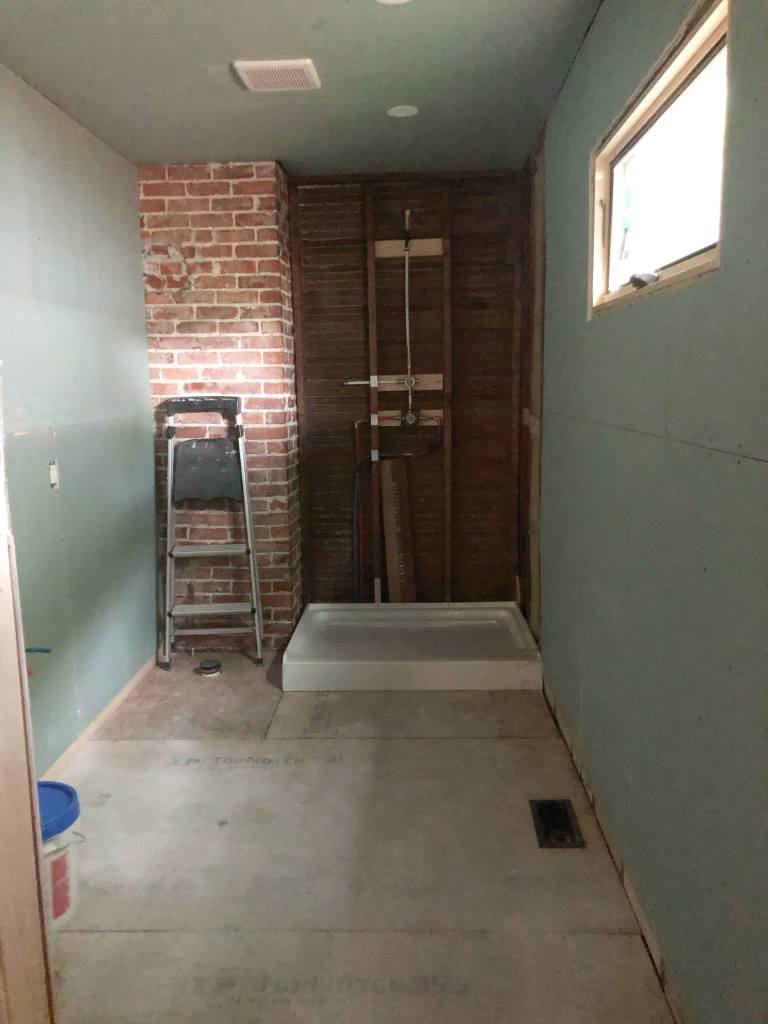
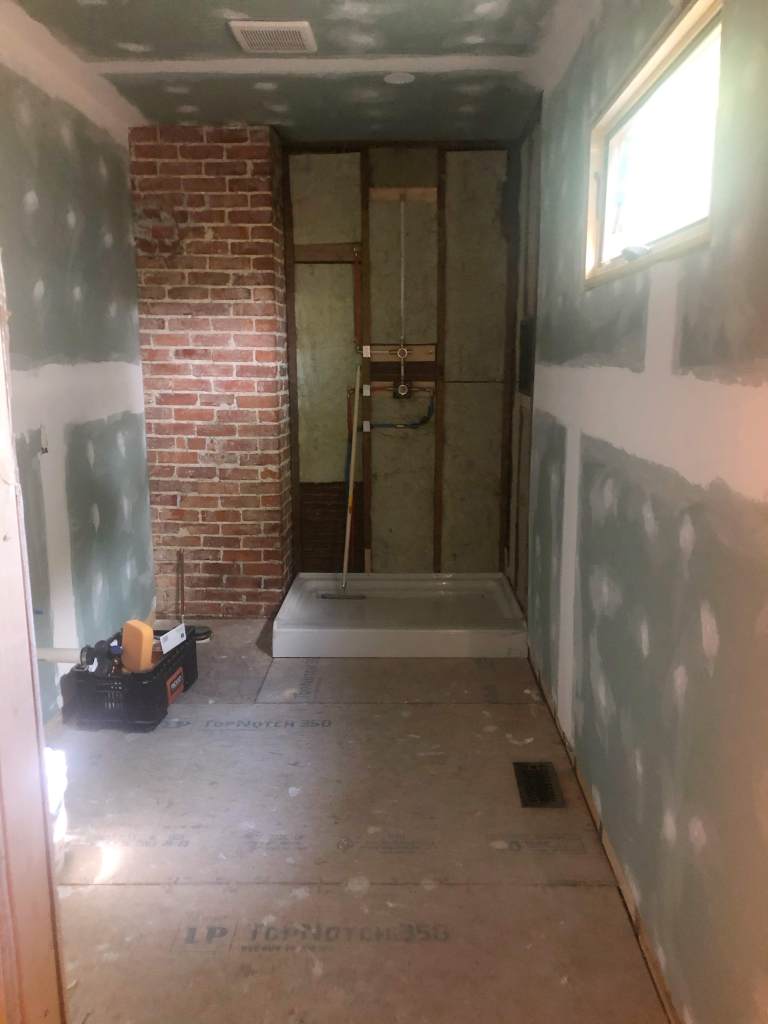
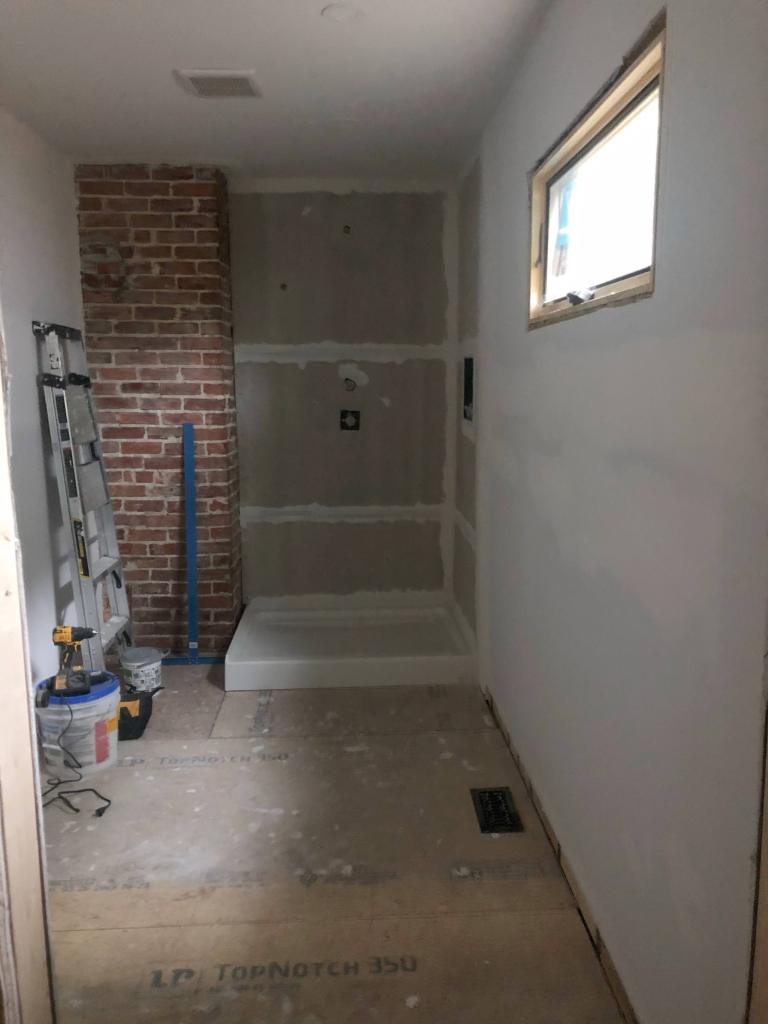
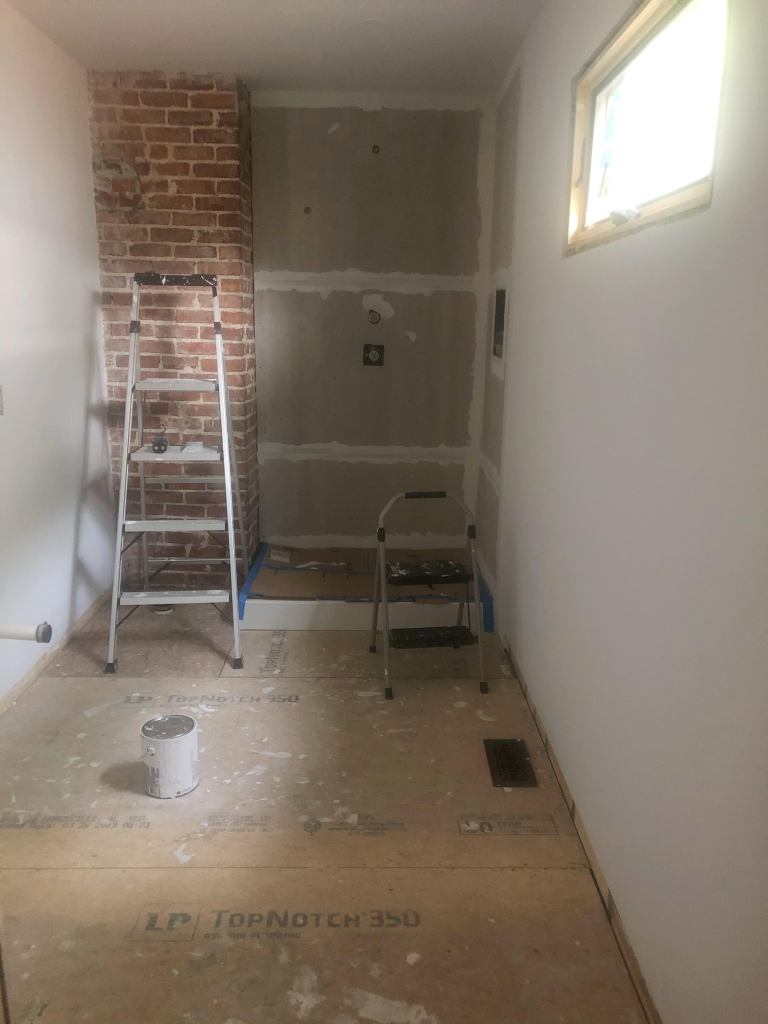
As a reminder, the end of the Spring ORC got us here:
Rough in plumbing completed, electrical run, drywall and cement board installed, one coat of primer on the walls
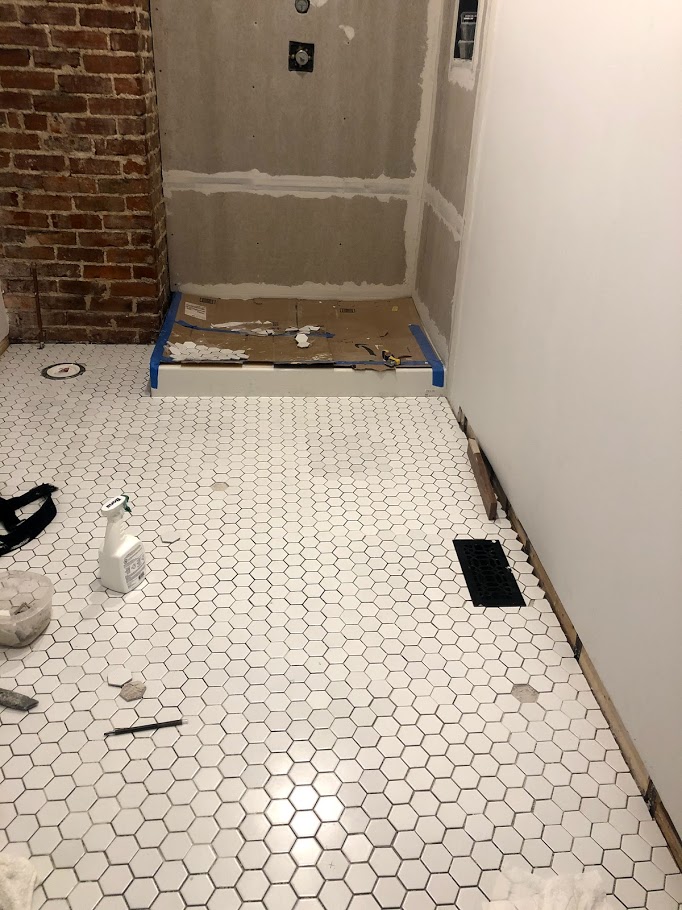
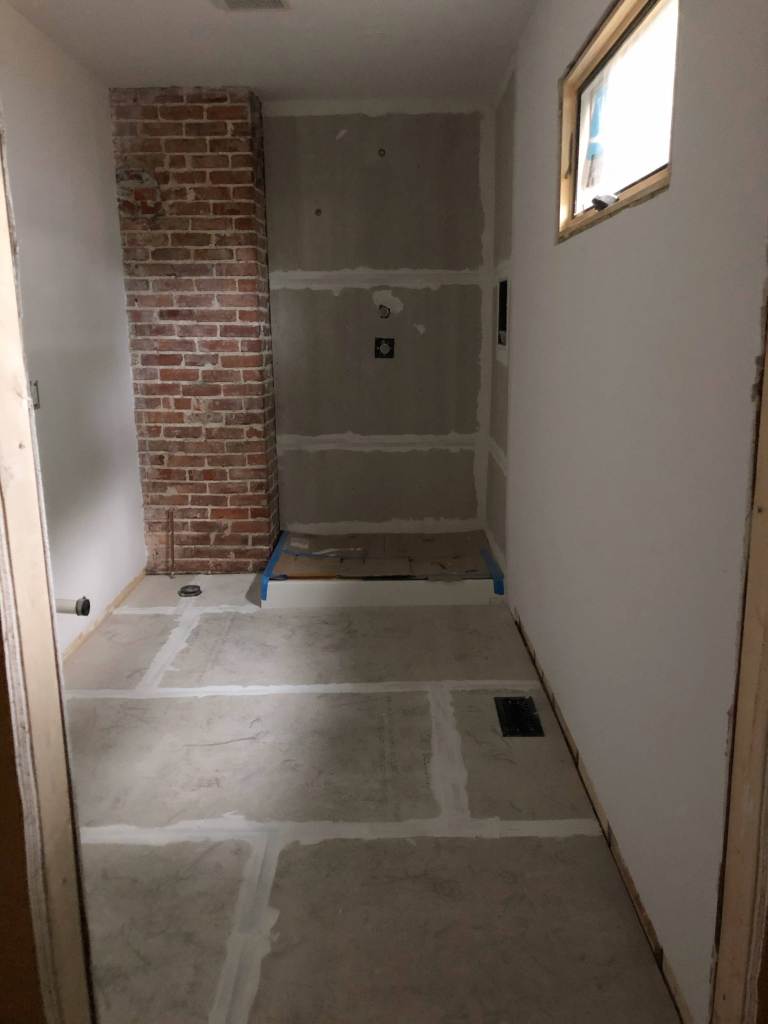
Since then, I have completed the floor tile which was a – whole thing – and started to tile the shower.
Floor tile laid and grouted. I used 2 inch white hex tile from Floor and Decor and Gray Mapei pre-mixed grout
Red Guard waterproofing membrane on the shower walls
White penny tile up on one wall of the shower
In the next 8 weeks, I hope to finish this room, which involves:
1. Finishing tiling the shower 2. Grouting the shower 3. Installing shower fixtures 4. Painting the walls 5. Installing the toilet 6. Finishing plumbing and installing the vanity and sinks/faucets 7. Finding and installing a door 8. Installing window, door and floor trim 9. Accessorizing
It is still a HUGE amount of work, but it really does feel like we are in the home stretch! (Don’t ask how many times I have declared that we are in the home stretch only to later realize that we are not.) I really could not have gotten half as far without my internet friends cheering me on and supporting me. So if you are reading this right now, thank you.
Inspiration
Our house is a craftsman although most of the craftsman character has been removed over the years. The space where this bathroom sits I believe was once the kitchen in the house. Sometime in the 80s, the kitchen was moved to the other side of the house and a horrible giant tub was installed. Doing the demo on that tub was so cathartic. It did not drain properly so we never used it in the first 4 years we lived in the house.
My goal is to bring this house back to it’s former glory and to put design elements back in that reference that craftsman style. That’s why I chose simple white hex and penny tile. Originally, I had envisioned subway tile, but, next to the exposed brick it just didn’t feel right.
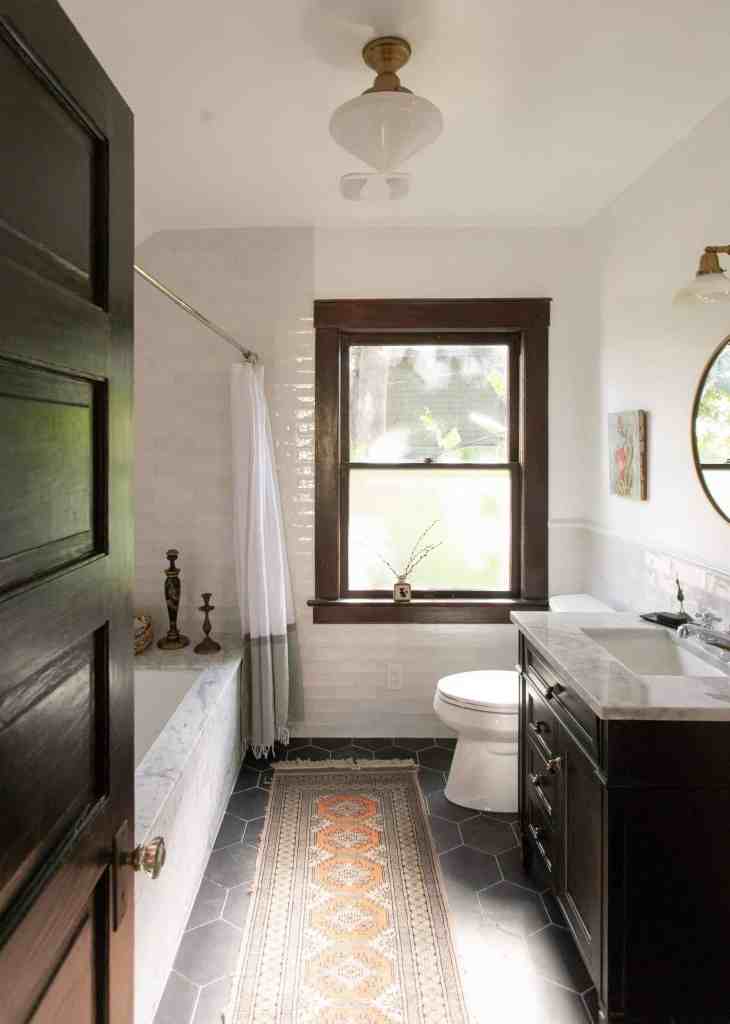
Craftsman style to me means using wood tones, natural stone, simple lines, classic shapes and the result is a room that is very function forward but also feels warm and inviting. Here is a picture that isn’t what this room will look like, but I think what it will hopefully feel like when it’s all finished.
This bathroom from Em Henderson’s blog is definitely a bit more lux than ours will be with that marble tub, but many of the same elements are there: clean lines, hex tile, natural stone, wood grain, mixed metals and a beautiful runner. The trim around that window is similar to what I hope to do with our window as well.
Another inspiration to this room is Stephen and David’s Spring ORC bathroom (although, I’m pretty sure I started my bathroom first…) Their use of wood tones, marble stone and mixed metals is truly perfection. Their ability to make a room feel both modern and classic all at the same time is amazing. Even though they covered their brick back up, it’s still one of my favorite bathrooms on the internet. If you haven’t seen it yet, go check it out here: The Suite.
Here is a peek at what we will be installing over the next few weeks.
The following post contains affiliate links. As an Amazon Associate I earn commissions from qualifying purchases.
There are still many details that I have yet to work out – such as what color grout we’re doing in the shower and what the baseboard and window trim will look like – but I do have a few items I have been collecting over the last several months just waiting to get installed when the room is ready for them.
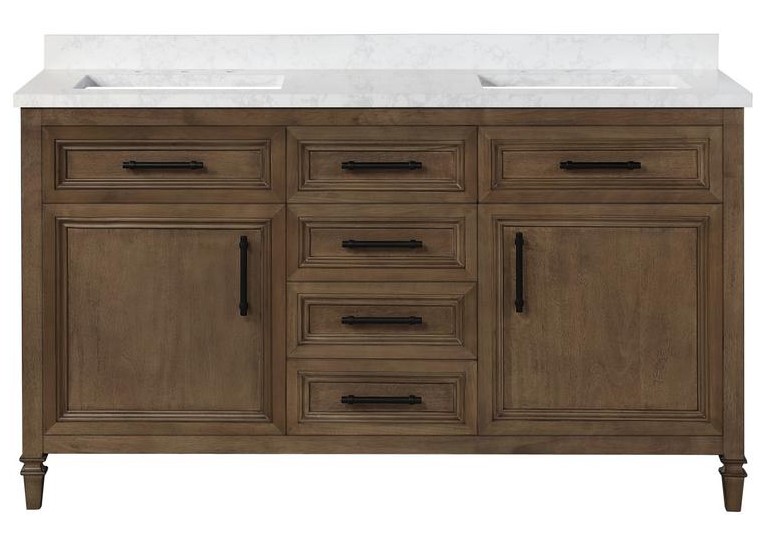
Since this project has taken so long, the vision of what we are going to do has evolved over time – and as our desires came in contact with reality (read: budget). I even toyed with the idea of building my own vanity for a while. A few weeks ago, this vanity came up on a Home Depot Deal of the Day. It isn’t exactly the style I had originally envisioned, but it has a white (cultured marble) top, two under-mount sinks, soft close drawers, black hardware and the right wood tone. Honestly, once it arrived, I am very happy with this purchase and I am thrilled with the price. Home Depot lists this for $1799 but we got it on sale (with free shipping!) for just under $1200.
I will say, check out my saved stories on Instagram under “vanity saga” for a bit about how this was delivered. Let’s just say I was not impressed. However, once it was un-boxed and we got it in the house – I’m very pleased with the vanity itself!
Home Decorators Collection Aiken 60” Vanity
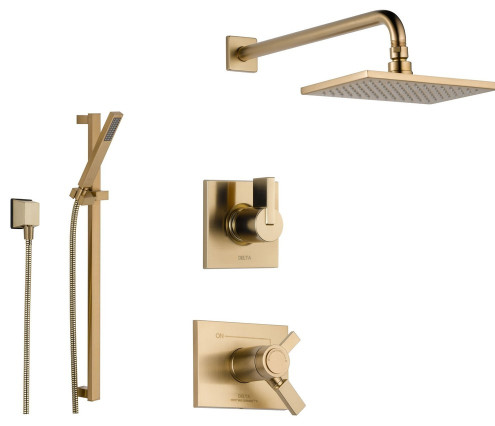
One benefit to taking a super long time to complete a renovation is that you have time to search for good deals and collect your items slowly as you find them. One of the things I am most proud of finding for a great deal are the shower fixtures. I scoured eBay for months to collect all of the pieces we would need and ultimately paid around $400 for what we needed, saving about $1,200 compared to what it retails for. I think champagne bronze looks so luxurious and I can’t get over that we will have these fixtures in our shower.
My eBay skills did not pay off when looking for sink faucets. I came up empty handed despite months of searching for the Delta Trinsic wide spread sink faucets in matte black. When we ordered the vanity, I started searching for something with a similar look and came across this faucet on Amazon. I am not familiar with the brand Mr. Faucet [“Please, call me Jim; Mr. Faucet is my father”], but when these arrived, I was immediately impressed with the quality. Time will tell if this was a good purchase, but the price was definitely right: $80 for Mr. Faucet vs. $300 for the Delta one.
MR. FAUCET Bathroom Sink Lavatory Faucet 3 hole Deck Mount Two-Handle, Matte Black
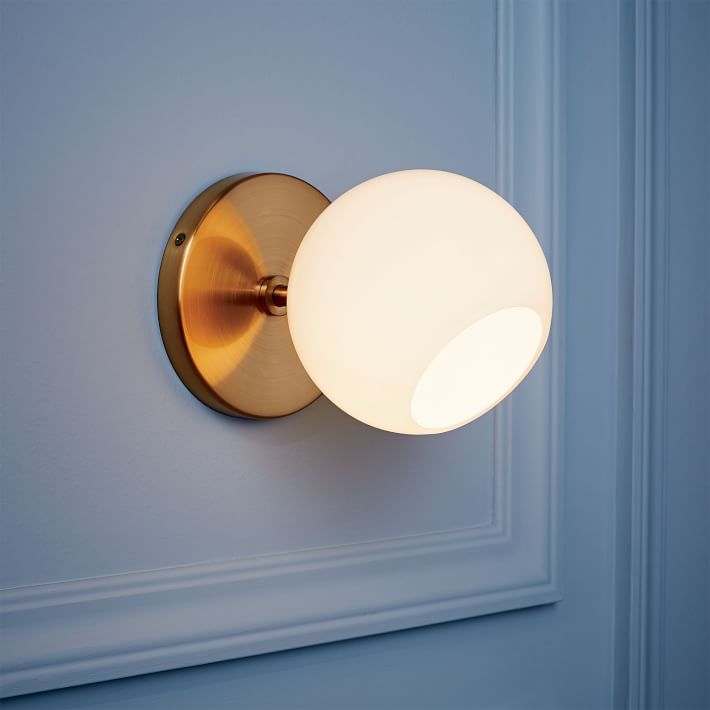
When I thought I might actually finish this project in the spring ORC, I bought a pair of lights from West Elm that I am really excited to finally get up on the wall. I love the milk glass and how it softens the light. I am a little bit nervous that the antique brass will clash with the other metals in the room, but talk to me in a few weeks about that.
West Elm Staggered Glass Short Sconce, Antique Brass/Milk, Set of 2
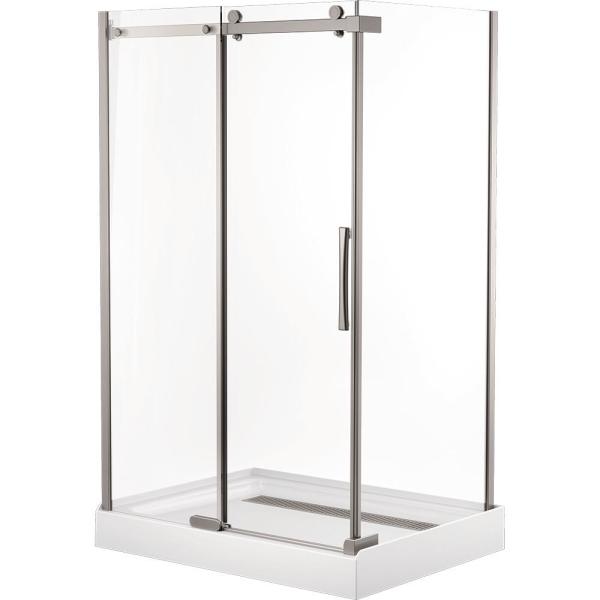
We haven’t purchased our shower doors yet, but we designed this whole bathroom on the ability to use a standard size 48” x 36” shower pan that had an enclosure available. This has probably saved us the most amount of money in this whole process as we would have needed to hire out the shower if we hadn’t done this and the price of a custom-everything shower adds up quick. I did pick this out before finding the champagne bronze fixtures, so I may try to use Alex from Old Town Home’s trick to use Gun Blue to darken the stainless steel metal on this enclosure. I know it’s possible on screws, but it seems like it might be tricky with the amount of metal on these doors. We’ll see!
As you can see, we have a lot of items ready to go, but we still need to pick out and purchase a toilet, toilet paper holder, towel hooks or a bar and mirrors. Plus probably a mat to go outside the shower and a rug of some kind in front of the sink. And maybe some plants. And art. And, and, and…
Stick around and see if 6 weeks is finally the amount of time left on the bathroom renovation saga or if I will still be working on this room at Christmas. Sign up to get email alerts about new blog posts – every week during the ORC!
Real time updates on Instagram on the grid and in stories (stories if you’re a time-lapse junkie). Instagram is the best way to keep up with this bathroom renovation as well as the 15 other projects we have going on at any given time.
Make sure to keep up with the rest of the One Room Challenge Guest participants via their blogs and on instagram. Find them here .
Step 1: Contact contractors to see how much they would charge you to renovate two bathrooms. Find out that they all want at least $50,000 and for you to move your family and your pets out for at least 16 weeks.
Step 2: Cry about how $50,000 is approximately $50,000 more than you’d budgeted for. Since without a renovation you will not have a working bathtub, begin mentally preparing for your one-year-old to be the smelly kid at daycare.
Step 3: Convince yourself that you could renovate one bathroom yourself in 4-6 months, then the other bathroom in another 4-6 months. Even if each bathroom runs long, it couldn’t take more than a year total, could it? (Narrator: “It could.”)
Step 4: Blithely cross the point of no return by demo-ing the bathroom on a whim.
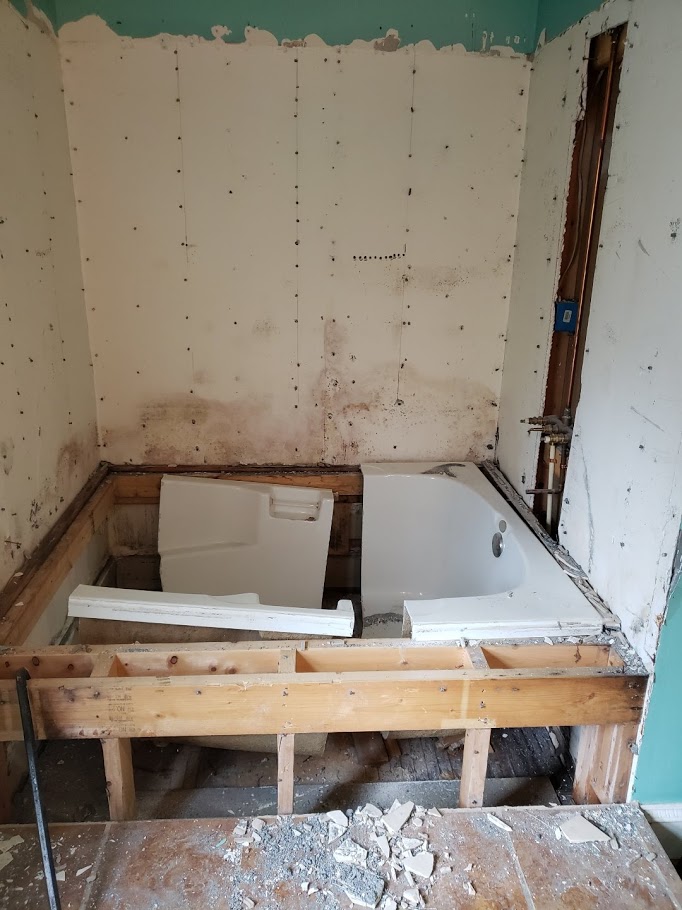
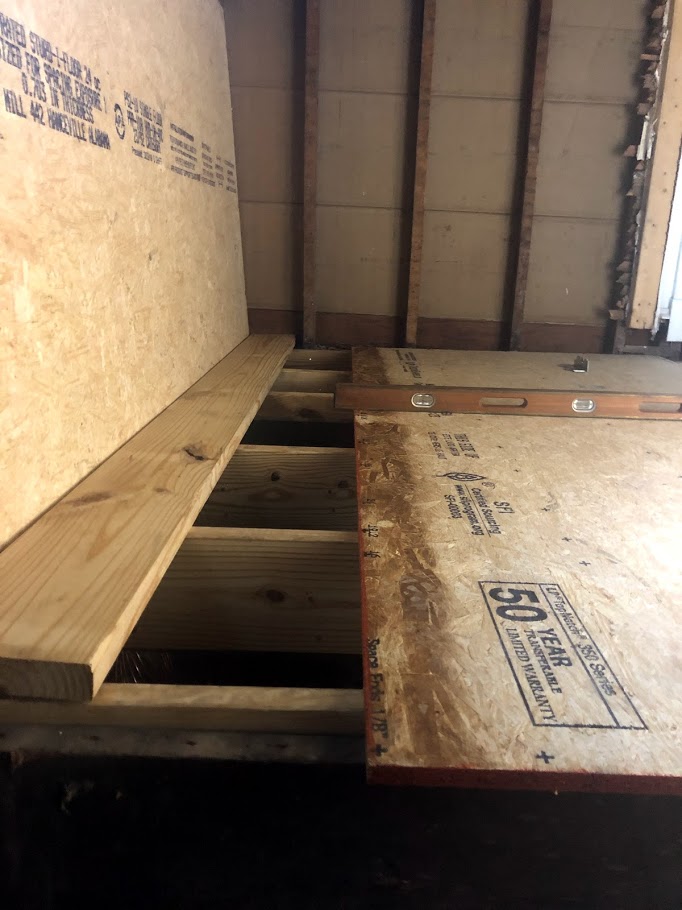
Step 5: Find out that the floor joists were not even attached to the outside wall of your house.
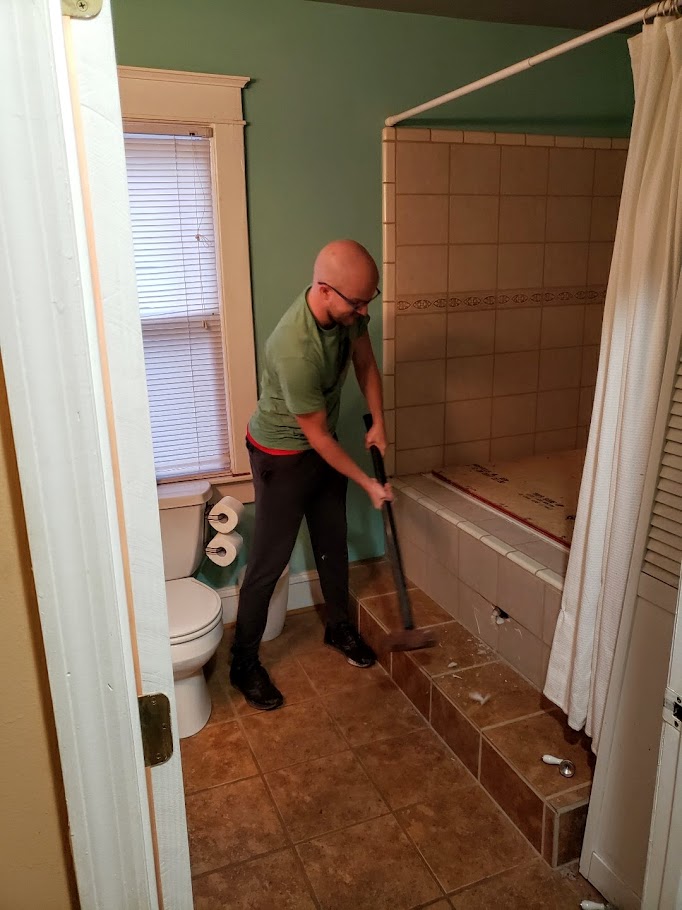
Ceremonial first strike
Ceremonial first strike
This giant tub never worked properly
U.G.L.Y you ugly
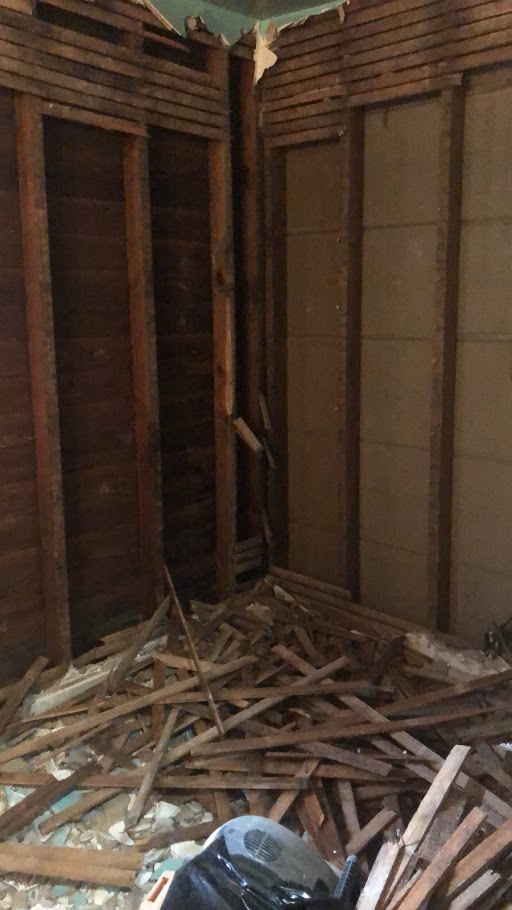
let’s see whats in these walls
uh.oh…
Step 6: Throw your time-line out the window
Step 7: Live without a sub-floor for a very long time and get weirdly accustomed to it.
Step 8: Spend two days wondering why there’s an ever-growing swarm of flies in your kitchen. Discover the opossum carcass in your exposed crawlspace. Remove the opossum with a shovel. Make a blood oath with your partner to never speak of it again.
Step 9: Learn how to do a lot of new things: plumbing, electrical, framing
Sistered joists, all level
Pex water line manifold
duct work
Step 10: Forgive yourself for making mistakes, try again.
Step 11: Do nothing related to the renovation for weeks on end because life has other plans
Trip to see family in South Carolina and a pit stop at our alma mater
Step 12: Find that it was surprisingly easy to get used to having your only sink and only toilet in separate rooms.
Step 13: Forget what it’s like to have people over to your house because its always a disaster – who has time to put the laundry away AND run the water lines? (and also your toilet is just behind a curtain and you can’t figure out how to have guests over if they have to use it)
Step 14: Crowdsource your emotional support for this project from strangers on Instagram.
Step 15: Continue to bathe your now two-year-old in the kitchen sink.
Step 16: Remind yourself that everything is fine. You’ll finish eventually!
Step 17: Freak out because what if you don’t finish eventually?
Step 18: Join the Spring ORC thinking it will help you finish. Make lots of progress, but do not ultimately come close to finishing.
Step 20: Attempt to tile the floor. Make mistakes, fix them painstakingly over a period of 7 weeks.
learn about glazing numbers and making sure all of your tiles come from the same batch
Step 21: Listen to Hamilton approximately 2700 times.
Step 22: Join the Fall ORC thinking it will help you finish.
See? It’s so simple. Just follow these 22 steps and you too can gut renovate your own bathroom 18 short months!
In all seriousness, I am truly looking forward to the structure that the ORC gives me. I accomplished more in the last 8 weeks of that challenge than I had in the few months prior. The community that it helps to build is also a HUGE perk. Some of my best internet buds are participating and I can’t wait to follow along with them and meet some new friends too.
Sign up below to make sure you get notified when I post an update here on the blog.
You can find real time updates @lifeinafixer on Instagram.
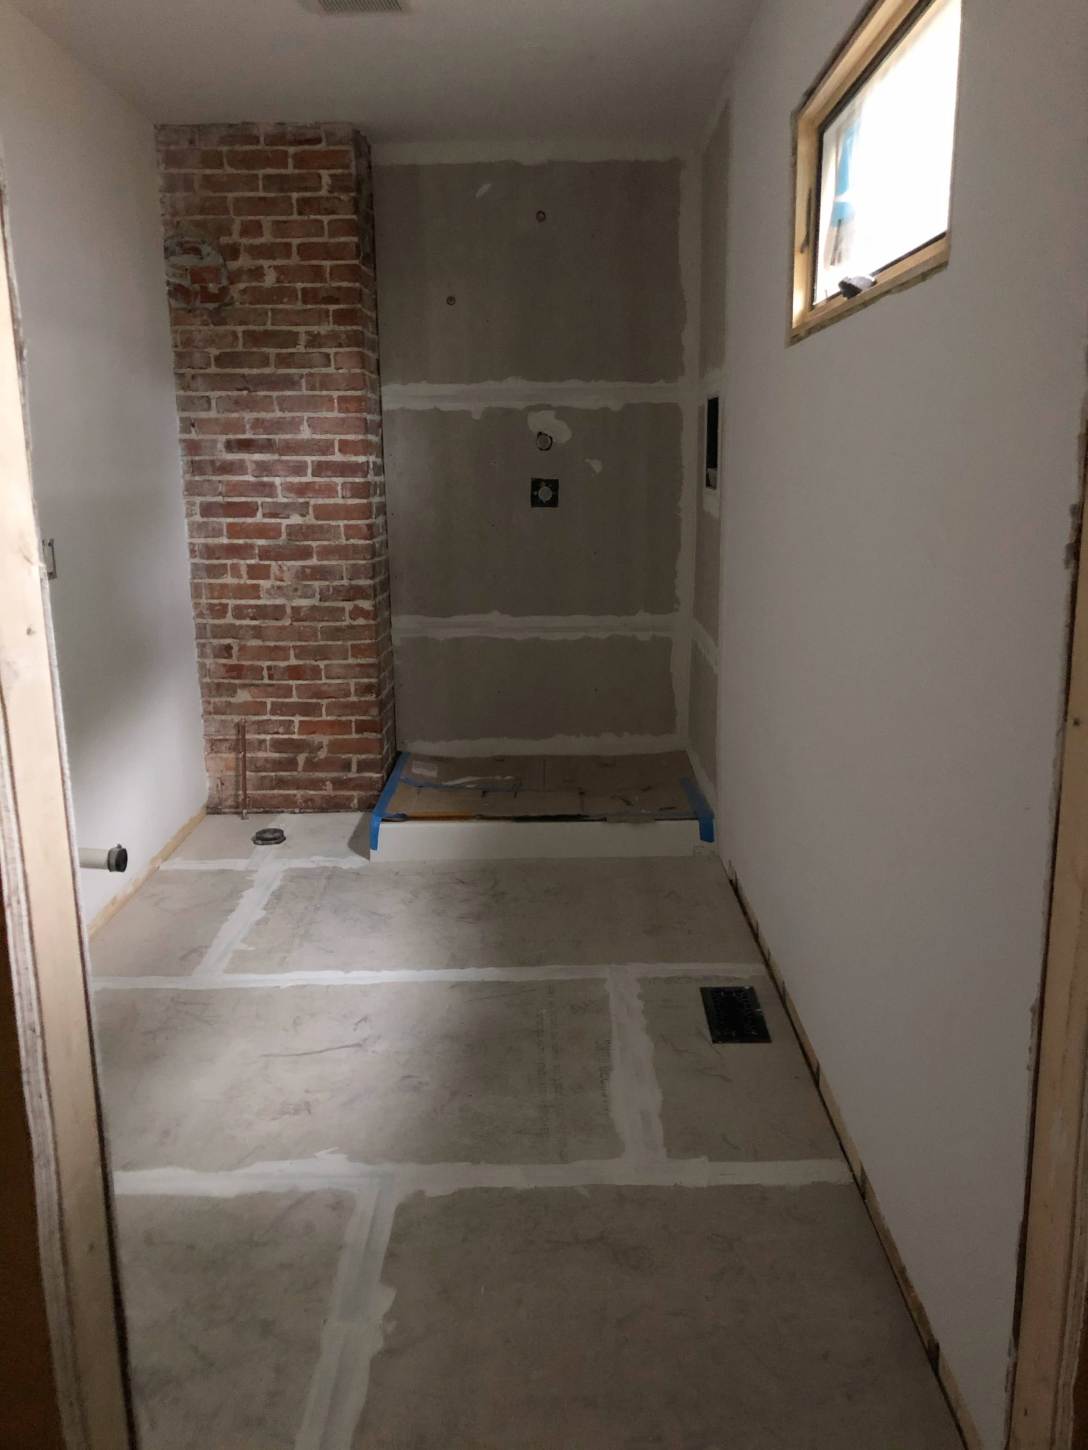
Today is the official last day of the Spring 2020 One Room Challenge. Most reveals were posted on June 24th, but many – now including mine – have been trickling in since then. Don’t get too excited, the bathroom is not finished. But a lot of progress has been made in the last 2 months. Let’s remember what the room looked like on May 7th:
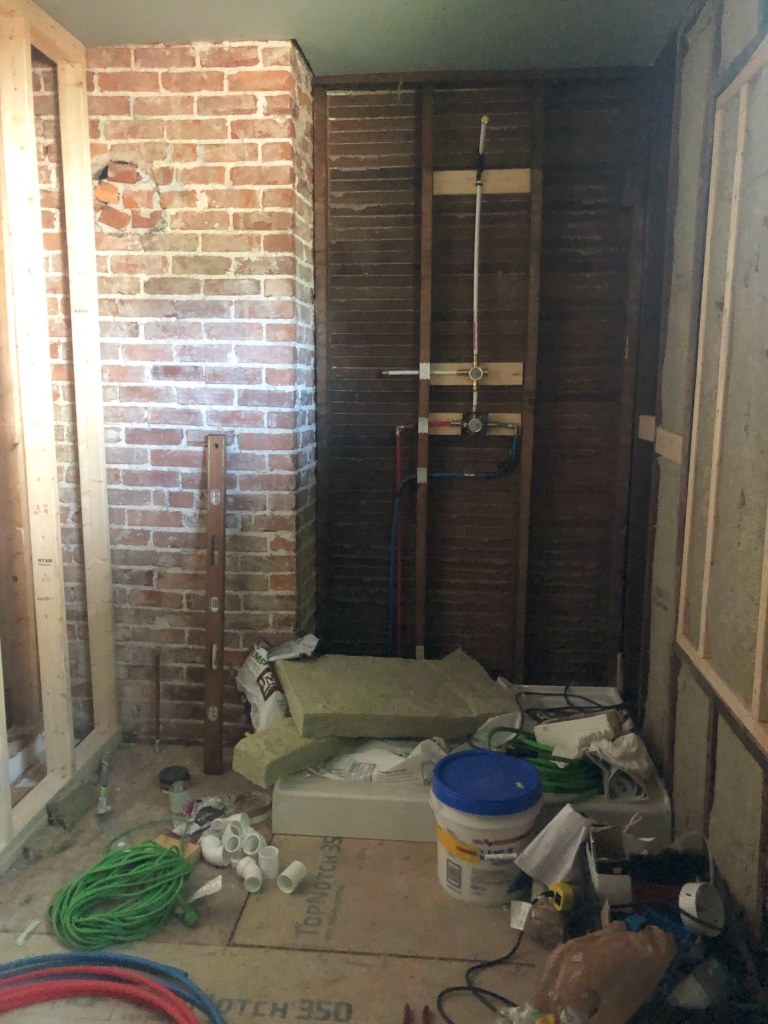
It still very much looked like a construction site. Walls were framed, electrical was mostly complete, plumbing was mostly complete, insulation was partially installed, some drywall was up. In the 2 months since my dad left after coming to help us finish framing and install our new window, the room had become a dumping ground for all of the junk we didn’t want to deal with. We were, after all, figuring out how to live in a global pandemic with a toddler and work from home during quarantine.
So, knowing that I had a mountain of work left on the bathroom, I entered the One Room Challenge as a guest participant. What did I have to lose? Nothing. (Except the feeling of defeat watching everyone’s beautiful room reveals knowing that I was probably still months away… )
Prior to starting the ORC in May of 2020, we already been working on this project for quite some time. We started with demolition of the old bathroom in April 2019. As with most renovations, we ended up with more than we bargained for and needed to completely rip up the sub-floor, reinforce and level all of the floor joists, run a new ground wire to prepare for new electrical, run all new water lines and drain lines, remove a window, add a window, frame and cut a new door opening… you get the picture. But we just are here to talk about the last 8 weeks.
Week 1:
The first step was cleaning up the space and getting organized. That’s honestly all we did the first week. One thing I have learned during this long renovation is to always put everything on the to-do list. The second most important thing is to keep my workspace as tidy and organized as possible. It makes it easier to jump in and do a bit of work when I have a moment at nap time or in the evenings.
Week 2 and 3:
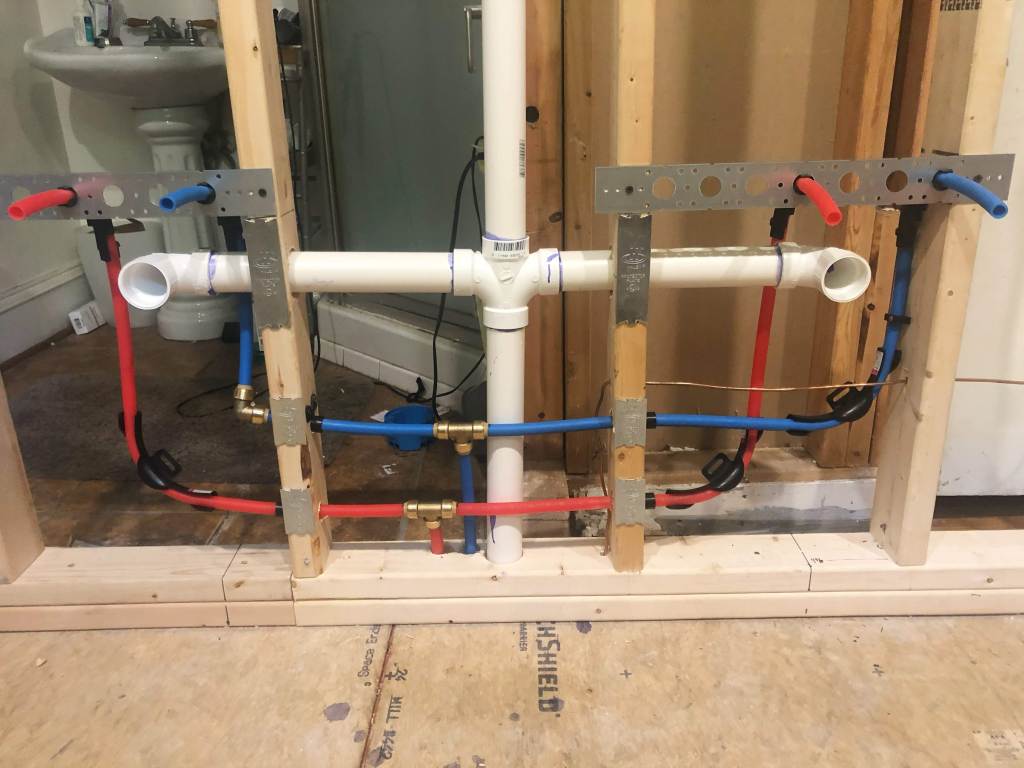
Plumbing. We had run the water and drain lines for the double vanity months ago – before the subfloor was installed. I’m going to be honest, I kind of forgot how much more plumbing we needed to do when the ORC started. This error probably contributed to the hubris I had when I started that there was any chance I would finish in the time period. With vanity plumbing there are two main options: plumbing coming up from the floor or out of the wall. The wall option is a bit more work on the front end, but I think it will give us an easier time later when we tile since we won’t have to tile around water and drain lines in the floor. It will also make it more possible to switch out the vanity sometime in the future if someone wanted to.
Finishing the shower plumbing happened somewhere in here as well. (What is time anymore, anyway? I feel like this whole year is Jeremy Bearimy). There’s a whole post about theshower plumbing if you want all the details.
Week 4:
Drywall installation: this is where I started to feel like progress was moving quickly. Drywall up on the walls made such a HUGE difference in how the room felt.
Drywall taping and mudding: this is where I started to feel like this project would drag on forever.
Unlike many people, I actually enjoy the process of taping and mudding drywall seams. There is something therapeutic about it. I like to have a project that I can throw some headphones in and knock out a bit of in the evenings – and mudding is definitely one of those things. I learned a lot in the process and I plan to write something more detailed with all of my drywall mud tips in the future. There are some steps that can be taken to minimize the need for lots of sanding, which is always everyone’s drywall finishing complaint.
Week 5:
Week 5 we went dark. The heaviness that our country is dealing with warranted some time for quiet self reflection. In this house, we believe: Black Lives Matter. Love is Love. Science is Real. Women’s Rights are Human Rights. Injustice anywhere is a threat to justice everywhere.
I have been so proud to be part of the old house community in this moment. So many accounts are speaking out and using their voice and platform to amplify Black voices and educate others on matters of racial injustice. I used to compartmentalize my politics and my renovation story, but through these last few weeks it has become increasingly clear that is not an option. It’s all connected. We’re all connected. It’s important to be vocal about the things I think are right.
Week 6:
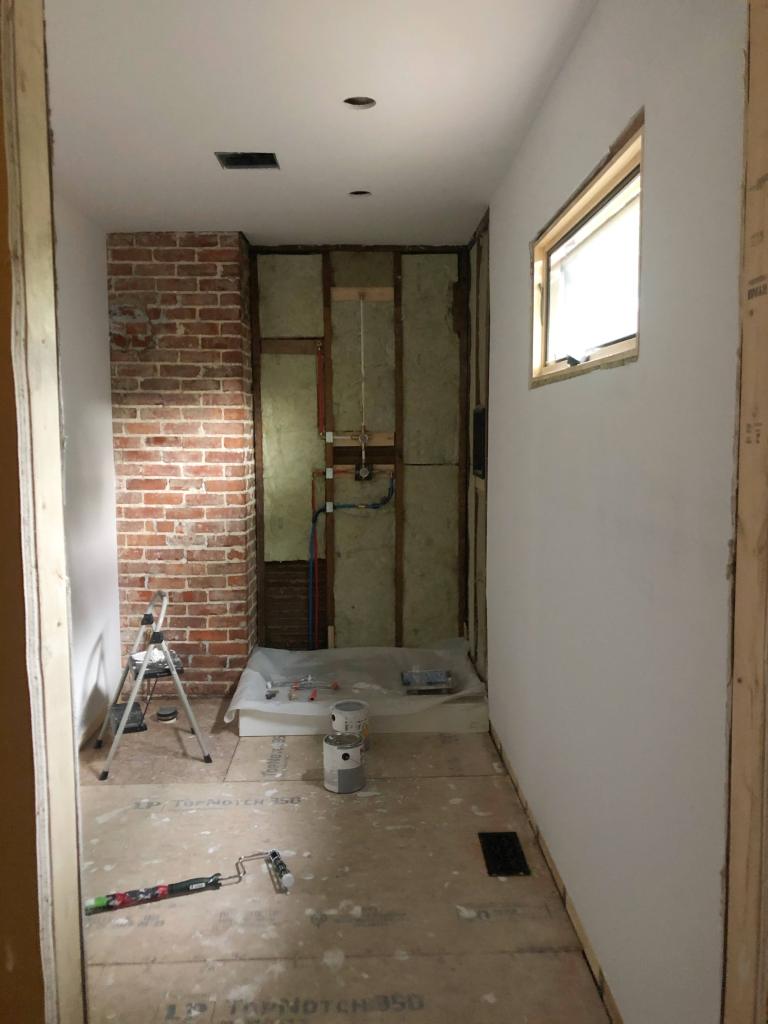
Primer. Drywall primer is an important step of any new drywall installation. Unlike paint, drywall primer will soak into the drywall and seal it and the mud (which is water soluble). Getting that primer up on the walls accomplished two things:
1. It stopped feeling like a construction zone and started feeling more like a real room, and
2. Brought out the imperfections I needed to fix in some of my seams – so, more mud was in my future.
Week 7:
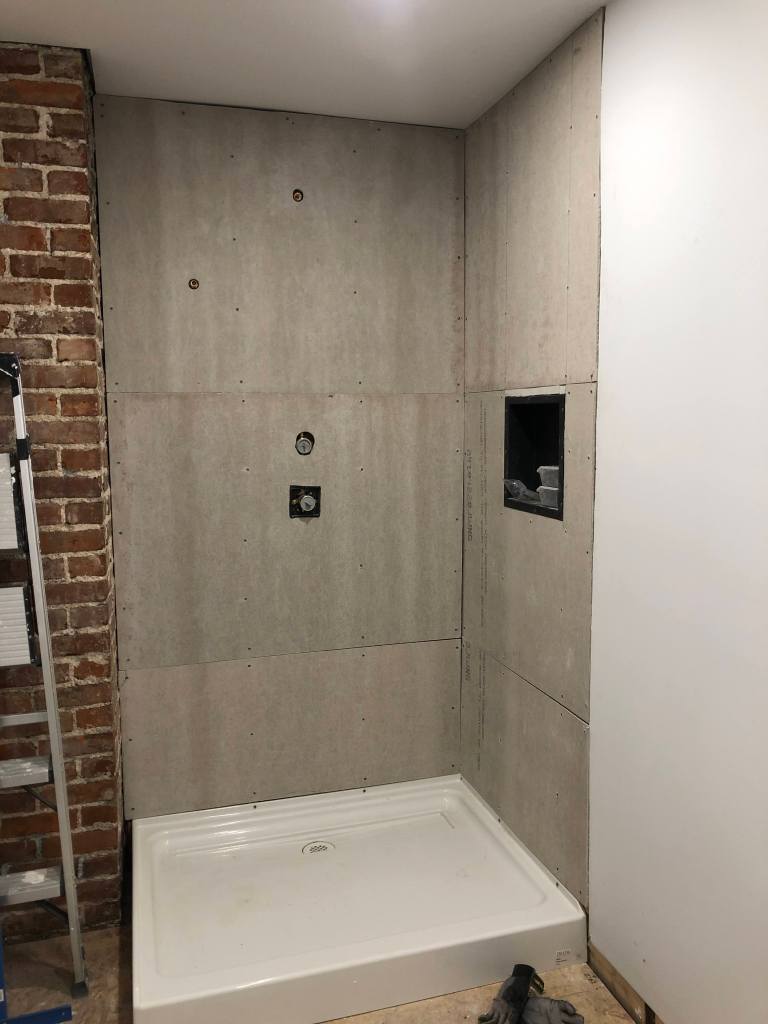
Cement Board. I had never installed cement board before this project. I figured, how hard could it be? Seems like it would just be heavier drywall. Boy was I wrong. Cement board is a pain. It’s difficult to cut; I had to go buy new tools (but who doesn’t love an excuse to get new tools!); and kneeling on it really hurt my knees (I have since invested in some knee pads). The tools I needed to acquire were: a carbide grit hole saw set, a jigsaw (how I didn’t already have this, I’m not sure) and some heavy duty metal cutting blades for the jigsaw.
After some trial and error, the cement board went up in the shower and I was able to tape the seams and cover them with mortar.
One issue we uncovered during cement board installation was that, since the outside wall of the house is bowed, there was more than a quarter inch difference between the cement board and the drywall in some places. I was very distressed by this initially, but, as we’ll see – it turned out just fine!
Week 8-9:
The last two weeks have felt slow because I didn’t make any dramatic visual changes to the room. I needed to work on fixing the issues with my original drywall seam finishing job. There was one seam where you could see a lump all the way down the top of the seam. Primer can help bring those imperfections out and it actually makes them easier to fix because the mud underneath is sealed in and you can’t make it worse. I also needed to level out the seam between the cement board and the drywall that I mentioned earlier. It took several days because I only did one coat per day, but I think it turned out really well. In addition, I wasn’t happy with the size of the gap between the drywall and the exposed chimney, so I used mesh tape to get a little closer – which meant I needed to mud that as well.
There were a few other spots here and there that needed some touch-up with the joint compound (mud). Once I finished that, it was time for another coat of primer on the walls. I also worked on sanding a spot on the subfloor that was a bit unlevel.
This weekend I have been working on getting cement board down on the floor in preparation for tile. This time, I have some better tools that are really making the process easier than when we did the shower. I have knee pads, which is making it far less painful to kneel on the cement board while cutting it or while screwing it to the floor. I upgraded my cordless drill from my trusty 10-year-old Ryobi to a DeWalt a few weeks ago and it has been SO much easier to use. Using the carbide grit hole saw went twice as fast with my new drill, and fastening the cement board required way less force. I can’t believe that I waited so long. Seriously, thinking about how much faster the drywall would have gone up with this drill almost makes me want to cry! I also got better blades for my jigsaw – blades for cutting thick metal seem to be working the best, but they don’t last long. I did not get enough of them and had to go back to the store for more.
The Reveal:
My reveal is a transformation from a construction site to a room with walls, ceiling and a floor and plumbing and electrical ready for installation of all the pretty features. In the grand scheme of things, it’s a massive amount of progress in just 8 weeks.
Don’t forget, I still have a full time job and a toddler at home! Sometimes I need to remind myself of that because it seems that others are able to get things done at a much faster pace. It’s important to remember that everyone has different circumstances and I can only do what I can do.
I’m not giving myself a timeline for finishing the room, but here is the list of things we still have to do (probably close to the order I’ll do them in):
Tile floor
Grout floor
Apply Red Guard water-proofing to the shower
Tile shower
Grout floor
Prime (again, I know) and paint ceiling and walls (x 2 coats)
Install shower plumbing fixtures
Install toilet
Decide on a vanity and sink fixtures
Install vanity and sink fixtures
Install vanity lighting
Install door
Figure out what we’re doing for trim… and do that.
So, the ORC challenge is over – but, life and renovations goes on! I’ll keep plugging away at this bathroom until it’s done. And then… we’ll demo the hall bath and start the whole process over again…
But what if the real One Room Challenge was the friends we made along the way?
Right away, the camaraderie that I felt as part of the ORC was wonderful. I met a bunch of great people who were also working on bathrooms like Sachi Lord and Jenna Beach. I became closer with insta-friends I already knew who were participating like Mary from @homebuggie. The online DIY/old house/renovation community is truly a special place that I am so grateful to be a part of, especially now when we are all isolated from our in-real-life friends.
It’s interesting to see the designers renovating their rooms alongside the “regular” folk. Mostly, it’s inspiring to see what they are creating. (Sometimes it’s a little discouraging, but that is a post for another day.) I am forever grateful to Stephen and David of @renovationhusbands who shouted me out and encouraged me so much along the way. Their bathroom/bedroom/closet renovation is truly a work of art. The detail and precision they bring to their designs is really inspiring. Plus, they’re just delightful human beings!
So, despite not actually finishing my room, I’m glad I joined the One Room Challenge this year. Next time it rolls around, if you’re considering joining but not sure if you’ll finish – what do you have to lose?