
We’re finally putting up cement board in the shower and the plumbing for the water lines will finally no longer be visible, so I thought it would be a good time to take one last look at it.
What we did
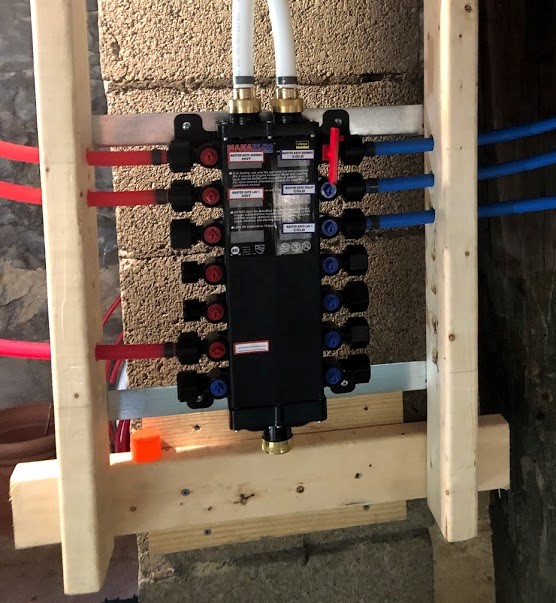
The existing water lines in the house were CPVC and were not in good shape. Originally, my dad wanted to run new copper water lines. He ran out of time when he came for his visit to help us and, since we had no experience with copper, we decided to go with pex. A little research led me to find the Viega Manabloc system.
What we like about this system:
It was easy to install. We made a frame out of 2x4s and hung it from the ceiling joist. There was a template to drill holes in the sides of the frame to support the pex exiting the manifold.
It has room to grow. We could run new water lines to our master bathroom while keeping the old water lines to the rest of the house. As we gradually renovate the whole house, we will be able to run new lines from this manifold and eventually have replaced all of them.
I like that the lines can be run in red or blue to indicate hot or cold. The system also came with labels to keep the manifold organized.
Another benefit of pex is that there are fewer connections and joints. Less connections mean less places for leaks. Because the lines are flexible, you can run them as “home runs” which means that there is one continuous line from the manifold to, for example, the toilet. This also means that we can control the flow of water to one fixture at a time. If, for example, we wanted to do some work on the shower, we can turn of the water to just the shower and not have to also turn off the water to the rest of the house.
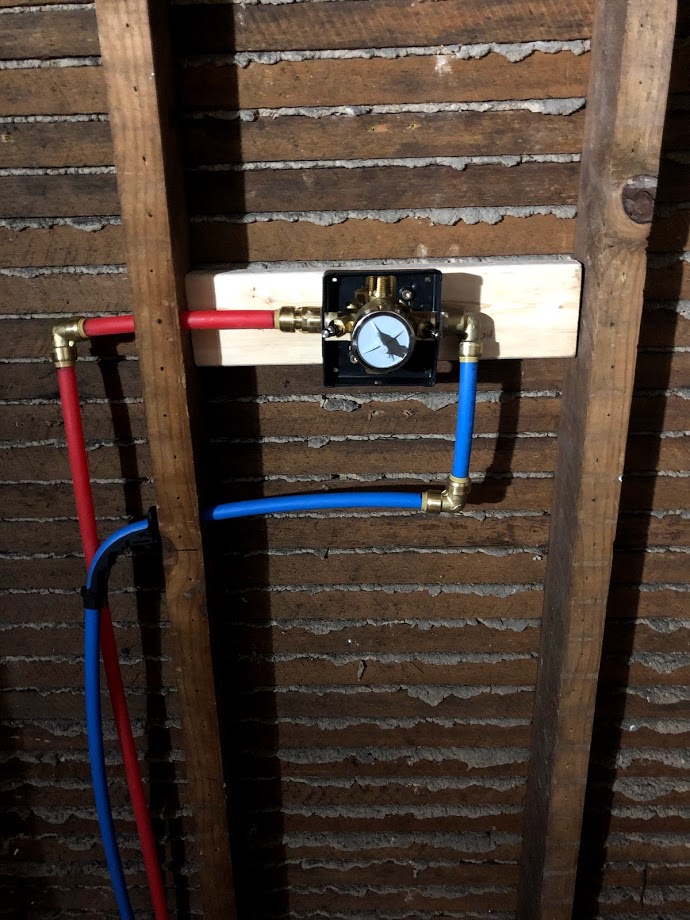
After installing the manifold, we ran one hot and one cold line from the manifold to the master bathroom shower. The lines are secured to the joists in the crawlspace with hanging supports.
Once we had the water lines in, we could plumb the shower.
My first attempt resulted in being unable to tighten the cold water connection to the shower diverter enough to prevent leaks.
I was able to re-work it to improve the connection to the diverter, but I did end up having to add another connector than if I had known what I was doing from the start.
I also should have used a bend support for the hot water connection instead of the 90 degree connection, but I didn’t have enough length to do that. Overall, I don’t think two extra connections are the end of the world, but next time I’ll know better.
It was more difficult than I had thought to get the connection between the main diverter and the diverter for our future hand shower just right.
First attempt, leaky cold water connection 
Second attempt, no leaks! 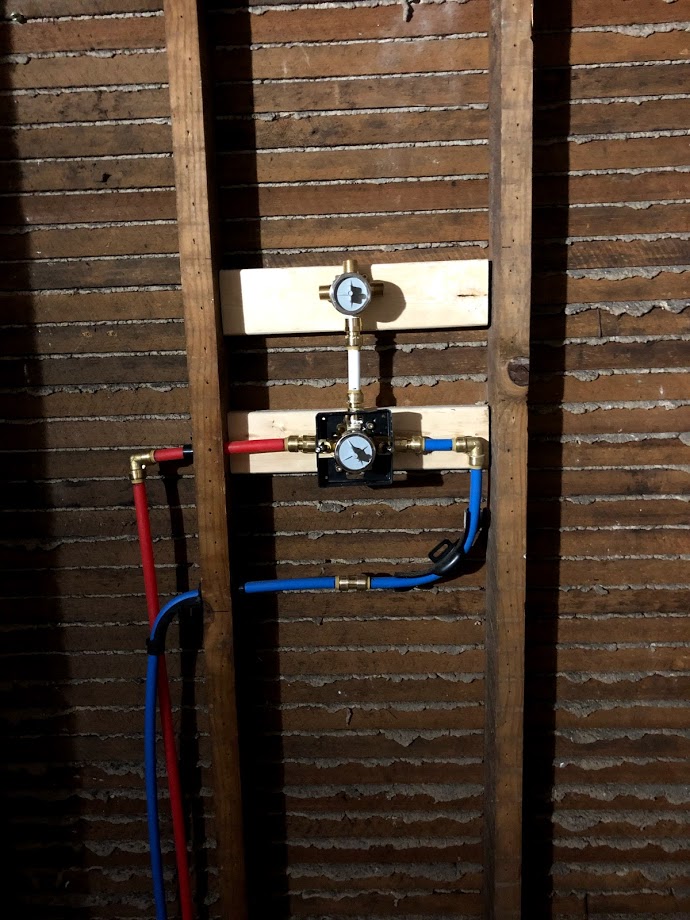
with the connector to the hand shower diverter
The shower plumbing looked like that for quite a while. I needed to wait until I had the actual fixtures purchased to make sure I was making the correct stub-outs. A few days ago, I finally finished plumbing all of the connections. And now she looks like this:
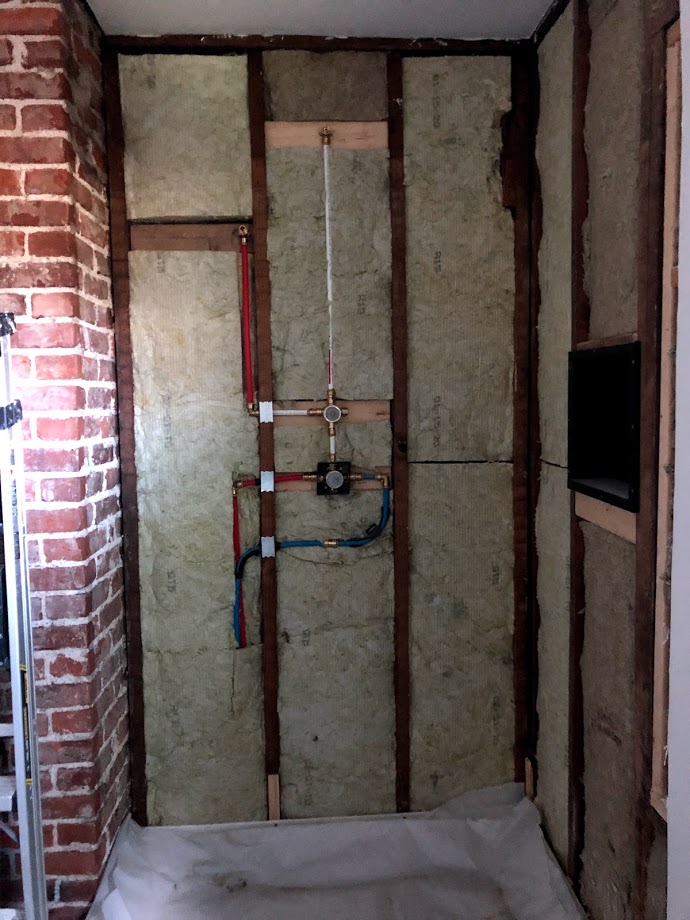
I added a threaded connection at two locations: 1. for the main shower head and another for the hand shower. The main shower head needed a female connection, but the hand shower required a male thread. We filled in with rock-wool insulation which will help dampen the sound of the shower through the shared wall with the living room. We are ready to add cement board and get ready to tile in here now! It feels strange that after looking at this exposed plumbing for almost a year, I will never see it again (fingers crossed).
What I would do differently
I’ve touched on a little of this already, but there are a few things I would be sure to do differently the next time we run water lines and plumb a shower (coming soon, hopefully this fall).
- I would make sure to have enough length on my pex to have as few connections as possible.
- It has been pointed out to me by some friends that the SharkBite connectors I used are expensive, and I would have saved money using press or clamp fittings. I have RA and my hands just are not strong enough to use the pex press tool that we have, which is why I used the SharkBite here. I might attempt to plan out my connections and have Connor use the press tool for me for our next shower, but I might not. Jury is still out on that one. I am often willing to pay a little extra in order to be fully independent on a project.
What’s next
- Cement board on the walls
- Tile
- We have picked out a white penny tile and haven’t decided on grout color yet.
- Installing the fixtures
- We’re using the Delta Vero rain shower system in champagne bronze. And no, I did not pay full price. eBay for the win! Getting this system at the price I did is one of the greatest accomplishments of my life.


[…] anyway? I feel like this whole year is Jeremy Bearimy). There’s a whole post about the shower plumbing if you want all the […]
LikeLike
[…] 9: Learn how to do a lot of new things: plumbing, electrical, […]
LikeLike
[…] How difficult was it to move the plumbing for the new vanity?We didn’t end up using any of the existing plumbing (water or drain lines) in here – it was all poorly done and in pretty bad shape. Once we had to pull up the sub-floor, it really wasn’t a big deal to run all new plumbing too. We decided to install a manifold system and run new water lines with pex which we will eventually expand to include the whole house as well as new drain-lines. I was very intimidated by plumbing when we started this journey and we got some help from Mito at DIY Assist. If you are in Nashville and need some help with a DIY project – I highly recommend you check him out. He was a huge help and gave us the knowledge we needed to continue on our own. He helped us through running our new drain lines for the room and talked us through the water line installation. Drain lines are fairly straightforward – you just need the water to run down-hill. Running pex is nice because you can do what is called a “home-run” meaning one hot and cold water line goes directly to each fixture. This makes for fewer connections and fewer chances for connections to fail. It’s always a good idea to check local codes before embarking on a DIY plumbing adventure. There is more detail about the shower plumbing specifically in another post here. […]
LikeLike